This is from a large skirt I got at goodwill. I have one of these already made but I wanted another one. I found this skirt and it was more sparkly than my other pair.
These pants were a bit harder to make and hence no pictures. Basically I cut off the top of the skirt with the elastic. Next I cut the skirt in half. Attach to a pair of boy short bikini bottoms.
here is with a hip belt (which covers the shorts).
Without (a side view)
I just need some hemming here. Because they are long. But having a pair of black sparkly pants to dance (especially when I have fat days!... or to hide my knee brace).
XOXOXO,
Lauren
Pages
▼
Tuesday, August 30, 2011
Rose Dress
This dress is super easy to make. I had this fabric in my stash that I didn't know what to do with. I decided to do the dress done found on iCandy handmade from Chie you can find the information here
It isn't a hard sewing project. Just some math. Here are some pictures while I made it.
I busted out the serger to finish this dress. But I only had 2 black spools but I had an Olive green spool that I opted to use. And the color matched the green in the fabric.
This is why you practice serging first! My machine ate my fabric!
My dress paired with a belt to take it in (I opted for plain black, a patterned belt would just be too much and just get lost in the dress).
Love this dress, comfy, airy, since it is still HOT here!
XOXOXOXO,
Lauren
It isn't a hard sewing project. Just some math. Here are some pictures while I made it.
I busted out the serger to finish this dress. But I only had 2 black spools but I had an Olive green spool that I opted to use. And the color matched the green in the fabric.
My dress paired with a belt to take it in (I opted for plain black, a patterned belt would just be too much and just get lost in the dress).
Love this dress, comfy, airy, since it is still HOT here!
XOXOXOXO,
Lauren
Aqua dress
Another found gem from goodwill. Loved the color hated the dress.
Here's the back
The zipper only went to the waist and the rest of the dress buttoned. EEEEEK!!!
After thinking about it, I decided I just wanted to keep the skirt portion of the dress. It was high waisted and pencil shaped. I could work with it.
I took out me seam ripper and detached the top from the skirt.
I folded down the top and hemmed it down.
I put it on my dress form and took it in some and hemmed up the bottom.
Done!
Yeah it needs some ironing but I love this skirt and it is not black. So now I have some color in my wardrobe. And it is work appropriate! Yay!
xoxox,
Lauren
Men's polo shirt Refashion #2
Ok here is my 2nd men's polo shirt refashion.
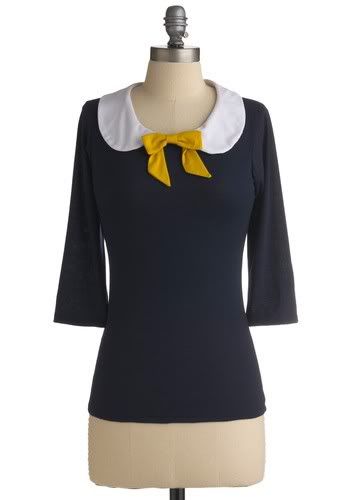
I had what I wanted to do in mind from seeing this shirt on modcloth!
I put it on my dress form to take it in...
To make the peter pan collar I found it on burda.com and it was free.
Cut out 2 different pieces of the white fabric with some leftover fabric I had.
Sew leaving a gap so I can turn it right-side out. Clip it since it is curvy and it will help ease the fabric for the curved collar.
Turn inside out. So its the right way!
I cut off the collar on the polo shirt and then found the center.
I found the center of the collar and pinned the shirt to the collar. Sew it down.
I created a casing for the sleeves and added elastic. It ruffled with the elastic and it looked more feminine with the shirt.
Lastly I hemmed the bottom.
To create the bow I have been messing around. I tried to do tan but it was too bulky. So far I have opted for the cream ribbon I used in my lace shirt.
The end product. I call it charm school cool. I also feel somewhat french for no apparent reason. I threw on my button skirt for the heck of it but I am going to play with more bottoms.
Can we say "Oui!"
XOXOXOXO,
Lauren
Anne Klein gets a face lift
I found this wonderful Anne Kleine dress at a thrift store. It was again $0.99. I loved the pink and thought it would be good for me to practice working with woven fabric. It can be pretty challenging to sew.
First to compensate the larger armholes with taking it up at the shoulders. Sew down.
Next, the top of the shirt needed something. It was so boring. I decided to change it to a V-neck.
Measure from the center of the shirt, I think it was around 3 or 4 inches.
Cut
Pin and sew.
Additionally, I added some fusible interface at the V spot to stabilize it, so it would not rip anymore. That woven fabric really wants to fray with it. I could not take it in much on my dress form. and it was only a smidge so I opted to not take it in on the sides. I used a belt instead with a big cream flower. I also took it up about 4 inches from the bottom too. It was just too long.
Here is the end product.
Love it! Not so mom-ish! :)
XOXOXO,
Lauren
White ruffle dress
I loved this dress when I bought it back a few years ago. I loved the white and the ruffles.
But I never seemed to wear it and always opted for another dress. I just never felt completely comfortable wearing it, I think I know why
It is short but that back slit goes right to my bum!!! I never felt comfortable wearing it, I could barely move in it.
Instead I decided to hem it and make it a shirt. It would get much more use out of it for work.
It had a back zipper and fit well. The zipper was long I basically opted to go about 2 inches from it and marked it with some pins. I hemmed it there. Before that I took out my seam ripped and undid the ruffle up to the point at which it was going to be cut. I saved that baby for later! :)
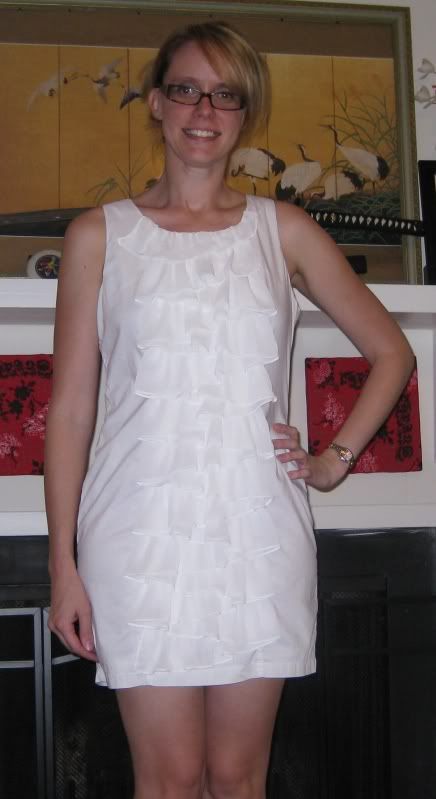
Here is the finished product
It would be great with a cardigan and jacket for work. Yay!
XOXOXOXO,
Lauren
Men's button down refashion #3
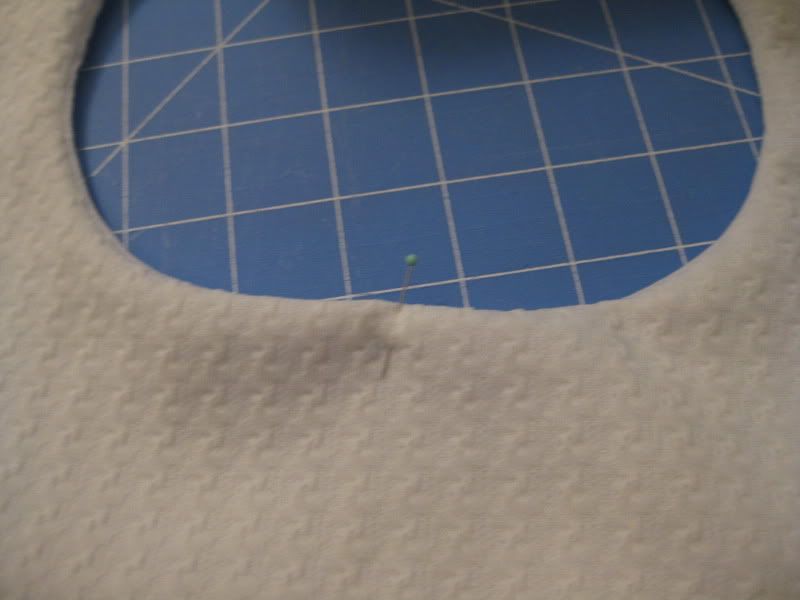
Ok here is my 2nd attempt with refashioning a men's shirt. It was another light cream that I dyed with RIT dye in scarlet, I got a peachy coral. Just like my other men's shirt. :)
I cut off the top part of shirt, in addition to the sleeves.
I hemmed the armholes to finish it up.
Next I folded down the top of the shirt to make a casing.
I had some peach and white striped fabric that I made a tube with (actually refashioned from a pair of stained pants that I somehow wound up with from someone??) I wove the tube through all the casings.
I hate the bottom of men's shirts. I like it straight! What is up with the curved bottoms?? Seriously? So I cut it off and hemmed it.
Basically I created a pillowcase-like top for myself out of a man's shirt. I decided to tie the bow in the center of the shirt. I can always change my mind.
XOXOXO,
Lauren
An easy fix!
Here is a cardigan I found one day but it was too big for me!
I got to use the duct tape dress form I made of myself (blog post coming soon!). Let me tell you how easy it was to fit the sweater to me! I was actually stupified for about 30 mins b/c it only took 5 mins total with my dress form.
here it is on my form
The end product. I nice fitting cardigan perfect for work! And also pretty girly-girl. LOL
Wahoo! Ok I've got more posts coming tonight. :) Finally able to sit down and blog, mostly b/c I came home early from work with a slight fever so I really can't do much but blog! :)
XOXOXO,
Lauren
I got to use the duct tape dress form I made of myself (blog post coming soon!). Let me tell you how easy it was to fit the sweater to me! I was actually stupified for about 30 mins b/c it only took 5 mins total with my dress form.
here it is on my form
The end product. I nice fitting cardigan perfect for work! And also pretty girly-girl. LOL
Wahoo! Ok I've got more posts coming tonight. :) Finally able to sit down and blog, mostly b/c I came home early from work with a slight fever so I really can't do much but blog! :)
XOXOXO,
Lauren