The Evolution of a Hip Belt
Well Its a semi-journey here... I took pictures between some of the intermediate but this is by no means a tutorial.
This all started with my purchase of a silver bra with the matching skirt from ebay. It was very inexpensive but it did not come with a hip belt. The picture was deceiving. But that is beyond the point.
I decided to set out and design and make a hip belt to complement my new shiny bra. I knew from the get-go that I would be unable to exactly match it. And even when I tried I learned I could not get the trim that matched it (it came some where from China and impossible to find in Alabama). I decided to make my own using 8mm cupped silver sequins and gluing rhinestones to each one in the same pattern as the bra.
So I started one night and using a belt I got at an outlet store, which makes a great template, I traced out a simple hip belt on white felt. I then attached a white satin (crepe satin maybe? i forget!) that sort of had the same feel as the white straps. I stitched them together with my sewing machine. Since i was adding trim on top of my belt, no one was goign to see my line.

Here's me adding the first sequins with my middle circle I am making to match the circle on the bra. It was still being glue at the time (it was a wrapped wooden circle bead with white ribbon). I started to add the stones to them, to get a little idea (plus its easy!) Now onward to blinging...

Next I made appliques that semi matched the design on the bra. This was harder than i thought. And i never did this before! But i made a total of 6 in the 3 different sizes and added them to the belt. I anchored it by using some 11/0 seed beeds (~3) and tiny silver sequins (3mm i think, cupped). Here is the larger view for both sides. :)

Well we are still pretty bare and need some filler sequins. I wanted to play a bit with texture so you could distinguish the different types of sequins. I used a 5 mm flat silver sequin and 5 seed beds and i started on the bottom left and worked my way to the edge....
 Nice!
Nice!
Here is a better view

And yet another view.. (Can you tell I was happy to figure this out!)

Next I worked on the botoom left and began to fill in. Here is the picture of what it looked like in addition to adding the circle. I could not complete the next step until the circle was added. So i just glued it on! Seriously!

Next I filled in both the top areas and the areas on the bottom next to the circle. I then added the hologram sequins in the middle of the circle. Hint if you are using no beads, use invisible thread so you don't see the thread! makes a whole big difference.

Wow I was starstruck and here is the whole belt done! and with the bra!

Another view looking at the edge.
Well I still needed some fringe! I mean come on I AM A BELLYDANCER! This I had to make myself. From past experiences with belts I know its best to sew each one individual so you don't loose everythign should one of them break. In the middle of the belt below the circle i added a string of silver seed beads with a hologram oval and some pearlescent beads. each one indiviually done!

Need more fringe! I cam up with a simple idea (mostly b/c i was running out of time!) I marked with a disappearing ink marker every 2 inches on the belt. Then I beaded 3 inches of seed beads and made a loop and continued a long on the belt. Both sides. At each loop then I added another single strand of beads just like in the middle.

A farther out view.....

Then I was done. Not too shabby for my first time! Here is it on me for an event (sorry the picture did something weird to our skin). And somehow after i added my hooks the fringe actually lines up. its crazy and i will never be able to do that again! Ever!

Enjoy!
Lauren of Baklava Bellydance
Mobile, AL

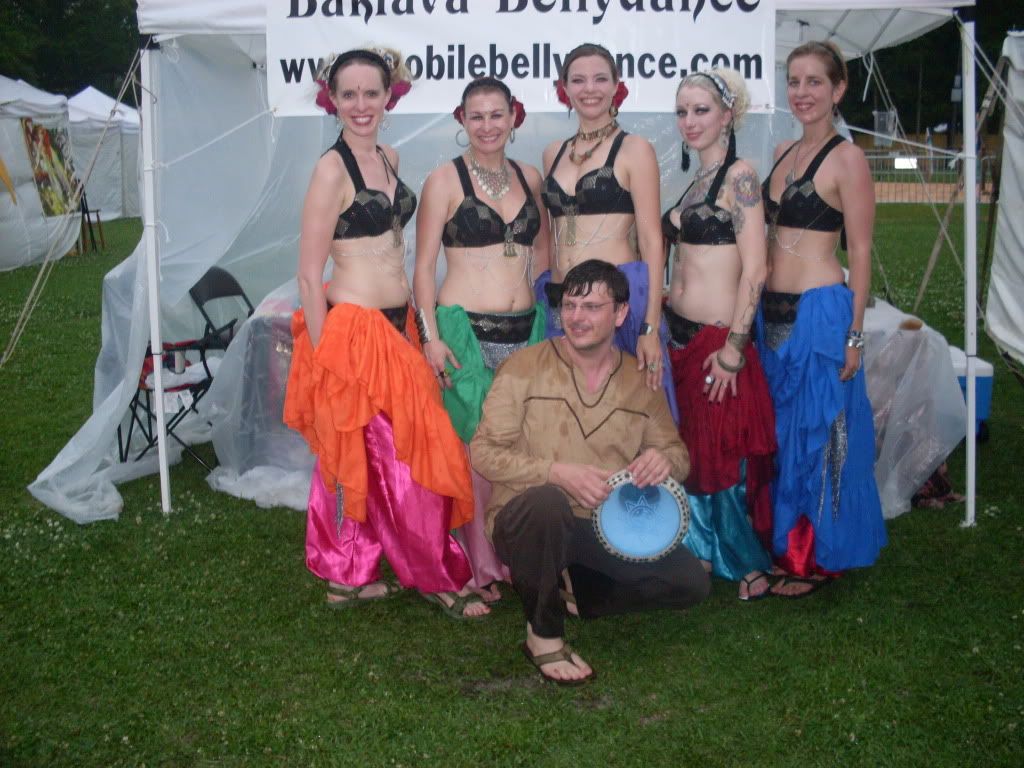 Ahhhhh finally getting to post the costumes we have been working so hard on! Here is the costumes complete.... The assuit belts are done, the bras are also covered with assuit and have D rings in the back. the harem pants also made by us. The 10 yrd cotton skirts are also done by yours truly. After making those skirts, I am never hand gathering again! I am buying a foot for my machine and serger! NEVER AGAIN! we also made the silver over skirts but you can't see them. It was really hot out and we tucked a lot of our skirts in order to not be so hot. Everyone draped their own chain on their bras and we also attached the kuchi charms to the center. Everything I have on (Last on the left) I have sewn myself! Even my headband!


