Well hi welcome to my little blog. Just my little corner of craftiness, sewing, and refashioning. I am also a newly gluten free eater so you have a little bit of recipes mixed in here.
Showing posts with label tank top refashion. Show all posts

Monday, May 23, 2016

Too big tank top refashion

Time for another refashion. Yeah I am not doing many of them lately. I have not been thrifting either. I am actually not doing a lot of sewing lately period. I know it makes me sad.

This tank top was actually part of another top I got and refashioned (and can't find any info on, lol). It was a large top hence why the tank top was large too. It was super wide in the bust area. BTW this is a horrible photo of me, meh whatever.

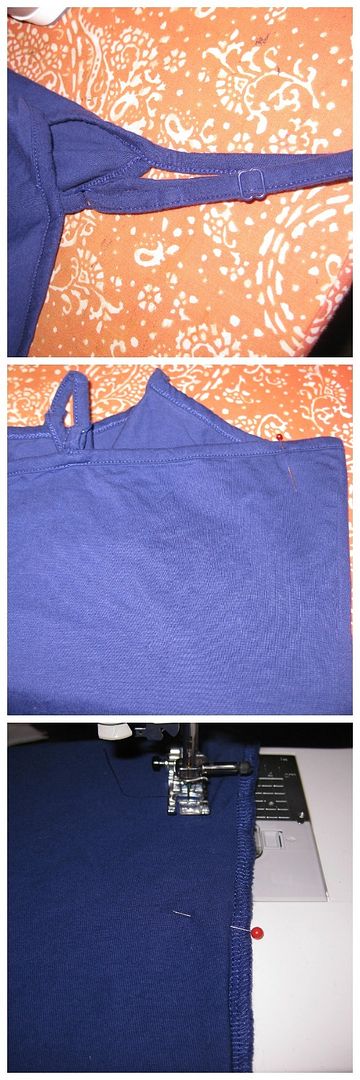
One of the blessings of this top was the straps were like bra straps so I did not have to remove and reattach them. I could simply adjust the height on mine. Really then all I wanted to do to the top was take it in the sides. I liked the idea of having more of a drapey, not-tight tank top for the summer.
Simply just measure and sew down! I serged out the excess  and tided up the seam. After adjusting the straps, I was done!
Here's the end product

It is just a simple breezy tank top. BTW when I took these photos it was winter. I froze and luckily it did not show too much in these photos. I have the perfect pair of shorts to go with this top that I am working on and can't wait to pair together. Here is the before and after- not bad for just a little bit of work!
Cheers,
Lauren

Tuesday, July 29, 2014

Fit to be tied tank top refashion, #55

I decided to try out an idea from a refashion book. I started out with an old dusty rose tank top and a black and white striped fabric.

The inspiration came from this book, custom couture. Another project from this book.

Going to try the "fit to be tied." Good way to use up fabric scraps! I followed the instructions. And then I stopped following instructions. Because they were so wrong. When I first cut the tube, it was way too long. What I would suggest is measure the distance from the arm hole to the bottom of the tank top and then add 6 inches. NOT 16 inches.

Actually this was the worst instructions I could ever read. It made no sense. No sense. And the only diagrams they had was for the bow. Which helped me for nothing.
So I had to cut off the bottom. Here is what I did.
I serged the bottom and top of the tube. 
Then I folded over the top and sewed. I also sewed a gathering stitch. 
Then I put my tank top on the chair and put the seam on a side. 
I sewed the tube on to the tank top.
Created a casing in the bottom, add elastic. 

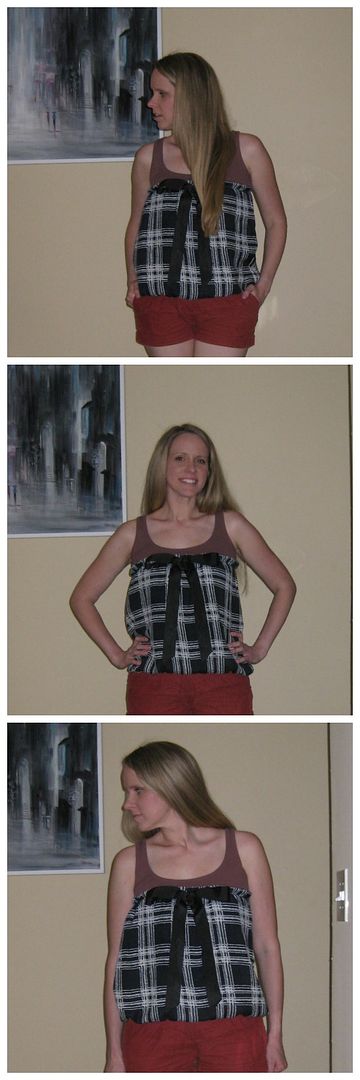
Next I added a bow. Simply just found a scrap ribbon in my stash. Created a bow. Sew. Cut off excess . 

Done. Obviously I need to wear with another pair of shorts. Red isn't working.
It looks like what was in the book. This could have potential in other projects. 
I don't need to use the book whatsoever. 
Recap

Cheers,
Lauren

Monday, June 20, 2011

Patriotic Refashion

Yes I am coming back from the dead. Well I am coming back from the ground with my back problems. But I am slowly rejoining the world but no physical activity yet. Luckily this doesn't pertain to sewing. :) And I can stand and sit longer. So now I am playing blog catch up! :)
This refashion project was not intended to be patriotic but somehow it became patriotic.

I started off with a tank top I had. It was a cute red sweater knit tank top, that came with a cardigan I got at goodwill one day. I liked the top but its a tad too short for me to wear at work. I kept it because I thought I could maybe figure out something to do.
One day online shopping, where I get ideas for my refashions when my brain hurts. I noticed a lot of dresses have these built in elastic waistbands. Then I had my aha moment... turn it into a dress!


Both of these dresses I found online at modcloth. So cute yet so easy to make!


I search and searched my fabric stash but nothing really sang to me. Then one of the last piles I went thru had some light-medium color denim. I thought it would look nice paired with the red tank and a wide white elastic belt. So off I went.

Here is what I did...


First I got about a yard of wide elastic from Hancocks. They were out of black so I had to go for white, guessing it was fate. I got the widest they had, think around 2 inches. There was a 4 inch but that was too wide.


Next for the actual length, I took the elastic and laid it on top of the top, then I added 1/2 inch seam allowance on each side. But we won't sew it together yet.

Time to make the skirt! Now I did not measure anything out for the width, but for the length I went for 25 inches. Why don't know, just felt like a good number. The length went down to my knees and then i could hem it. I wanted to create a gathered effect for the skirt b/c if i didn't I would not fit over my rump!


I took the denim and lined it up with the elastic (right sides together). Next I went to the sewing machine. I sewed the denim to the elastic, while i stretched elastic. Wow first time sewing denim and first time sewing and stretching elastic. This was a challenge! It was hard to get my mojo going stretching while sewing together. Definitely took some coordination!


Natasha helping me out!

Sewed to the end and we have half a skirt. Next, I sewed down the seam for the skirt and we were in business. I did not hem it b/c I did not know how this was going to turn out.


Next sew the top to the skirt. I lined up right sides together: bottom of the top with the top of the skirt. Stitch down.


Turn everything out the right way. Ok. then I hemmed the bottom. Voila! Done!


Here is the end product.


Now with a cardigan for work!


By the luck of my fingers the skirt just fits. It has a bit of a pencil like appearance which I have no idea how it happened.


Yay here is to catching up my blog and my life. I am not fond of being a slacker or being able to keep up with my own life! More to come!

xoxoxo,
Lauren

LinkWithin

Related Posts Plugin for WordPress, Blogger...