Well hi welcome to my little blog. Just my little corner of craftiness, sewing, and refashioning. I am also a newly gluten free eater so you have a little bit of recipes mixed in here.

Wednesday, July 2, 2014

Send in the clowns refashion #48

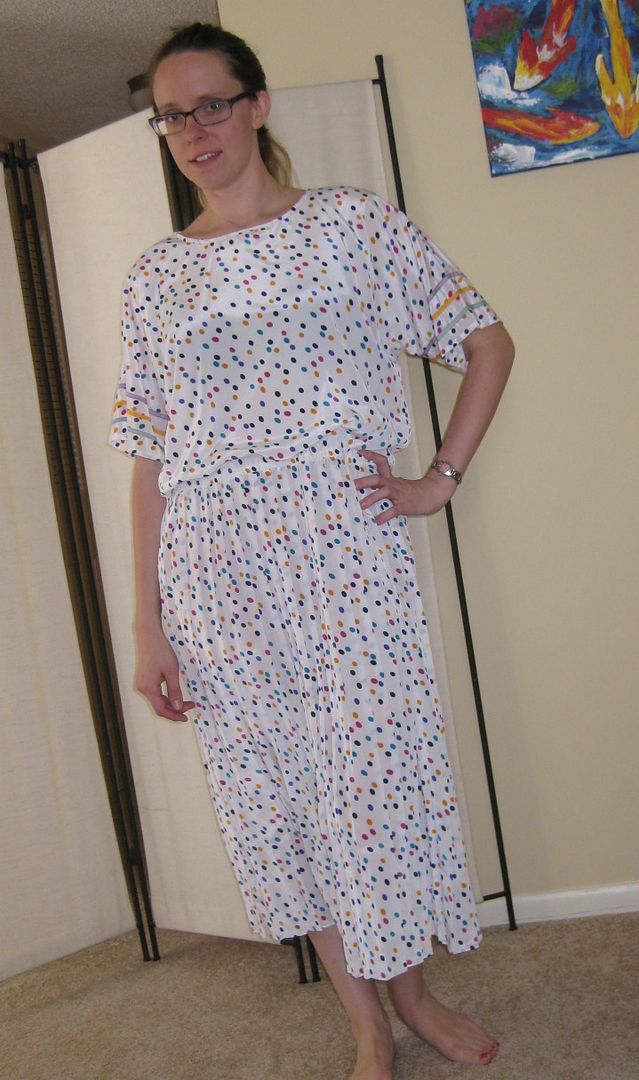
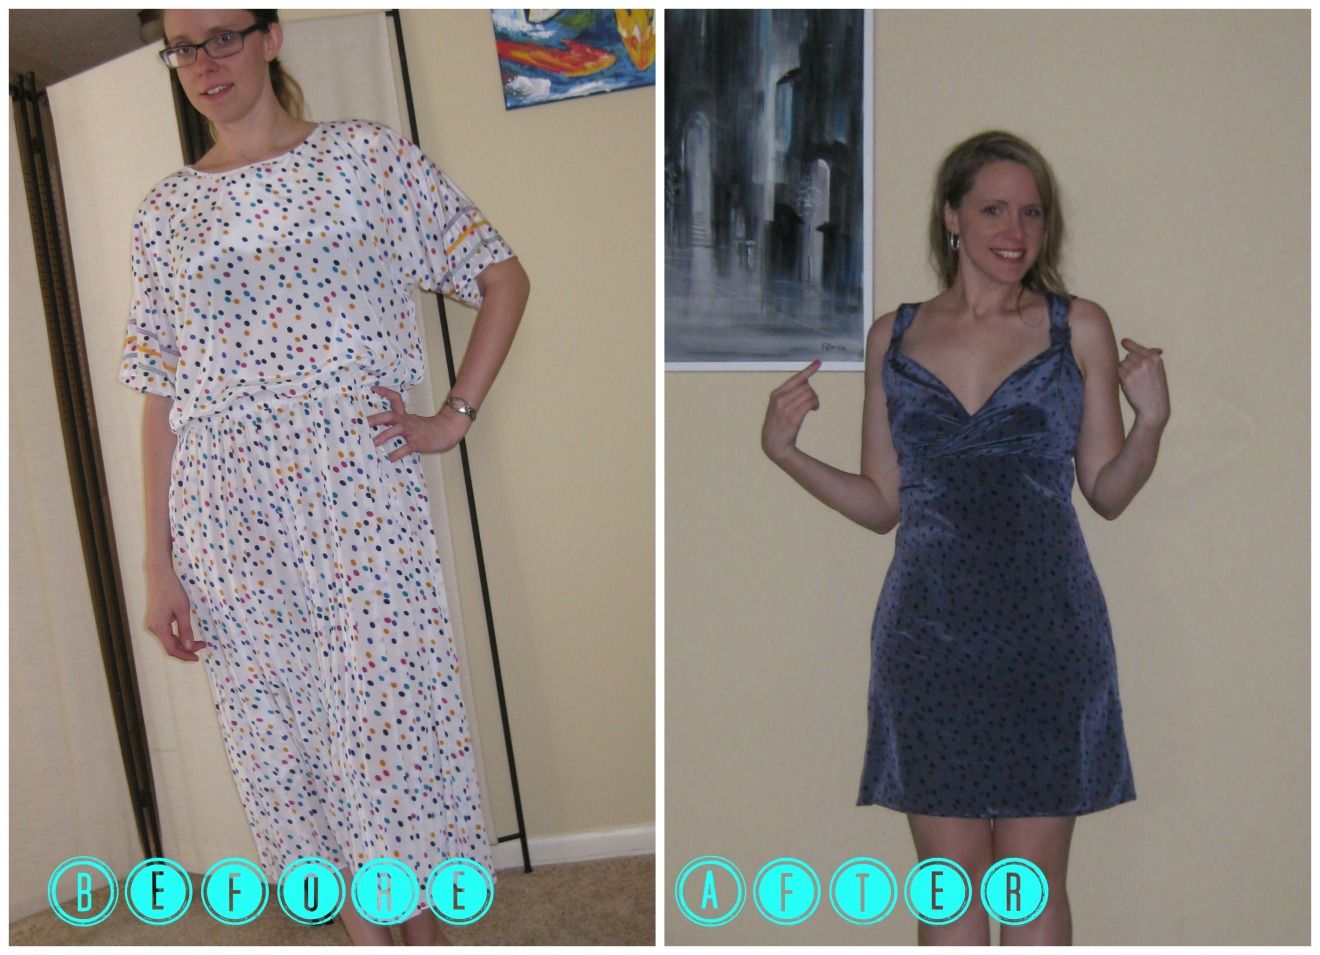
I think this dress was meant for a clown's mother. I mean wow..... bright polka dots. Stripes on the side. Gah!

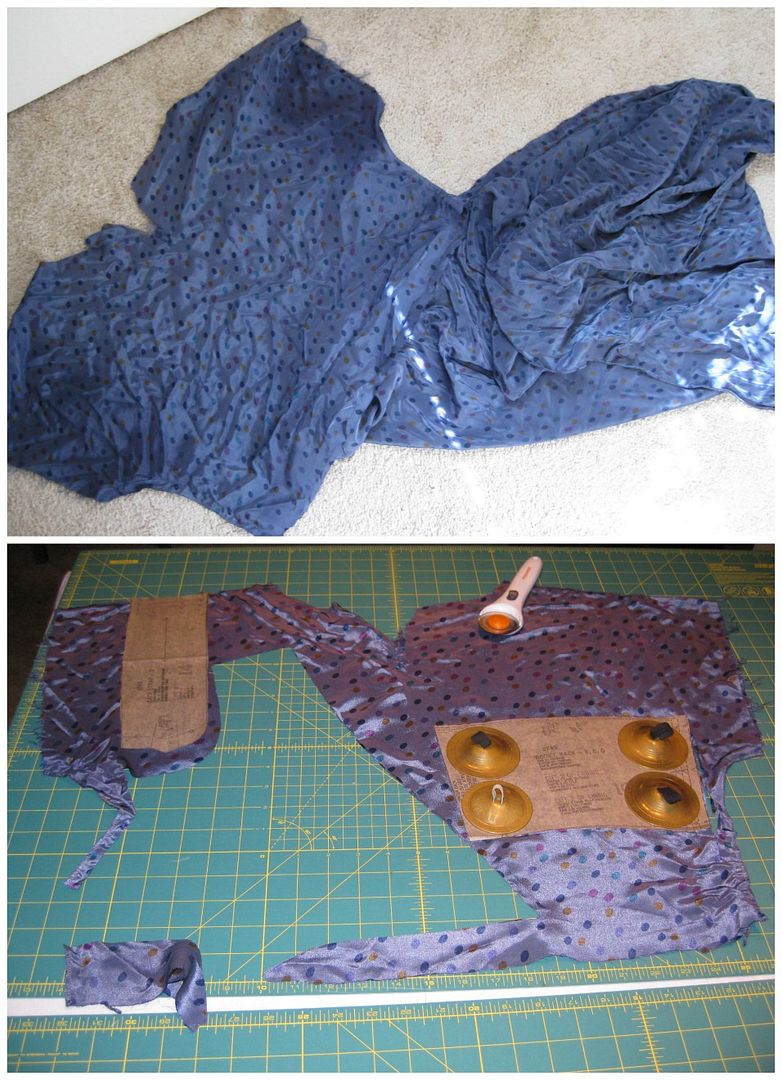
This dress required a complete redo. First I took apart the bodice from the skirt. Actually it was really a simple design and not many pieces for this dress- it was just ugly. Luckily I had a cute little helper who was drawn to this dress. I mean as soon as I pulled her off the dress and grabbed the camera-she was back on it. But you know it isn't a blog post unless you get kitty-bombed.

I decided since it was a simply a big old fabric, I would use one of my patterns. I used this new look pattern. 

But first! I must dye! And it was 100% polyester so iDYE was in the plan. I used steel grey. I also precleaned with a better detergent (from Dharma) that helped me achieve a better and even dye. It already looks better! Then I had to get creative with fabric pattern pieces. 

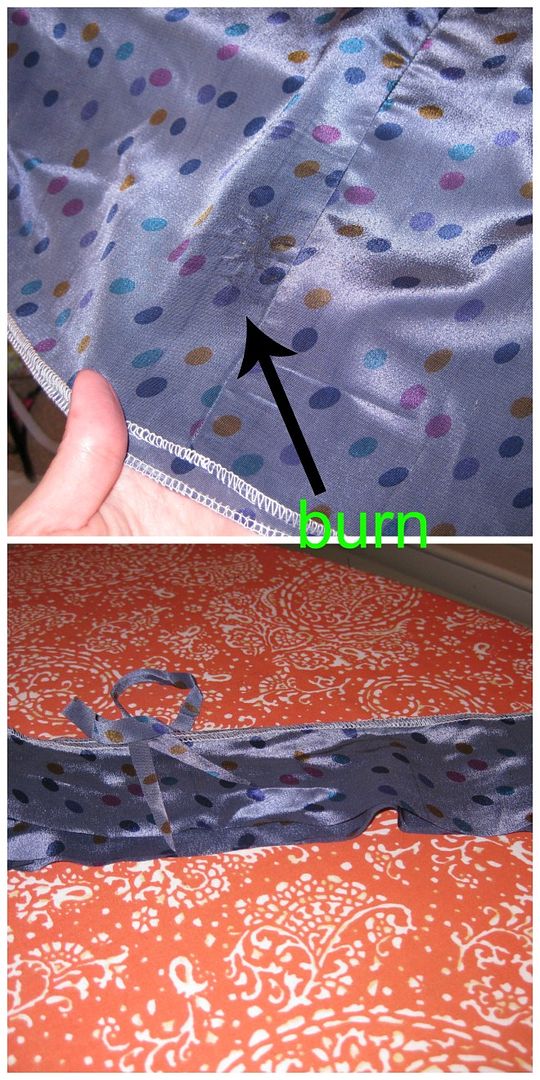
I followed the pattern. Pretty easy but had a small hangup with the bodice. I decided I was a high and mighty sewer and top stitched the upper edge. Then I got an odd fit and after multiple seam ripping, my solution was to angle the bodice differently- so slanted down. And as I was hemming the bottom, sigh, I had my iron too hot and burned my dress. Really?????!!!!! So I took off a little more from the bottom. No worries this dress works.

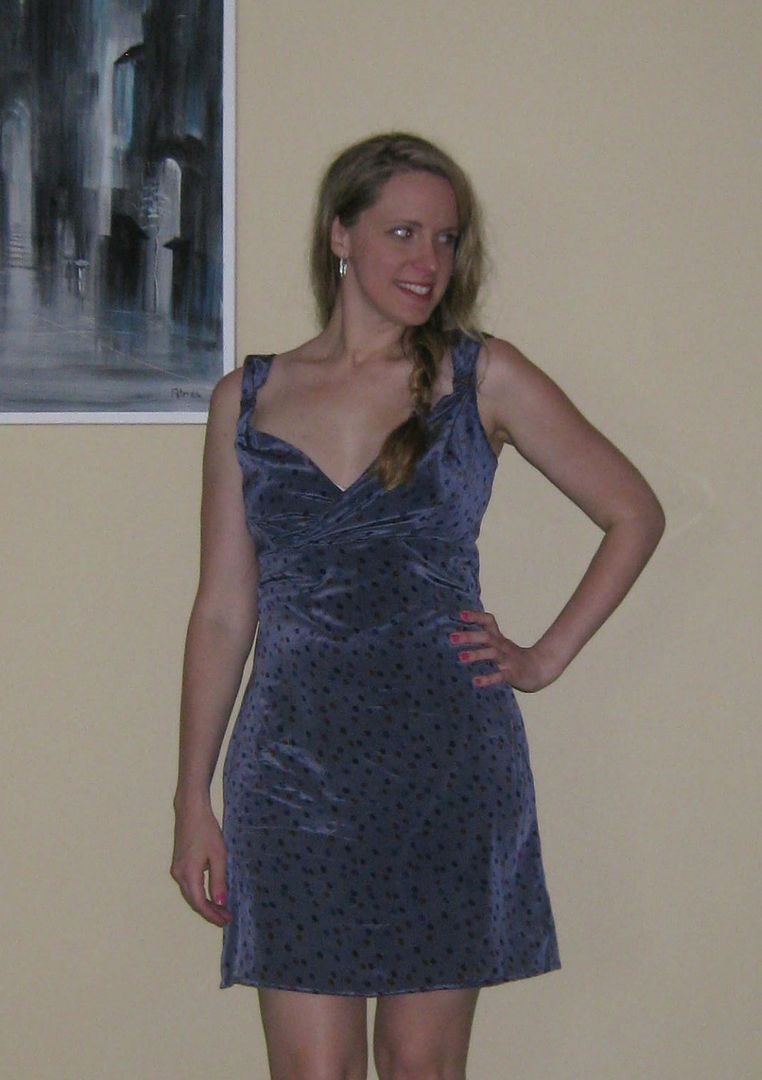
Done, now this picture is for pure giggles- you seen I haven't worn heels since my spill but it really helps pictures. And I lost my balance here- no worries I didn't hurt myself anymore.

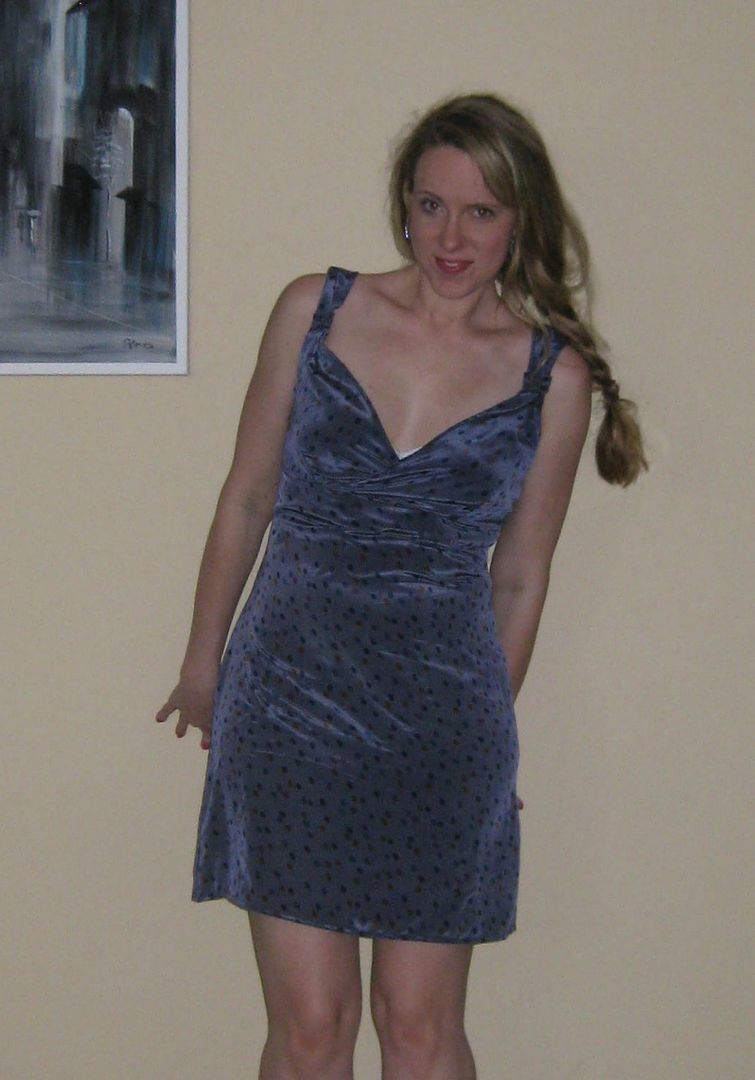
But the dress is done and super cute. And ready for date night!


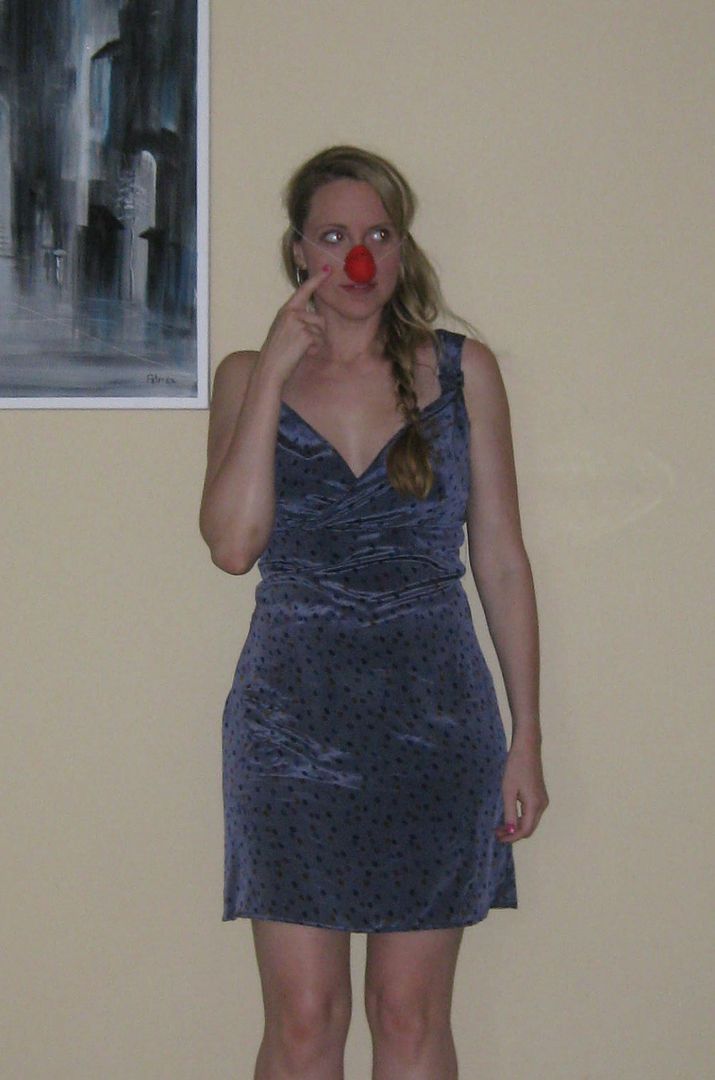
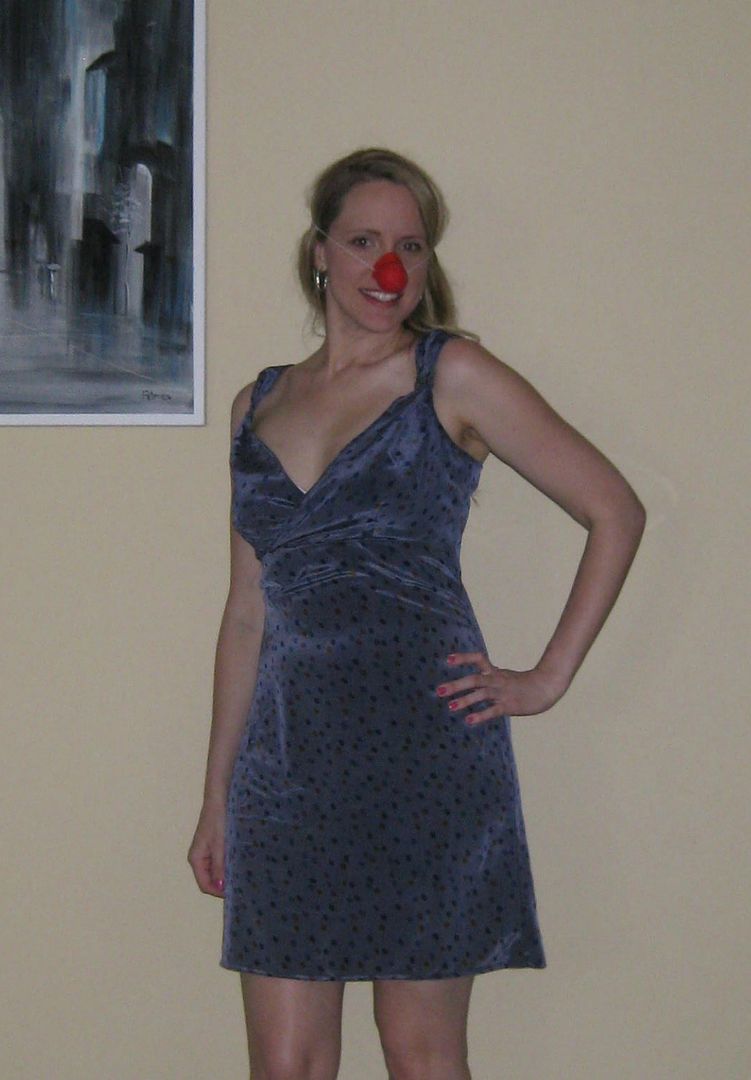
Couldn't help myself.... now the only thing clown about this dress is this the nose. 

Send in the clowns!!!! 

Alright no more clowning around, this dress is done! So drastic!

Cheers,
Lauren

Monday, June 30, 2014

4XL men's polo refashion to dress, #47

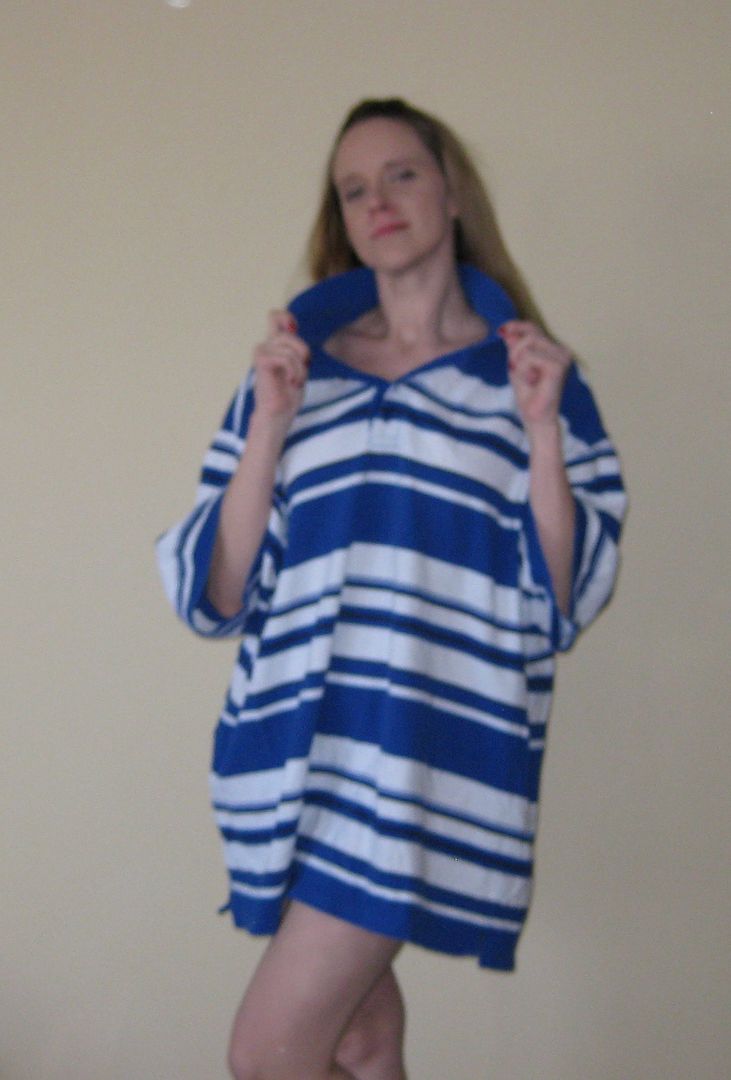
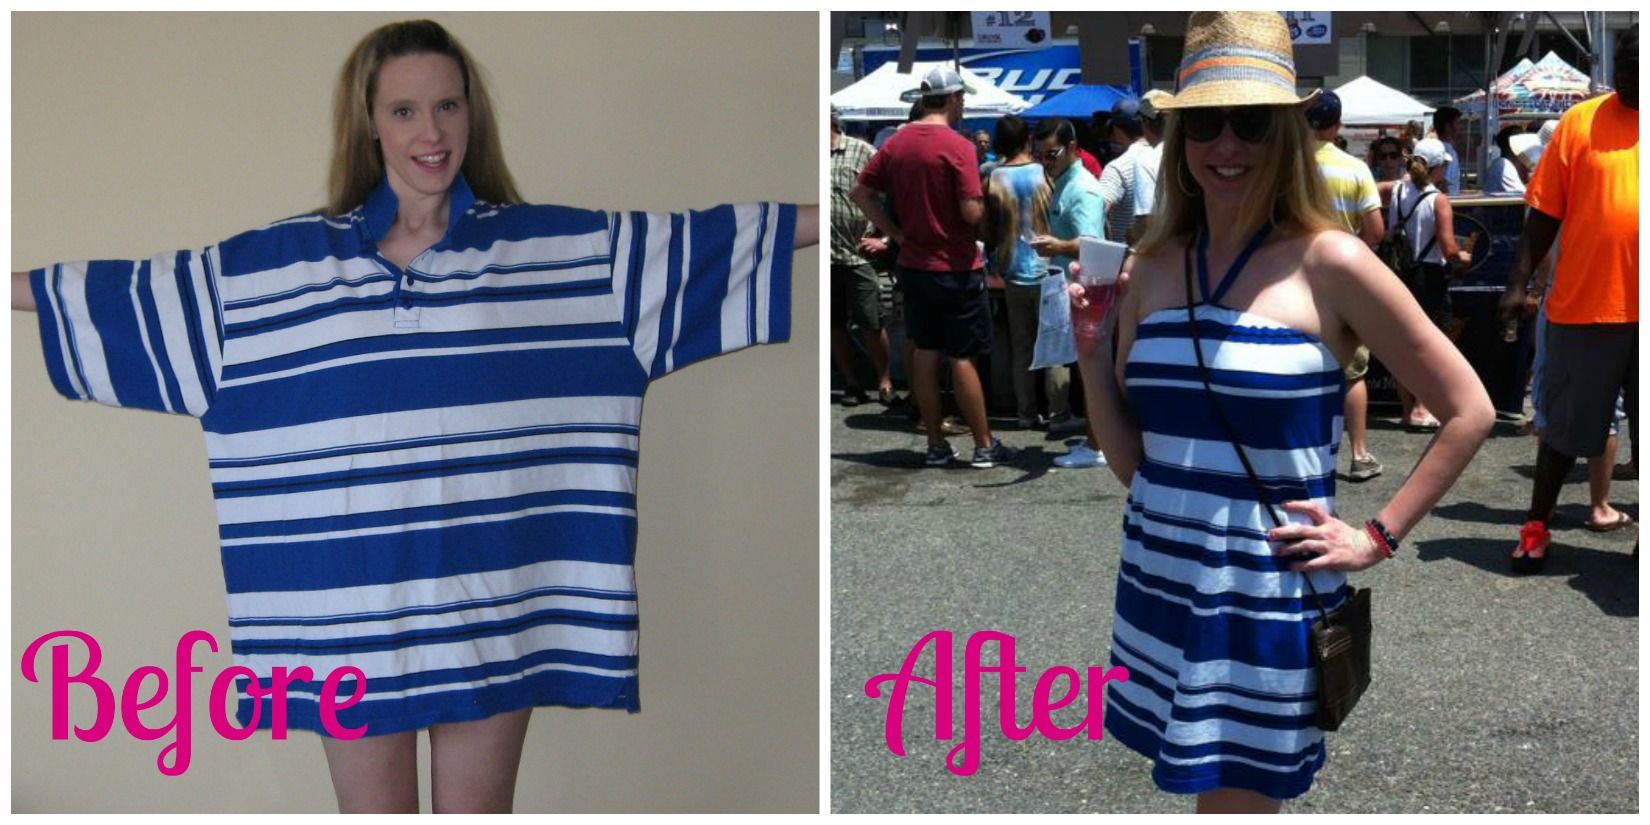
OMG how big is this polo shirt?? I am wearing shorts under this shirt!!! For real!
Ok I just have to pop the collar, I can't help myself...
I'd call this an epic men's polo refashion. Now what should I do with it? This iron craft challenge, I am back! The theme is stars and stripes. I thought this would be great for stripes! And it is semi-patriotic.

Since it was so big and huge, my goal was to turn it into a dress. Now to make it happen.... And I had a hole too... :(

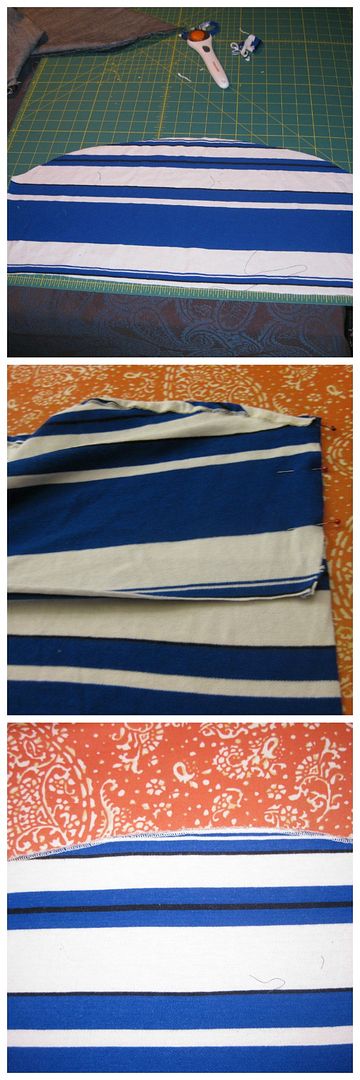
First we need to deconstruct this shirt. I cut right below the arm holes- this will become a skirt. I removed the collar too. Off cam the sleeves, which I opened up and removed the arm binding.

Dang still a lot of stripes. I attempted the bodice next. I really liked how the sleeve curved and thought it would make a cute bodice, I mean 1 sleeve was an easy half of the top. So I evened it out. I attached to the back, which was just another piece of material with a straight across. I serged the top to avoid fraying, and then ironed under to create a casing. More on that later.

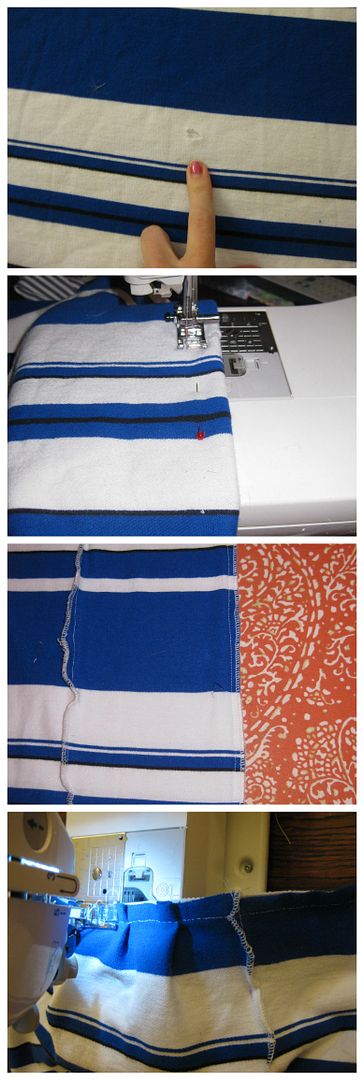
Time to fix up this skirt! I sewed out the hole. Serged to prevent fraying. I actually did a mirror "sewing out a hole" just so the skirt would look balanced. I did several pintuck both on front and back. Attach to the bodice!

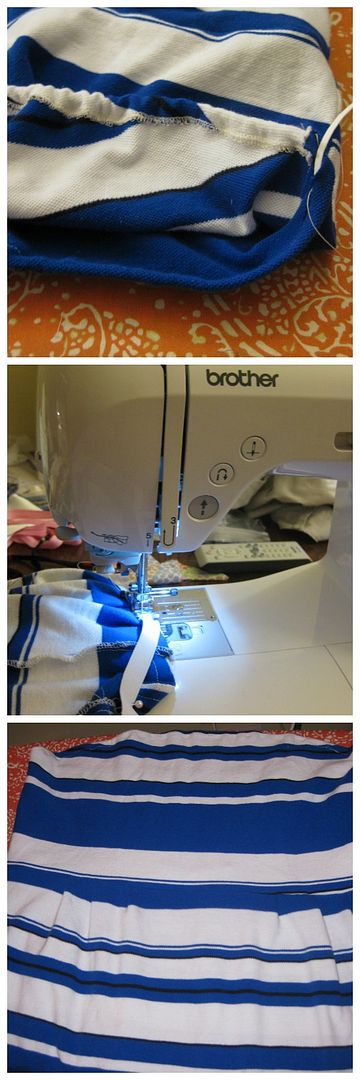
Time to start finishing up. I added elastic to the top of the dress. I also added elastic to the back part of the skirt to get a better fit.
Now we are not done yet! With the elastic in the top of the dress, you lost the curve that I really liked. I cut off the widest blue stripe and made a tube. I used my tube turner I just purchased and OMG my life is changed forever- quickest way ever to turn a tubing right side out!!! Yay! Then I sewed my new tube to the top of the bodice to give a slight point back to the curve.
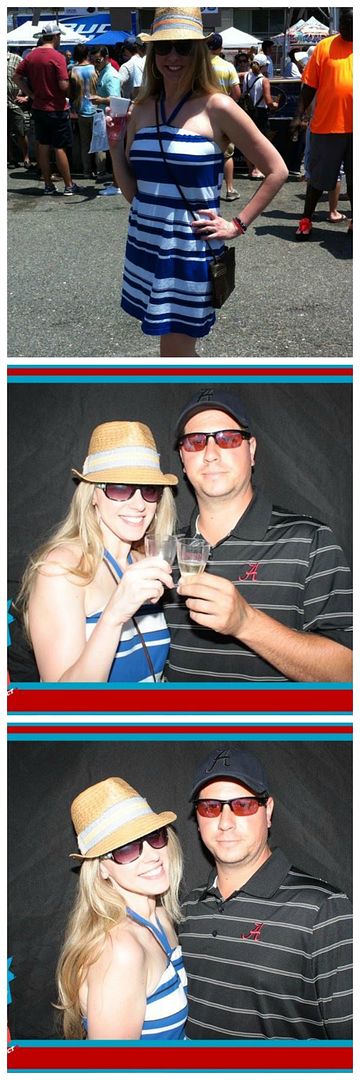
I just wore my dress out this weekend to a festival and it was nice for the heat. Here is my finished dress.

It was super comfy! Here is the recap! I plan on turning the rest of the fabric into bibs for boys. There is that much left of this polo! Crazy!

Cheers,
Lauren (almost half way done!!!)

Sunday, June 29, 2014

July MGAM Plans

Here are my plans for this July's MGAM.

I am going to make the side bow tie top  with the Butterick 5784 pattern. I am going to use this stretch satin fabric my mom gave me from leftovers that was used for my cousin's bridal shower. I am cutting today! Wahoo! Let's see how this goes!
I also have a lot more sewing going on as I will be making something for the challenge create with my mystery fabric (intrigued? b/c if it works with what I have planned it will be great!) and a refashion or 2 with patterns. So fun stuff is on its way! Yay!

Cheers,
Lauren

Wednesday, June 25, 2014

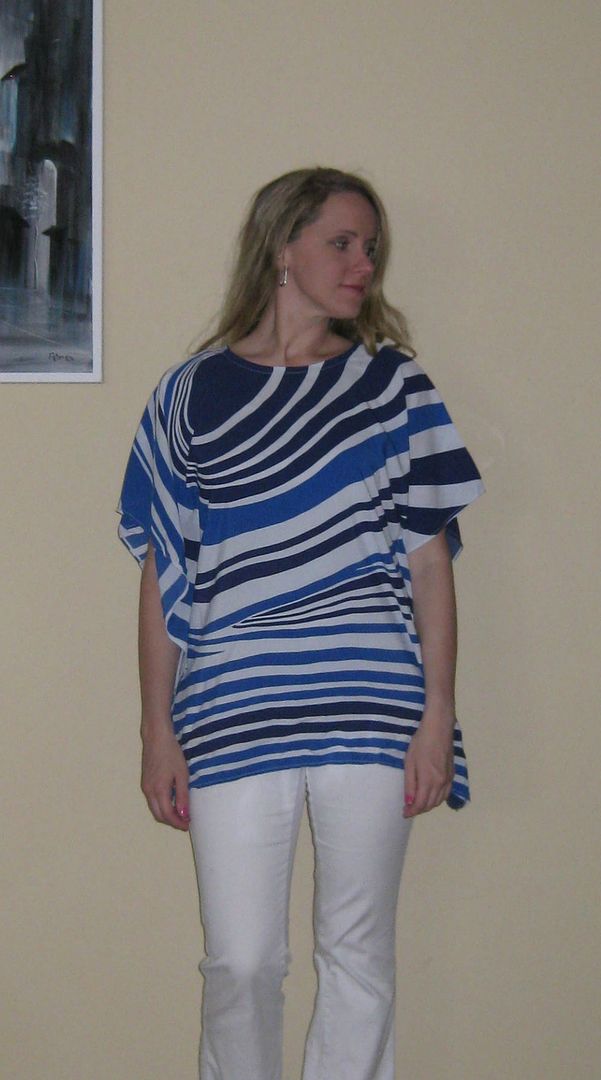
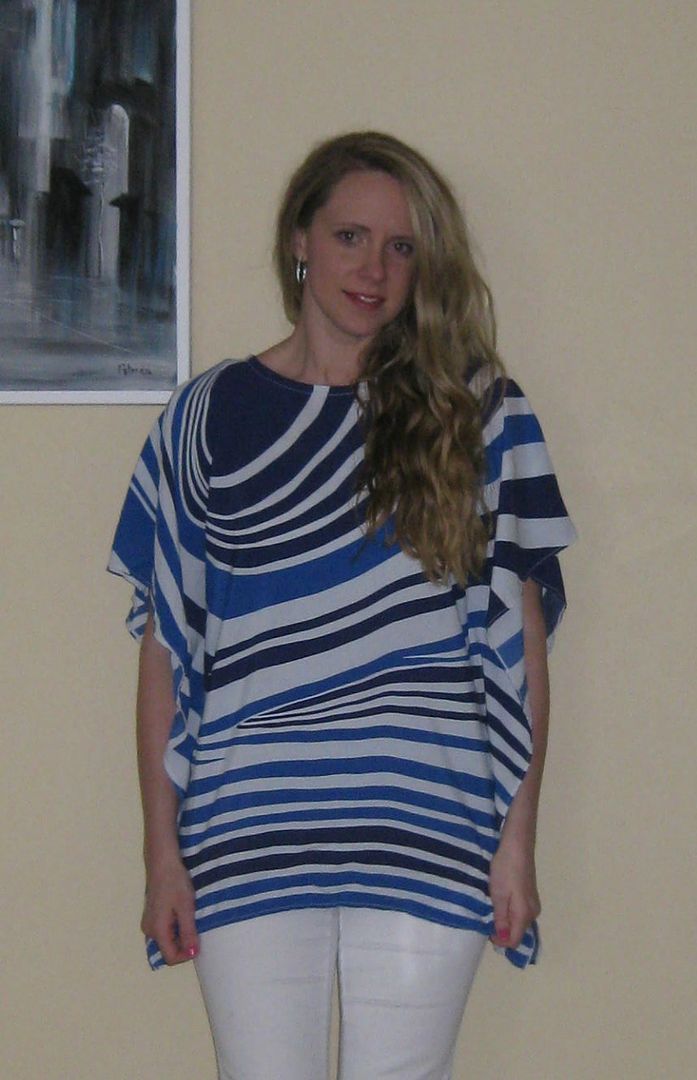
Swirly top, refashion #46

Ok, here is my other refashion with a fun drapey top. This top started as....
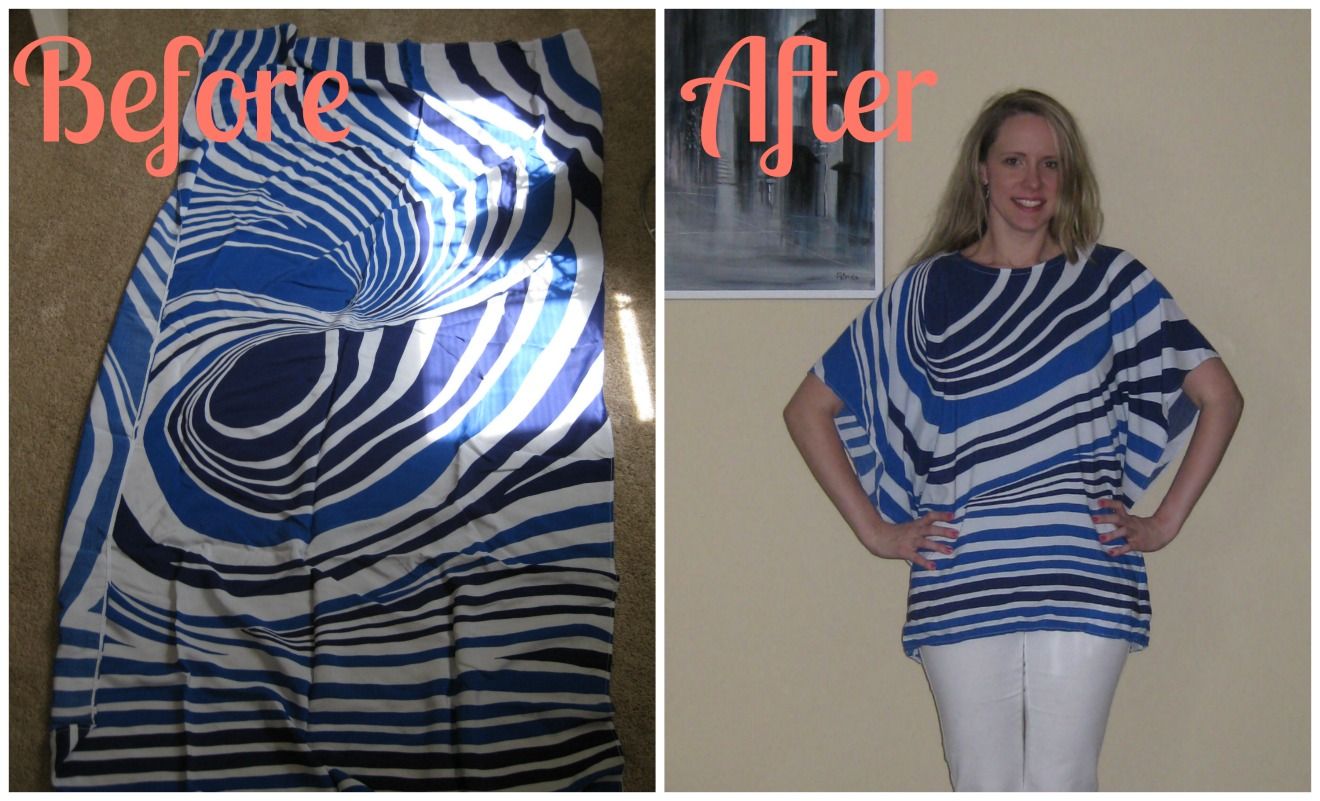
Um..... Err... Towel? No..... Um... Hmmm. Technically it is not a table runner. It is some sort of decorative fabric panel. To me it says it used to decorate some surfer guys house on this wall. That is what my gut tells me. The fabric was nice, thin, drapey and I love the color blue. Time for me to turn it into a blouse.

I gave it a good iron and folded in half. I pinned the sides together and then marked my hip measurement plus 4 inches. Divided that number by 2. That was house much I needed to fit my body in. I marked with a disappearing pen. You can see the marks in the first picture with the black arrows. I sewed down the line, leaving plenty of room for the arms (I seriously don't remember- I just winged it). When I got to the bottom of the blouse, I left the last 1-2 inches un-sewn. Luckily I did not have to sew a hem or clean up the edges as it was already done. Yeah that made me really happy!

Unfortunately, for the neck hole I apparently only took a mental picture and not a physical one. So my apologies. But I did cut a hole, 4 inches deep and 5 inches wide- curving the line. I then finished that edge with blue bias tape. Again, a good iron and this top was ready to go! I love easy refashions!


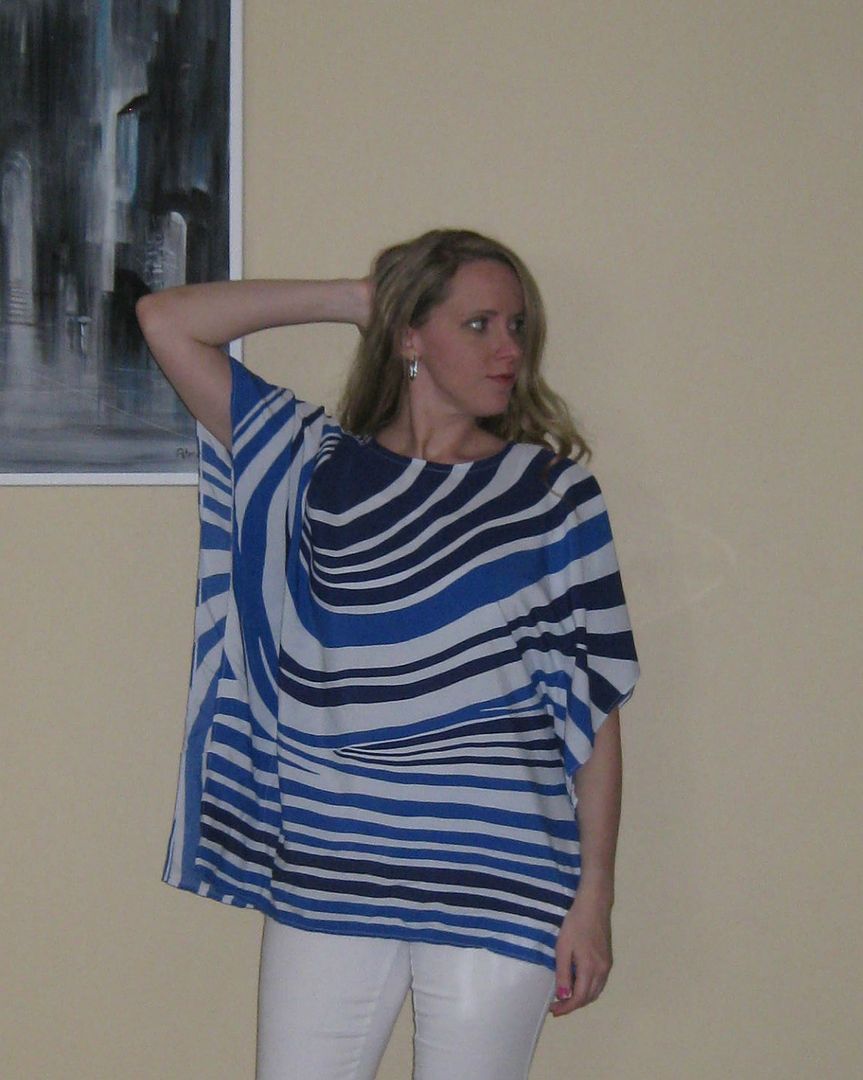
The one side was more visually interesting to me so I chose that as the front. 


Here is the recap, I feel as if I saved this fabric from a surfer. I have no idea why. But easy top!
Cheers,
Lauren

Tuesday, June 24, 2014

Challenge Create!

Just wanted to let everyone know that I am participating in Challenge Create: Fabric Swap Edition over at Skirt Fixation.

I am so honored to be one of the participants for this competition.
There are several portions to this contest: Red, White, and Blue; Linen; Geometric; Knit; and Mystery.
We all exchanged fabric, I sent off my 2 yards of mystery fabric and I pity the soul that got my fabric. I have also now received my mystery fabric. I can't show you yet, stay tuned b/c it is truly a mystery!! And now I have to figure out what to do with what I have!

Yeah so no hints.... I know this will puzzle you. But it is good! I hope I can make it work! July my friends, July!

Cheers,
Lauren

Monday, June 23, 2014

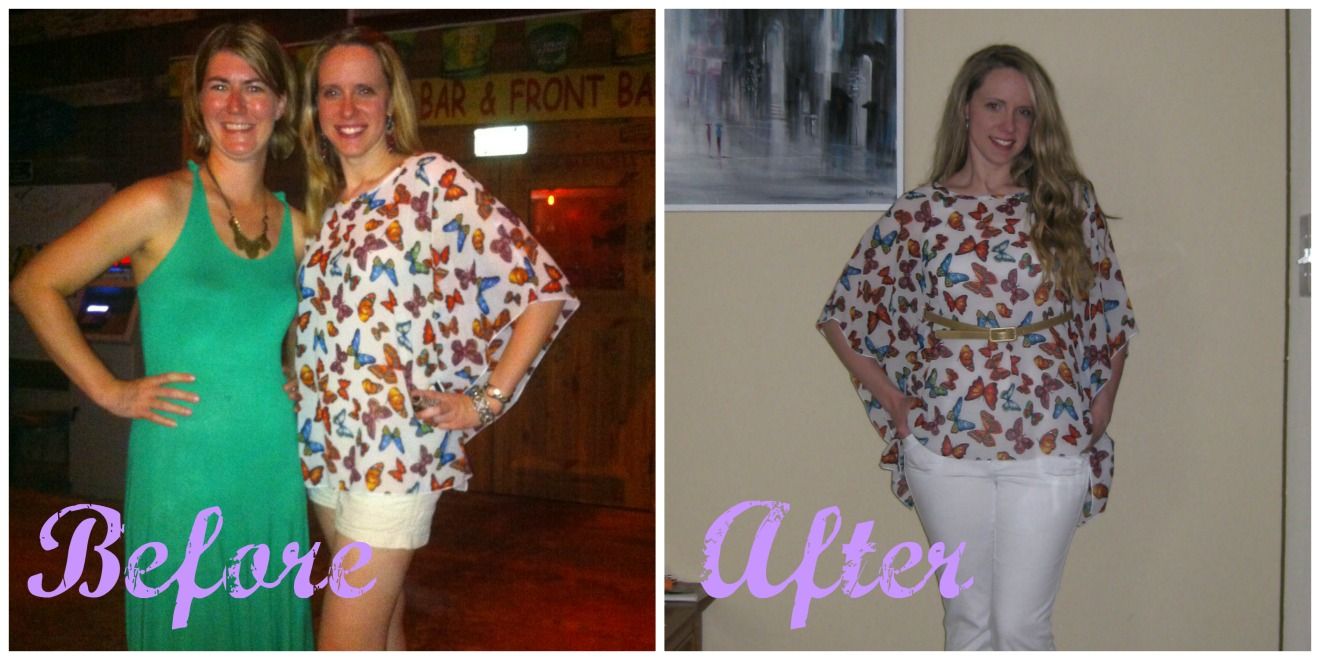
Butterfly chiffon top, refashion 45

This week is all about flowy blouses! All they are all very easy projects!!

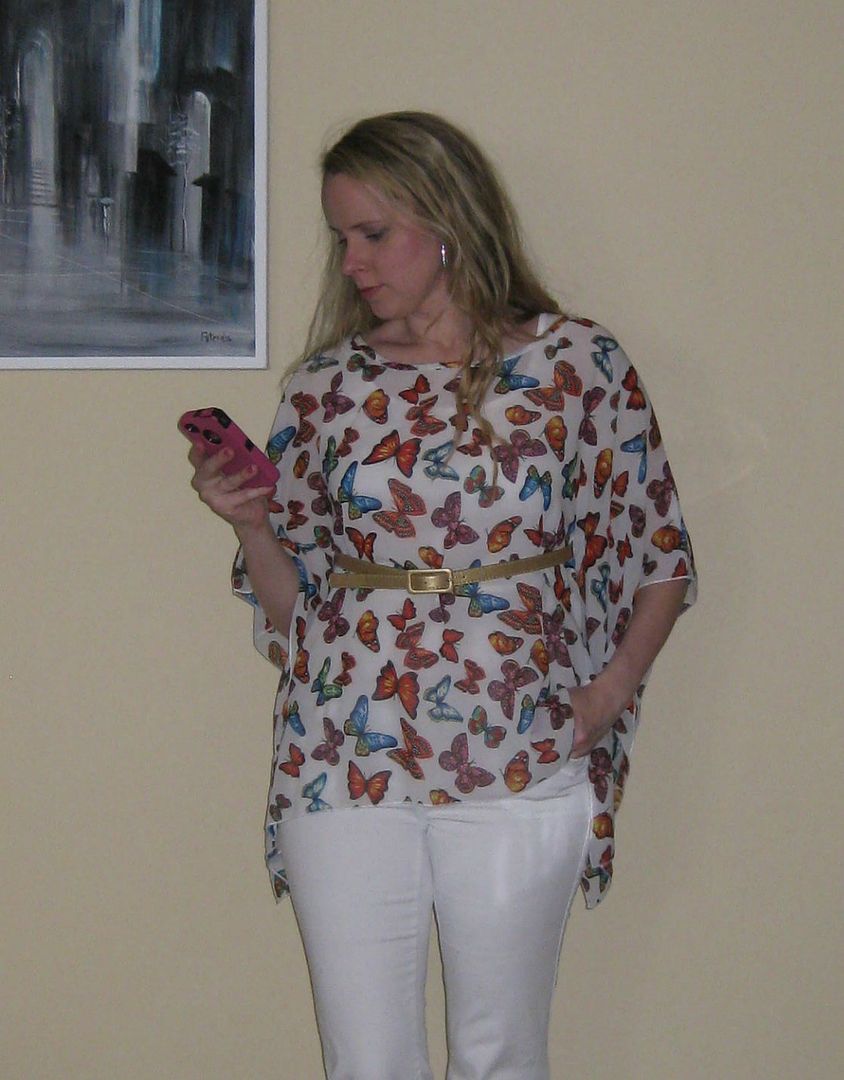
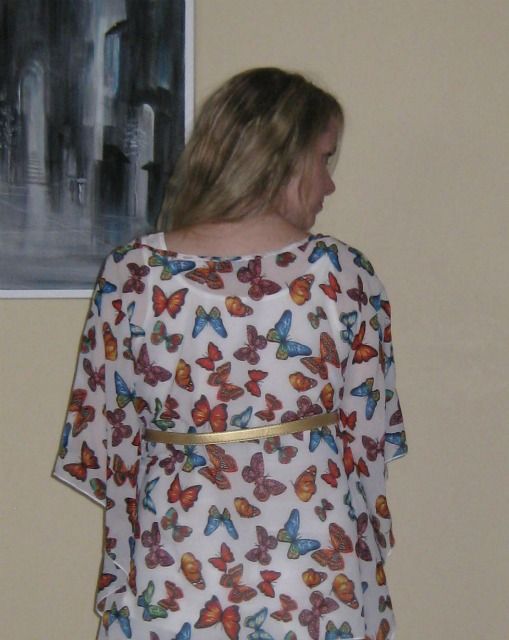
First one is this cute butterfly top. Now I loved it but I had fit issues as it was too big and always fell off my shoulders.

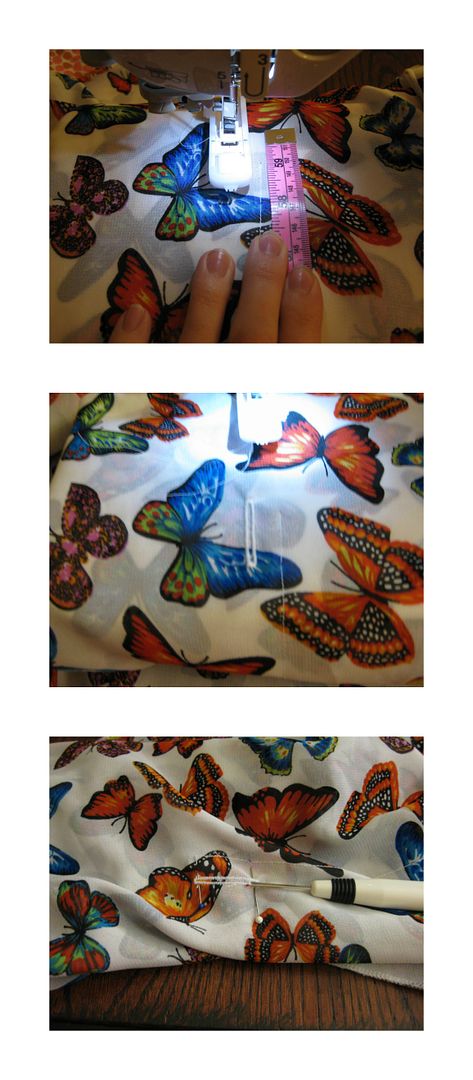
I decided the best option would be to add a button hole. I used my button hole foot for my sewing machine. Set it on the widest possible setting, measured where I wanted the hole to be. I did this on both sides. Simply pushed my start button and away I went! I love my sewing machine! Then opened up the button hole with my seam ripper. Finally, I added a dash of seam sealer since the fabric was delicate. Done!
Now I can add a belt and keep my shirt on me. Though I wish I did a hair lower but it still works.

Yeah I was texting, I am a busy girl. LOL


The recap- an easy way to get a fitting on a big shirt!
Cheers,
Lauren

Sunday, June 22, 2014

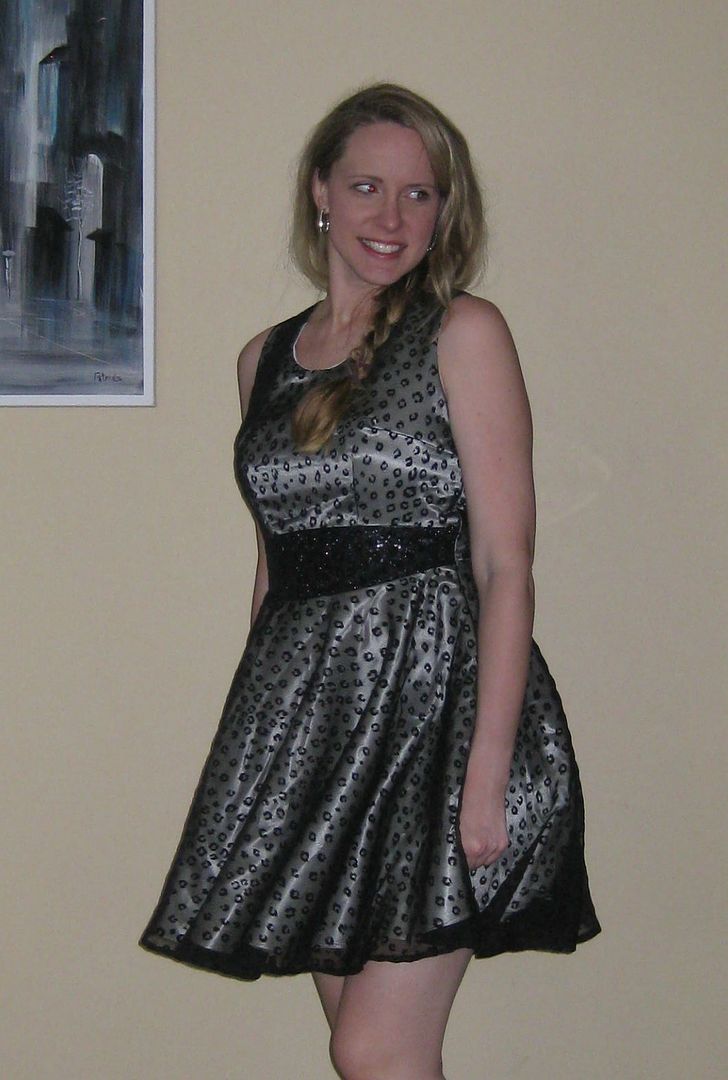
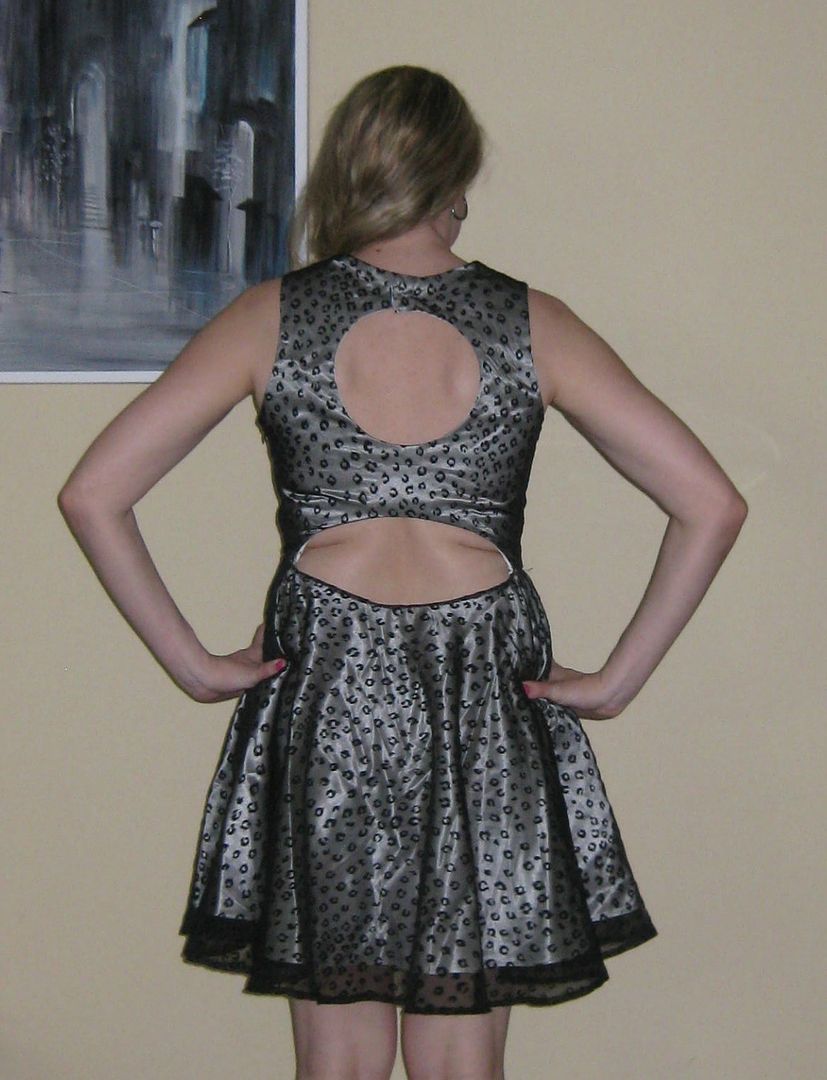
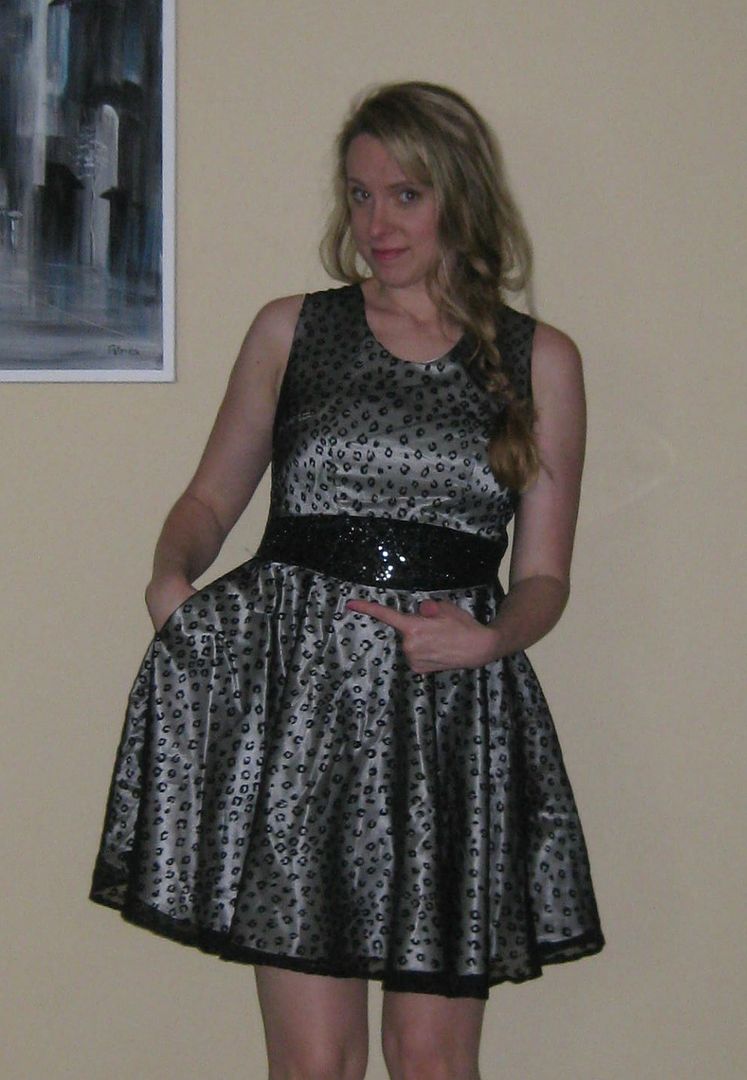
McCall's Leopard lace dress M6647

I literally was finishing this dress at the last minute. I finished the major sewing part of it before I got on the plane. Then the hooks on the dress the day before. I actually had issues with the dress b/c the back hook kept popping open if I moved, which I was going to move, while I was putting on my makeup. So I rescued it with a safety pin (which I brought b/c I know better!) and proceeded with the wedding festivities.

Here is proof I actually wore it. Unfortunately, no full length shots. I am horrible with taking pictures at events, I usually get so wrapped up with seeing people I have not seen in a while and forget to take pics. But here is proof.


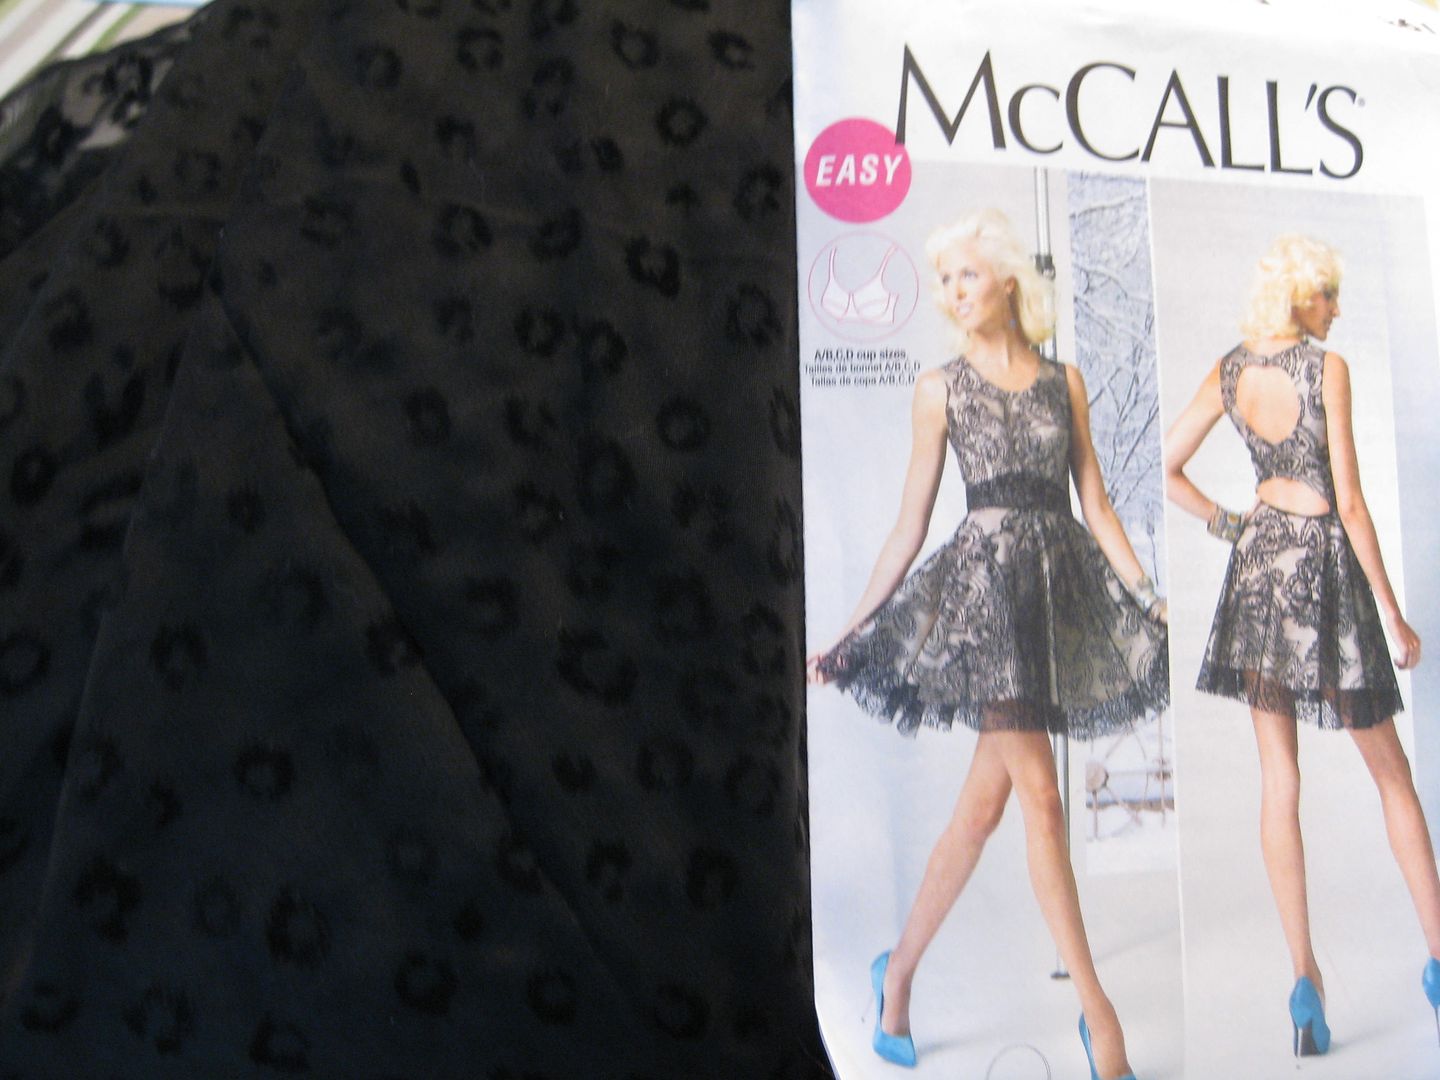
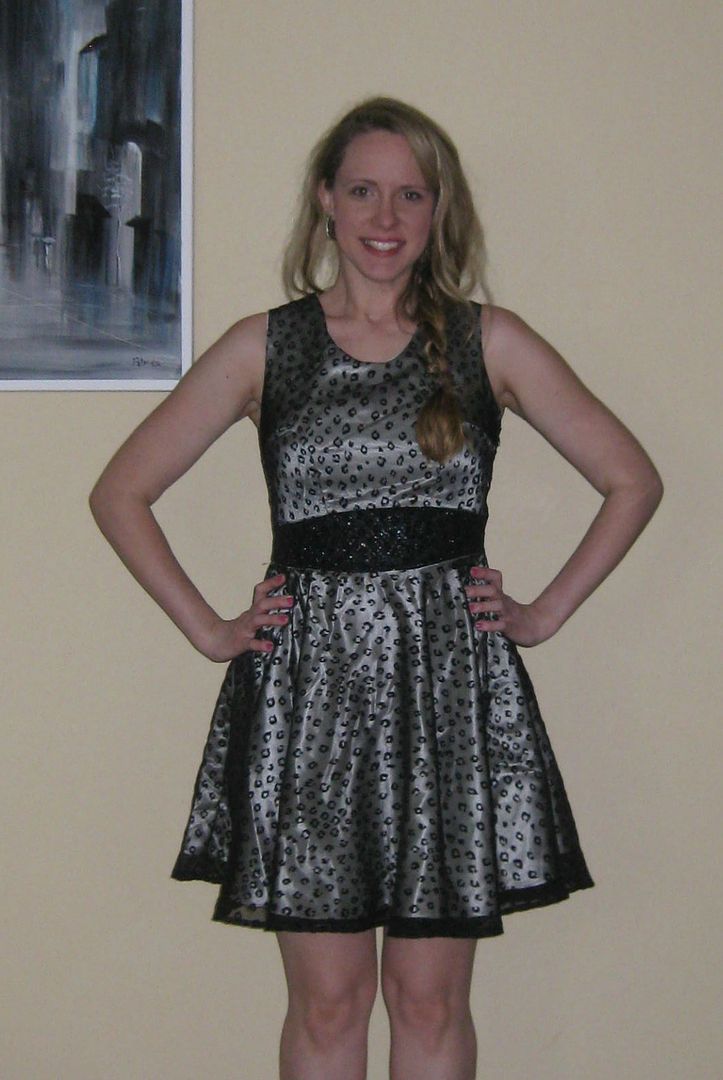
The pattern is from McCalls and is for an open back dress with a circle skirt. I used some cream satin I had in my stash, ran out (those skirts take a LOT of fabric than I thought would), went and bought more- turns out it was bridal satin, so a nice quality. The overlay was this semi-sheer black almost chiffon but not quite fabric with velvet feeling leopard spots. I also used a cream cotton for the lining. There are 3 parts for the bodice: the lace, the underlining, and a lining. You can also adjust for bust, so I cut a size 12 and for a C cup. I wish I had done a D, in all honesty. My other modification was I added 2 inches to the lace part b/c I thought the dress looked short. The pattern calls for 2 different lengths, so I used the original lace length for the satin underlining. I am happy I did add those 2 inches!!

First step was basting the bodice to the underlining. Front and back. And even the darts. I had white threads EVERYWHERE!! 
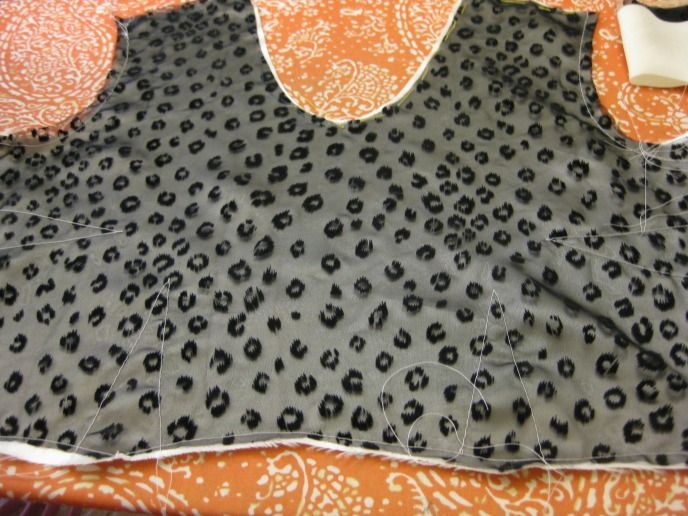
That was my only during photo, as I was frantically sewing to finish in time for the June 7th wedding. Sewing really was not too bad. The bodice just took time and patience to sew it right the first time. The skirt was easy except for the open back part. What was confusing was they don't call for a lining with the skirt, remember we have the satin underlining. Now you sort of need that for the hidden understitching for the skirt back. I swear this didn't call for it and with time ticking I improvised. Then I cut the lace so you wouldn't see the fabric. This lead me to ruining parts of the stay stitching, so I said forget it! Top stitch!!!! Then the other part which I initially missed, was there was 1 pocket. Yes, 1 pocket! I had cut 2 but then I realized it was a side zip- impossible. I put in both and had to rip and one late night, rip the one out. The dress JUST fit. I totally watched what I ate. LOL

Here it is done. Now I promise, it is not crooked. As you can see it just fits.


I was uncomfortable with my back fat showing, but my boyfriend promises me that it wasn't noticeable at the wedding- but it is when you are posing in front of the camera. LOL The back is cute. The only issue is that closure for the top portion of the dress. I put the hook and eye and moved it 2x, and it still popped open.when I would move. It was weird. I can't decide if I want to add a button or a snap. The hook and eye does not work. Thank goodness for safety pins. 

The one dang pocket!

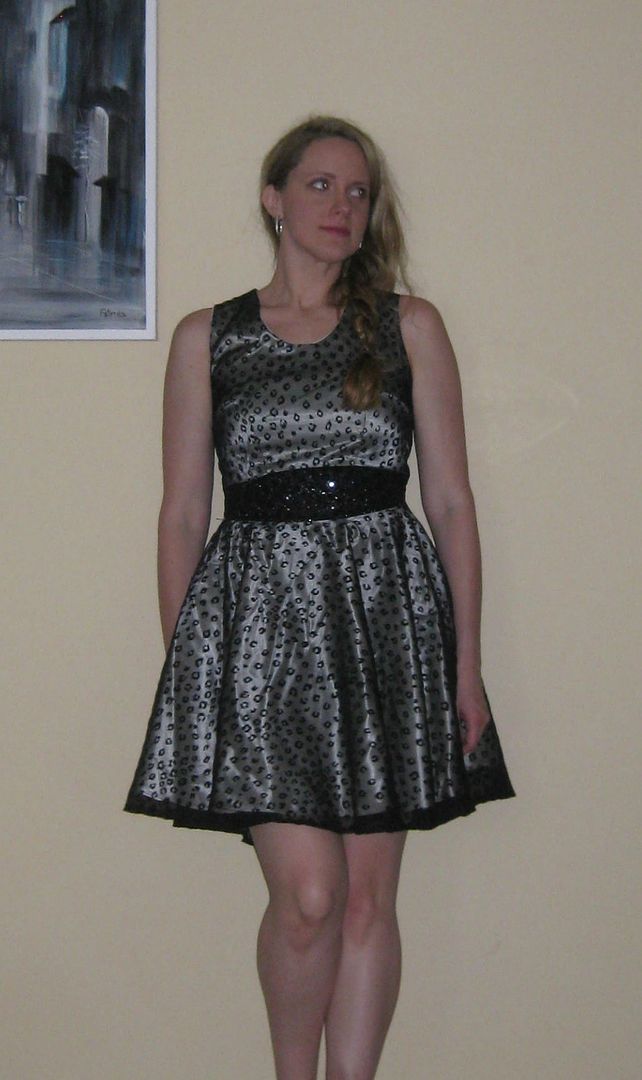
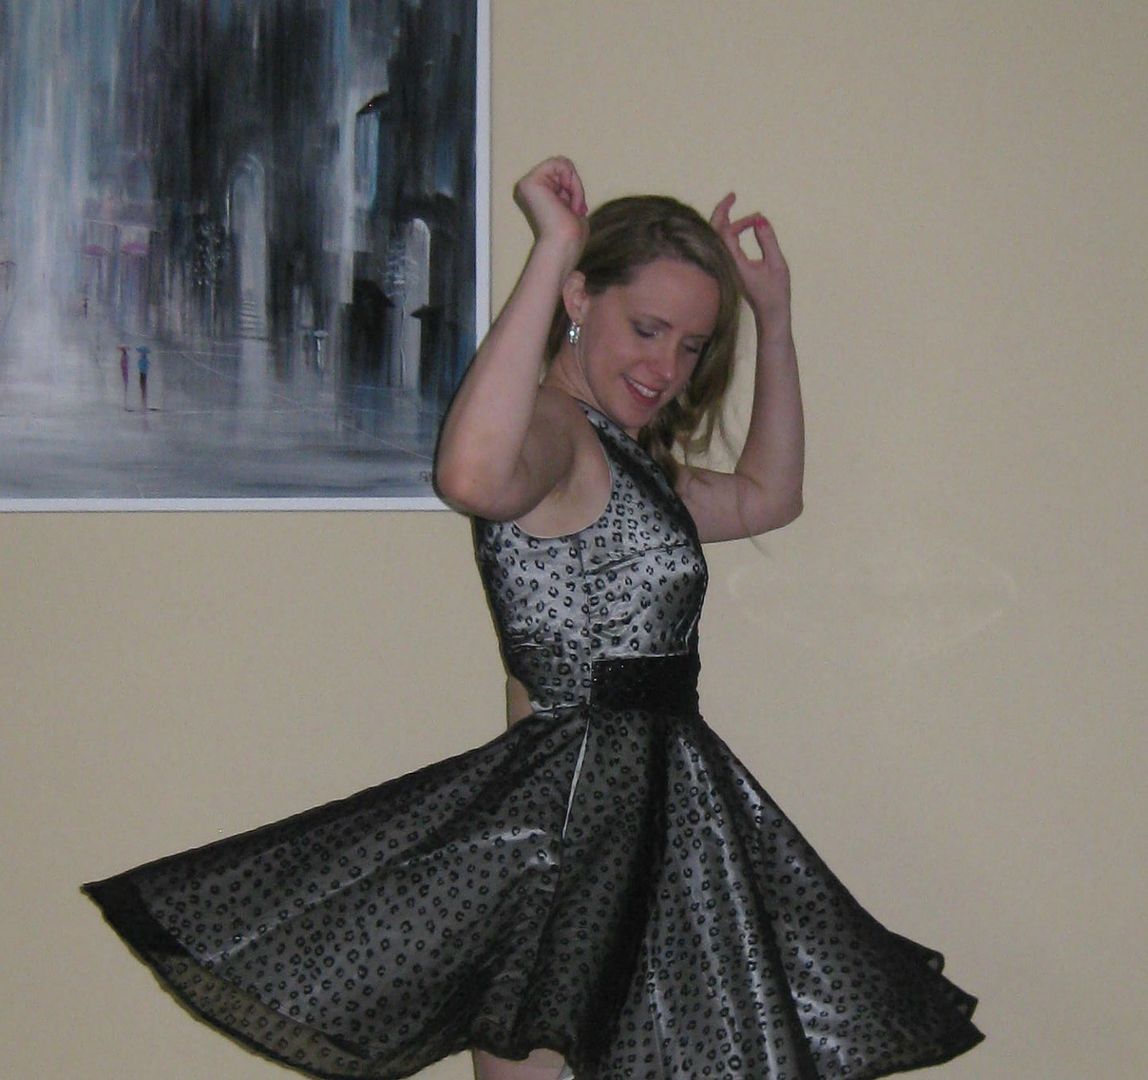
The dress had awesome twirling capability. Just have to watch the wind. I had a Marilyn Monroe incident 2X. 

I love this dress, great for events. I got a ton of compliments on it, wherever I went. From the hotel, to the casino, the wedding, the reception, and random people. Would recommend with the suggested length addition.

Cheers,
Lauren

LinkWithin
Related Posts Plugin for WordPress, Blogger...