Pages

Wednesday, September 28, 2011

Sewing tips from my class

A little while back, I took a class at Hancock Fabrics that was demo-ing a pattern drafting course that could fit you perfectly (which was super expensive, not going to happen, I'd rather spend up to $3, like for Vogue, or less for others to have the pattern already drafted. But I did gain some useful sewing information that I will share!

1. If you are using a pattern that does not have a seam allowance you can get a guide for your rotary cutter (on my christmas list).
2. The smaller the rotary cutter you use the better you will be with cutting curves. You have more control.
3. If you have a 50% stretch fabric you need to remove 2 cm from your pattern in order for it to fit well.
4. Here is where you loose so much fabric at certain seams (unless you use a walking foot)
  • back side seams: 1/2 inch
  • back shoulders 1/8 inch
  • back pant legs 1/2
  • sleeve caps 1/4 inch
  • collars 1/4 inch
  • facing: 9 inches=1/8 inch, 18= 1/4 inche, 36= 1/2 inch, 72=1 inch
So If fabric never matched up to how you cut it, it is b/c of the feed dogs! A walking foot controls this b/c it feeds the material in evenly. Now the only thing is get over that loud sound.

5. A roller foot is great for slippery and problem material. Or even attaching lace to other fabric. Yes I so want one!

Happy sewing everyone! Now I will never loose my notes! :)

xoxoxoxo,
Lauren

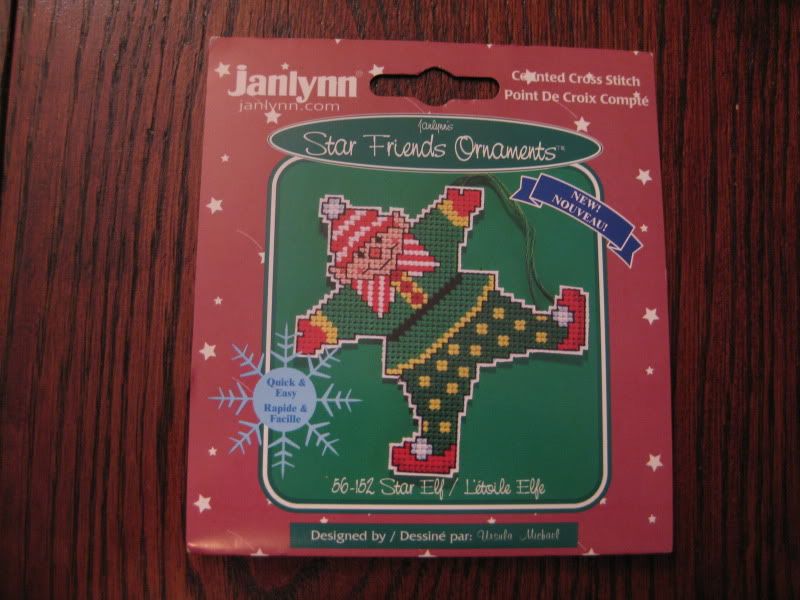
Drum crosstitch

So another cross- stitch ornament done! I have been slowly working on this while I have a little break when I work the weekends. Sometimes my brain doesn't work and it is nice to take a break and do some cross stitching. I have been cross stitching since a kid, and I think this is what makes me fast when I hand sew bling onto garments.


I am just happy another craft done. That is one less thing in my craft stash, which is equivalent to my fabric stash. And I am determined to not be a hoarder when I am older. :) I have no idea who I am going to give it to but someone will get it as a gift.

I have picked out a snowman and will slowly plug away at it while I am here during the weekends. :)

Guess who hit 100!


So when 2011 started and I gave up buying clothes for an entire year to either sew from my stash or refashion. I thought I would set the sewing number to 100 things. Regardless of the size if I used a piece of fabric, I got a fabric point. And so started my journey.

My biggest goal was to be able to get all of my fabric stowed away somewhere. Under the bed, in the closet, etc. Currently, yes I do have fabric stored under my bed, in my closet in a series of suitcases, but I still have a lump of fabric outside of the areas in my 2nd room. The lump has decreased in size but it is still there.

However, I did make 100!!!!! Thank you baby showers for allowing me to use my fabric to make gifts! I also gave some away (which amounts to 1 fabric point a piece).

Here is the run down... I started at 76 points... Not all have been posted on my blog but they are slowly making their way...

+ 6 to Sonja for giving all the "red" fabric I had, whether it was with a pattern or what.... It was used to make pillow for a school teacher in her classroom. What can I say you know I am generous ;)
+6 to my mom!! Yes my mother raided my fabric stash when she and my father came to visit in August. We went through to find all the off white and cream fabric so she could make curtains and pillows for the newly redone house :)
+1 Pink ruffled tank. I used some of my ribbed pink knit I had in my stash
+1 Maxi dress. The easiest maxi dress ever! Super comfy too!
+2 Peach lace top
+1 leopard bellydance skirt. This one is currently in the making but one night I got gutsy put in an invisible zipper on this skirt I had been waiting forever to do b/c I was a chicken. Now it needs some bling!
+1 the matching covered bra
+1 rose dress and easy dress to make!
+1 the peter pan collar on my blue polo refashion
+1 my renn faire robe/dance coverup! I almost want to give myself more points for this since IT IS HUGE!!!!
+1 the navy blue swag dress! the butterick pattern I will probably not sew any time soon!
+1 baby duck bath towel i so want to make one for myself
+1 itty bitty dress- I want to make like 30 of these just because they are so cute! I will keep this pattern b/c I will use leftover fabric to make some more later! :)
+1 garden bloom bib another design I will keep playing around with.
+1 Pink gingerbread bib
+1 Flower yo-yo bib>/a>
+1
Apple bib
+1 Pumpkin bag
+1 Lily's pillowcase dress

Grand total.... 106!!!! So I passed my 100 points mark! How great is this!! Celebrate!!! Happy dance!!! Jazz hands!!! Wahoo!!!

I am so surprised and proud of myself. There are 3 months left in this year (3 months!!!!) and I think it is completely attainable to hit 150....
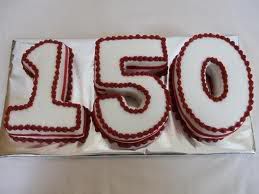


So here's to attaining my goals and here is to hitting 150!

I hope everyone else can reach their goals by the end of 2011!!

XOXOXOXO,
Lauren

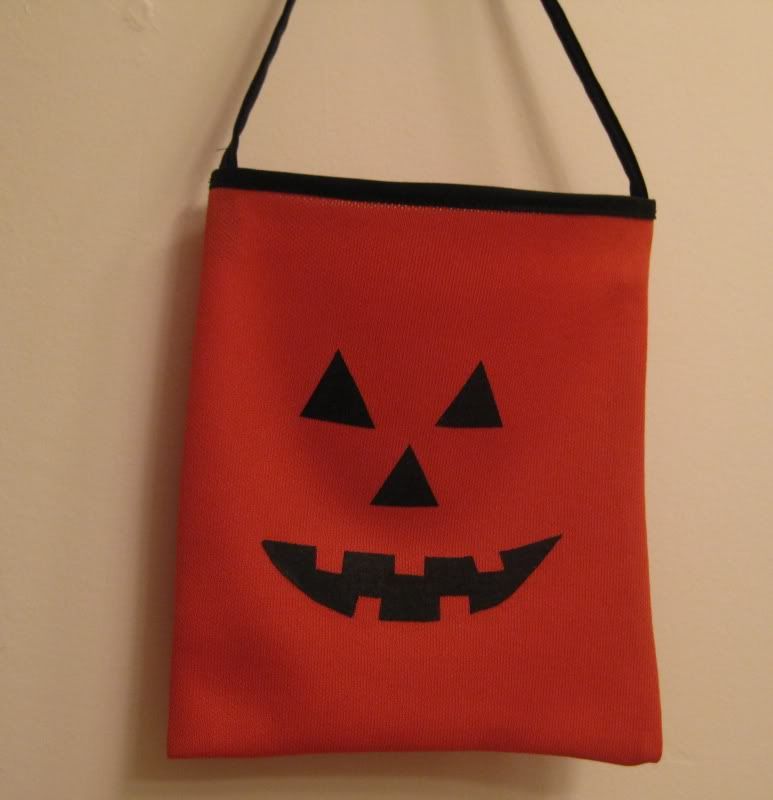
Pumpkin Gift Bag- Iron craft challenge

This week's iron craft challenge was to .... hmm. Again I am in the middle of finishing up some refashions I started and some sewing projects before I begin to start the Halloween costumes. I am sewing both mine and Calvin's costumes. I am not going to elaborate on what Calvin is going to be (b/c it is surprise and it is awesome!). My costume is somewhat related to his (sort of) and is one of Simplicity's new pattern for this Halloween.

What I am trying to say is I don't need to be starting huge projects! Then I saw a piece of Orange scrap polyester in my stash (from previous owner) and ding I knew what I wanted to do. Apparently everyone and their mother in blog land here have started to create all of their halloween decorations. I am apparenlty one of the slackers. So here is my contribution to the iron craft challenge this week- a halloween jack o'lantern mini gift bag.

Not to worry this project was super easy. First I started with a piece of orange scrap fabric, already nicely cut into a rectangle. Wahoo. I sewed up the bottom and side.


Next I added black bias tape, it was leftover from a previous project so I was happy to use it up! Attach to the top of the bag.


Make a handle for the bag, again I was using the leftover bias tape, I just sewed it to itself!

Next add face. I used scraps of black fabric and turned it into a fusible applique with that iron on stuff.... I cut out eyes, nose, and a mouth.


I just drew it out by hand. Yeah I am so not an artist!


Iron eyes, nose, and mouth to the bag.

Done. Isn't he cute?


See easy peasy right? I have several other pieces of orange fabric that I will probably never use so I may make more. Too bad I don't have kids (or nieces or nephews) this would be a great gift for some kids!

Until the next iron craft challenge!....

XOXOXOXO,
Lauren

Tuesday, September 20, 2011

The heart bib that left me clueless

I am not a person who normally gets doubtful of what I want to do with a piece of clothing or accessory. I make up my mind pretty quickly and stick to it and usually I have decent judgement and a good eye. This one left me confused.

So I started out with a pale pink bib. Alicia said she loves pink and brown. I wanted to give her something she would really like. I added a brown heart with fusible webbing stuff. But then I got stuck. I mean I got stuck. I thought I would like it more but I found something was missing.

I thought about adding a trim but none of the bias tape I could find matched the brown heart. I thought about adding multiple hearts in various sizes. Again, I did not care for it. I thought about adding words. But nothing worked. I was flat out stuck.

But I had sewn the bib really nicely I could not just throw it away. Again I told myself it is a bib, it doesn't always have to be a work of art- it just needs to prevent food from getting on the baby. But I was still frustrated as can be!

I went to my trim stash and saw what I had. I realized I did not hate adding a brighter pink rick-rack trim to the edge. So I added that. And since I didn't hate the bib I just left it like that. Something simple. But it kind of reminded me of a ginger bread cookie for some reason. I think it was probably becuase of the rick-rack.


Again its not fancy, it is not a work of art, it is just simple. Something to catch baby food/spit. :)

XOXOXO
Lauren

Baby swaddler/bath towel

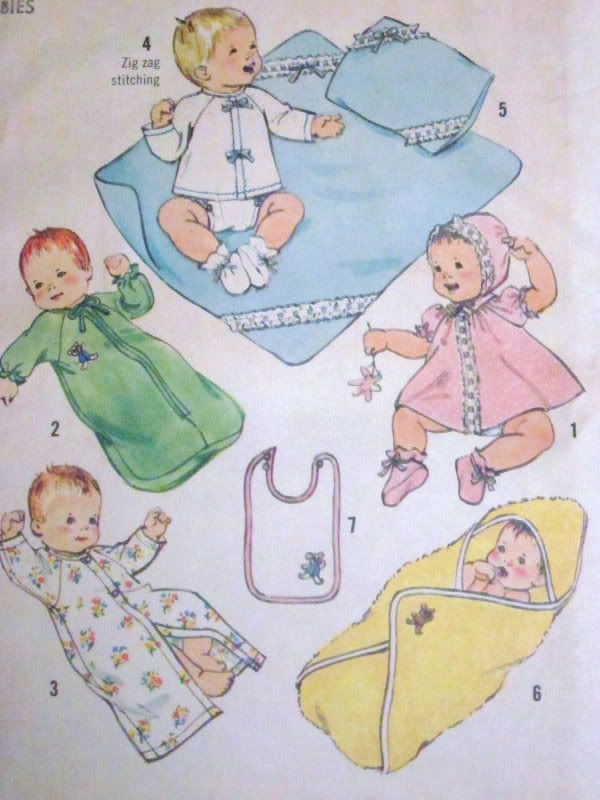
I made a baby swaddler/bath towel from some oh-so soft yellow jersey knit, again for Alicia and Dave's shower. Because seriously, I will never use yellow jersey material for anything I could ever wear!

I used a vintage Simplicity pattern, I was given by my co-worker Elaine.

Here is the end product. It was completely easy to make, the hardest part being the actual cutting of the material. The bias tape was easy and the duck iron on was from some craft store (I forget b/c I can spend hours in all craft and sewing stores).


I seriously want one for myself. But there is not enough fabric. I think I have just enough to make another one and just save it for a gift. It is just too cute and too soft!!!

XOXOXOXO,
Lauren

Itty Bitty Baby dress

I made this dress for the baby shower again and I have to say I absolutely love it!

I used some pretty flowered knit fabric and trimmed it with a light pink bias tape. I have yet to master piping yet so I ommitted it when I was sewing. :)
I got the pattern from the Made-by-Rae blog found here

Thank you for making this pattern. I want to make like a ton of them b/c I think they are so precious. I have saved this pattern and will make it for when I have a little girl. And it was even easy to sew! Double plus!

XOXOXO,
Lauren

Yo-yo flower bib

Another bib I made for Alicia and Dave's Baby shower was this flower bib from Simplicity 2273.


I chose a pink/orange flower material I had with a baby pink for the middle of the flower. Again I followed the pattern, made the yo-yo with the pink- a very large yo-yo. Here's a funny I have the clover yo-yo makers where you pop the material in and sew. You follow the holes, it is easy peasy. This one I had to figure out how to make the yo-yo the good-old fashion way. I had no idea! LOL


This time with the leaf I made I tried to draw the lines with some stitching to make it look like a leaf! I like how everything turned out... super cute girly bib. :)

XOXOXOXO,
Lauren

A is for apple bib

Now that the baby shower for Alicia and Dave has past I can post some of the items I made! This is now the 4th baby shower of this year I have sewn for!!! Crazy! But actually I have come to love sewing baby and children gifts. The small-ness of items just puts a soft spot in my heart (sssshhhh don't tell anyone!).

With every passing baby shower I try to push the envelope with my creativity and sewing skills. I also try to not give the same gift to everyone. I try to make it something special and personalized for each couple. :) This bib was something from a pattern.


There were a couple of choices. Which is like sewing crack b/c of course I want to make them all but I chose 2. First one was the apple bib. :) I thought it was precious!


I chose a darker red apple, a light cream for the yo-yo which makes the "shine" of the apple, and cream bias tape for the top. I had tried black bias tape and I did not like it so I ripped it out!

Hardest thing of this pattern was sewing the bias tape on that deep curve. I have sewn a lot of bias tapes now and I struggled with this one. I can only get better right?? I also have to remind myself that it is a bib, the neck is hidden and the rest of the bib gets baby food. LOL!

I would definitely make this bib again. I love the apple, I would love to play around with patterns and color with fabrics. I would love to make all of them and have a whole garden of fruits and vegetables!! :)

xoxoxoxo,
Lauren

The Navy Blue Swag dress

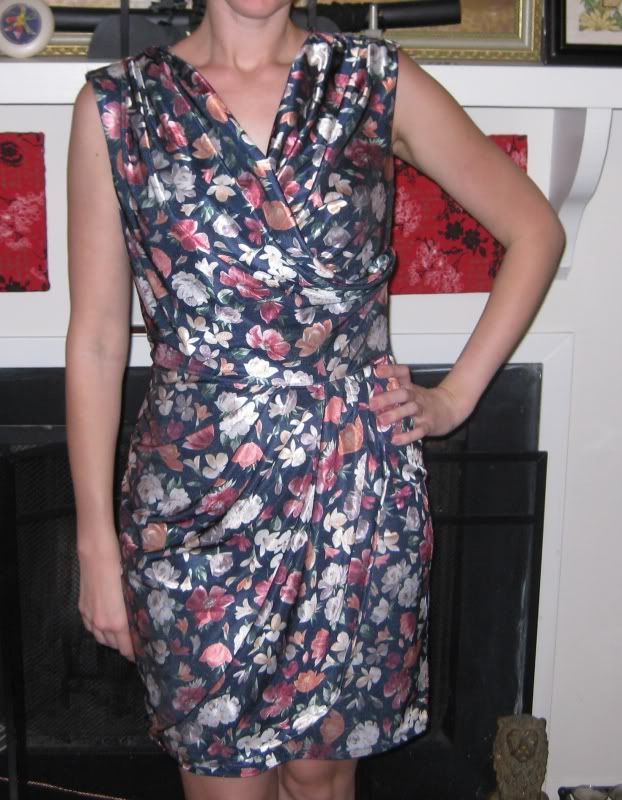
Not going to lie when I say making this was slightly painful. This was my first time sewing a butterick pattern and I feel that at times it was hard to discern certain steps. Additionally, different terminology was used then what I was used to in previous patterns I have sewn. I am not saying I am awesome at following patterns, which I am not, but I have sewn with simplicity and McCalls patterns and had little problems following along. This one I just got confused. And it is labeled as easy! EASY!

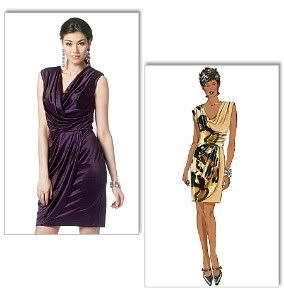
First of all, I used a new Butterick pattern for a cute dress with draping on the front both top and bottom. I had this stretchy navy blue and wild flowers material that I was inspired in my stash for a long time. Then I saw this pattern and I knew exactly the material I wanted to use!


I don't have any pictures during this sewing escapade. Mostly b/c I was really confused and just wanted to make it through the pattern! I also cut the lining of the skirt wrong (not parallel to the selvage) and had to toss the lining for the skirt. the top has lining. But the fabric is not see through so it is not a big deal. Let's see it took an entire day just to do the bodice. There was lots of tucks and odd sewing order, which is why I probably had problems. Also stretchy material, I am probably insane to sew this pattern. I think it worked out well, I cut for the size beneath where I should be.. my chest is 35 so I am technically between sizes so I cut a 12 instead of a 14 (which is 36 inches). This dress was also not form fitting either plus the stretch meant I had some leeway room.. Wound up being not much b/c I had to hem some off b/c with the stretch the back part with the zipper was slightly askew. So I just made it with this dress. Here is the end product.


Yes the material is wild. But I think it works well with the pattern. The dress actually looks good in the end. It fits just perfect. I don't have to alter it to fit. And I sewed an invisible zipper with stretchy material. That is the part I am most proud of the back looks great! My secret for the zipper was fusible interfacing. My dress could almmost pass for something that was purchased in the store. Almost... I am not a fan of the bottom hem.

Will I make this dress again? Probably not anytime soon since I have so many other patterns. Would I recommend it to a friend. Only if they have experience sewing with patterns and understand the terms. I had to look up understitching on youtube to understand what to do with the pattern. Thank you youtube! But this is not for the newbies even if it says easy!!! I really hate to know what their hard or advanced is...

More posts are a-coming! :)

XOXOXOXO,
Lauren

Burgundy Sweater Dress

Wow after Tropical Storm Lee hit us, we went from sutffy, muggy high 90s to highs in the 80s and in the 50s for the lows. It has been fabulous! This weather may be a tease but I love the change of the seasons.

Found this dress at Goodwill, again for $0.99. It was an XL but the sweater itself ws in really good shape. No holes or stains in the knit. Just big and long. And had a turtle neck.


First thing was i wanted the turtleneck to be gone. I can only handle so much turtlenecks. And I don't understand why every winter shirt needs to have a turtleneck either.

I found the seam in the turtle neck and cut down it to the collar.

Next before I fitted it, I decided to take up the length. I came up with I think 11 inches to which I cut off the dress. I will save that for a later occassion. :) Finish with a hem :)

Now to fit. This sweater is an XL I may be at most a medium. So there is zero stretch in this dress on me. It really needs to be taken in. Plus it has though pre-made hips. I am a hippy girl but not that hippy!

I used my dress form for the start of it.Pinned it and sewed. Tried it on. The armholes were sitting funny and the sleeves were still too big. So I refit the dress on myself. Sew down. I had to cut away all of the fabric in the armholes and the general area to get it to ease and fit right.


Lastly, I needed to take some serious inches off the dress.

Here's me cutting it with weights added so the dress won't stretch so much!

Then end product, which BTW I am wore today at work!


I am still undecided as to if I want to take the skirt in or not. The dress fits me better now. I like the length. The turtleneck doesn't choke me anymore. I think I may see what happens in the wash


All in all easy sweater dress for the fall. Comfy, not bad to look at, etc.

XOXOXOXO,
Lauren

Monday, September 19, 2011

More Posts on their way!

Yes I have been sort of absent from the blogging world. Been a busy gal but have no fear more blogs are on their way! First I had another baby shower for my friend Alicia! It was another baby girl so I got to have fun making baby girl gifts. For this year I am 2 boy to 2 girl baby showers. And I had no idea how much I would love making baby gifts. I did 4 more bibs, a dress, and a bath towel/hoddie/swaddler from a vintage pattern.

I did a bunch of refashions, mostly needing the end picture which I am taking tonight. A dress from the new butterick fall catalog (which took me a long time!!). I have managed to keep up with iron craft and those are the only posts I have kept up with (barely).

It has been busy in the lab here, my old lab submitted a paper where I am first author, we got accepted last week. I am still trying to find a picture to enter to make the cover of journal. So far I am clueless on what I want to submit. The current lab the paper we submitted needs a section added but we are making progress. And I have been a in physical therapy 3x a week. My knee is getting better and I am weaning myself off the knee brace, I am still struggling. But more PT and hopefully no surgery!

I counted 19 blogs i need to write! So stay tuned. I am determined to turn this to do list into a TO DONE list!!

Xoxoxo,
Lauren

Wednesday, September 14, 2011

elft cross stitch- Iron craft challenge

This week's iron craft challenge was "shrink to fit". Everything is always cuter when it is smaller. :) Now I had to think of what could I do for this challenge? My goal in joining iron craft this year (which I have enjoyed greatly) was to get my butt moving in making a dent in my craft stash. I swear I am not a hoarder but I do have a lot of everything.... a fabric stash that takes up a closet. A pattern hoarde that is over past the shelf I gave it on my desk.... boxes of beads and jewelry findings. A big box (plus a shopping bag) of other crafts- cross stitch, needle point, felt kits. By being a member of Iron craft I have got myself a crafting and a sewing but I still wanted to stay on track!

So thinking about it, I had a mini-cross stitch kit in my pile. Aha! That is what I shall do! Make a christmas ornament b/c it is not too early to start making things for the holidays! Because while I choose this small kit....


I should have been working on my large christmas stocking...the one I only have 1 color started. Sigh...

But I chose my little elf. He was so cute....

Here is a timeline of how long it took. Really it was very easy for a counted cross stitch, I flew through it!

After Day 1- got a good chunk of the lower body done

After Day 2- next we have upper body

After Day 3- all stitches done. Just need to do backstitches but I opted to watch college football.

After Day 4- All Complete Now just need to cut out. Will wait until tomorrow b/c sleepy + exacto knife = hospital trip

Day 5- all done! Iron Craft Complete with time to spare! Yeah! :)

Thanks for reading. Now on to the next challenge. And here is to me using my stash!

XOXOXOXO,
Lauren

Tuesday, September 6, 2011

Garden Bloom Bib- Iron Craft 36

This week the Iron Craft Challenge was Creative Activities. This was based on every year the State Fair in Minnesota has a Creative Activities Competition. OMG I swear everything is included, the categories will blow you away. Basically sewing, paitning, crochet, seed art, scarecrows, baking, quilting, creative collections, etc, etc, etc. Wow I really had my choice of what I wanted to do. I of course chose a sewing category b/c next weekend is a friend's baby shower and I really needed to work on making some gifts. I spent this wet Tropical Storm Lee weekend sewing for the baby shower (and also for myself! posts will begin to trickle in as the week goes on...).

First of all, let me state I am done early. It is tuesday night and I have everything ready. It is a miracle. But I just finished some other bibs and I am winding down for the night.

I call this my garden bloom bib. First I started out with some green and yellow striped fabric I used to make my bib base. Then I tried out one of my embroidery stitches on my sewing machine. I made 3 varying height "stems" with that fancy stitch. Additionally, I added tear away stabilizer to the back of the bib so the stitches would not look weird. I have learned this!


Next I made 3 fabric yo-yo's using my flower yo-yo maker from Clover. I love these yo-yo makers. No ironing is involved and the holes where I need to sew are marked. It is seriously brainless. Makes me happy after a long day in the lab. I used 3 different colors b/c I couldn't make up my mind. :) I secured them to the bib after I had added the backing and turned it through. I made sure to super anchor it! Here is a close up of one of the flowers. I still need some work to perfecting my technique. I'd say the flowers are the hardest (I've also tried circles and hearts).


The bib as a whole...


I really like the design of this with the yo-yos. I may play around with this theme more. Maybe make more of a bouquet of flowers? Oooooh. HMMM. Now I want more yo-yo makers!!! I just saw they have butterflies (hello cute kid gifts!) and shamrocks (hello cute st patty's day costume!). I am going to make a list for my bday it is at the end of November. Along with my ruffler foot.

Ok I am blabbing. Here is to finishing early! yes!!!

XOXOXO,
Lauren

Friday, September 2, 2011

Weekend Goals!

So, it is Labor Day weekend. And we have a huge tropical storm brewing in the Gulf of Mexico (and giving me horrible pressure headaches). The forecast, rain, rain, and more rain. The only positive is the temperature is forecasted to be in the 80s, a nice change from the blistering 90+++ temperatures. So no beach for me! The positive-football season is back! My boyfriend is estatic! For me, I need to recoup the knee some from its grueling pt sessions and still rest it. Which means sewing for me! Yeah!!!

Here are some goals for this weekend....
1. Sew 3 items from a pattern! I have 2 dresses which in the evening I have been cutting. I find cutting the fabric actually be the most time consuming part of making a garment from a pattern.
2. Sew at least 3 things for Alicia's baby shower coming up on the 17th. I am still currently brainstorming several ideas.
3. Refashion 3 items. At least 1-2 need to be for the Seasonal Transitions Challenge of the refashion co-op.

Yes everything is in 3s. I just felt like it! If I go over 3 then hooray!
The goal is to get some sewing done here this weekend. It is a good weekend since it is a 3 day weekend and we have a ton of rain. I hope to also find some time and go to Hancock and Joann fabrics to see their pattern sale. :)

Also this may be the weekend I hit 100 fabric points! Can't wait!

Have a great weekend everyone!

Lauren

Robe/Dance Coverup

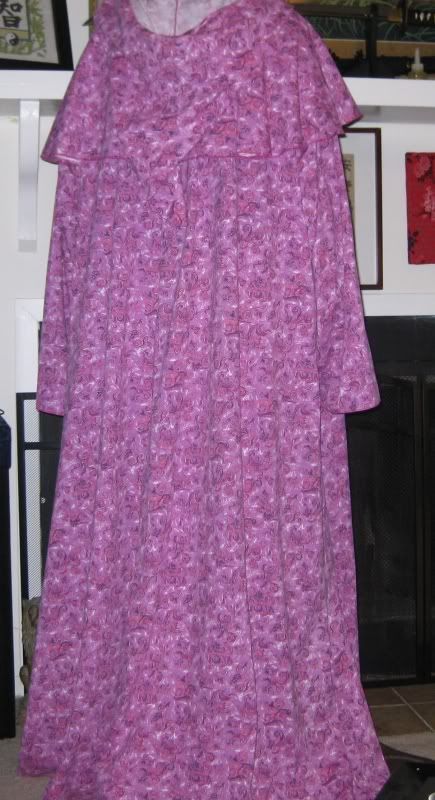
I have always wanted a robe to coverup at dance events but some of these robes are quite pricey. In my fabric stash, I had this pink swirly fabric that was a knit-like material that I had alot of (like 5 pounds!!!). I decided to use this since I need a lot of fabric to make a robe.

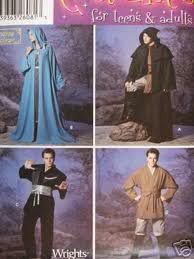
I chose Simplicity's unisex hooded robe pattern (with capelet). FYI this robe pattern is NOT graded. It is a one size fits all and the only sizing you have is for a belt. I wished this could have been a bit smaller and not so huge.

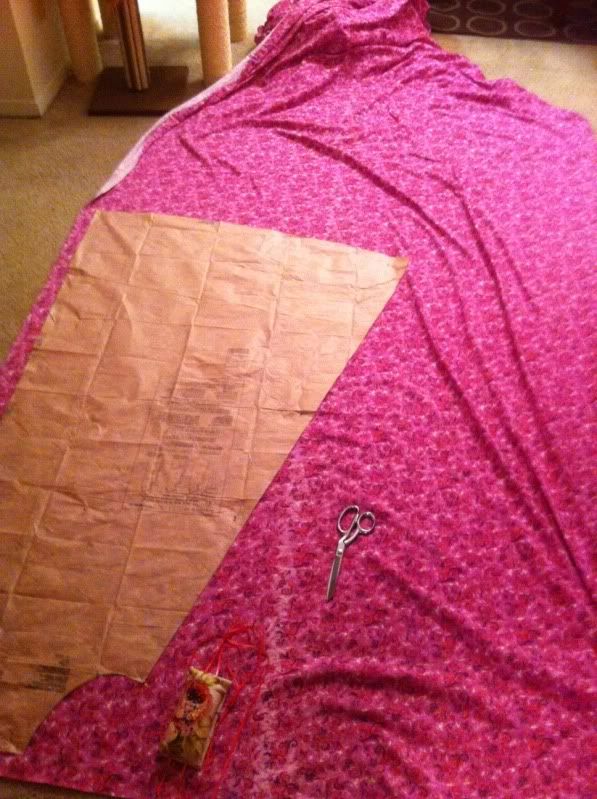
Here is me cutting the fabric. This took me quite a while and I was fitting cats who wanted to sit and play on the fabric. Not to mention a bum knee I can't bend deeply or put a lot of weight on. Holy cow. I just spent an entire night cutting the pieces. I waited until another day to actually sew it together!

This is not a hard pattern, no fancy things required. It is just somewhat cumbersome with the amount of fabric I had to deal with. I used my walking foot for the first time to help prevent puckers with the knit.

It took me some time to figure out how to get it attached (had to bust out the manual). It also took some time to get used to the sound it makes! Eek! My heart pounded.

For all of the seams I serged, but for some of the place where there was going to need some assistance. I learned about this stuff at my advanced serging class. It is also good for when you are serging knits as it won't pull (and you won't have to mess with the differential feed! yay!)

I serged in the seams of the yoke attached to the bottom layer. You could also use this for when you have the seam on the shoulder. I serged with a rolled hem on the bottom of the cape, the sleeve edges, and the bottom of the robe. I used a fun and bright pink! :) Here is the end product! It is huge!


I would like to add a purple trim to the front of the robe and the sleeves but haven't found anything I like. I also need to find some frog closures too. Again haven't found anything yet but there is a big labor day sale at joanne and michael's so I'm hopeful I can get something on a discount! :)

XOXOXOXO,
Lauren

Thursday, September 1, 2011

Book IC 35

This week the iron craft challenge was create something book related. I thought hard about this one. I just could not get myself to tear any of the books I had on hand, nor did I have any time to go and look for another book to tear up. Then I stumbled on a christmas fabric book I never finished. So I finished it! :)
I have the last picture of me sewing the books together. It was really thick so I chose a heavy duty needle, a long stitch, and lowered the tension- this helped it a lot. I opted for my clear open toe b/c it was about the same width as between the 2 sides, I could easily line it up, put my needle in the center position. Additionally I had to help guide the book through! Hmm maybe I chose the wrong loft for batting. Food for thought!

The end product! Now I have another christmas gift ready, just don't know who I am going to give it to but it is ready! :) It is a cute little story though!


Finally got this in, no on to the next iron craft challenge! :)

XOXOXO,
Lauren