Well hi welcome to my little blog. Just my little corner of craftiness, sewing, and refashioning. I am also a newly gluten free eater so you have a little bit of recipes mixed in here.
Showing posts with label fringe. Show all posts

Wednesday, August 20, 2014

Purple midi dress to fringe fun, #59

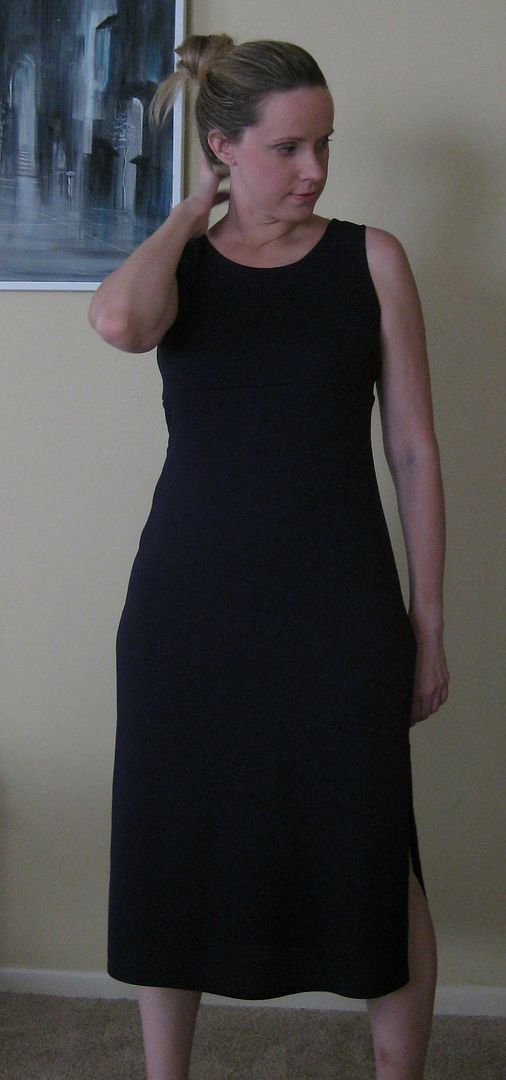
I had this purple dress forever, my inital plan was to use it for part of a costume,  But that never happened. so  now what?
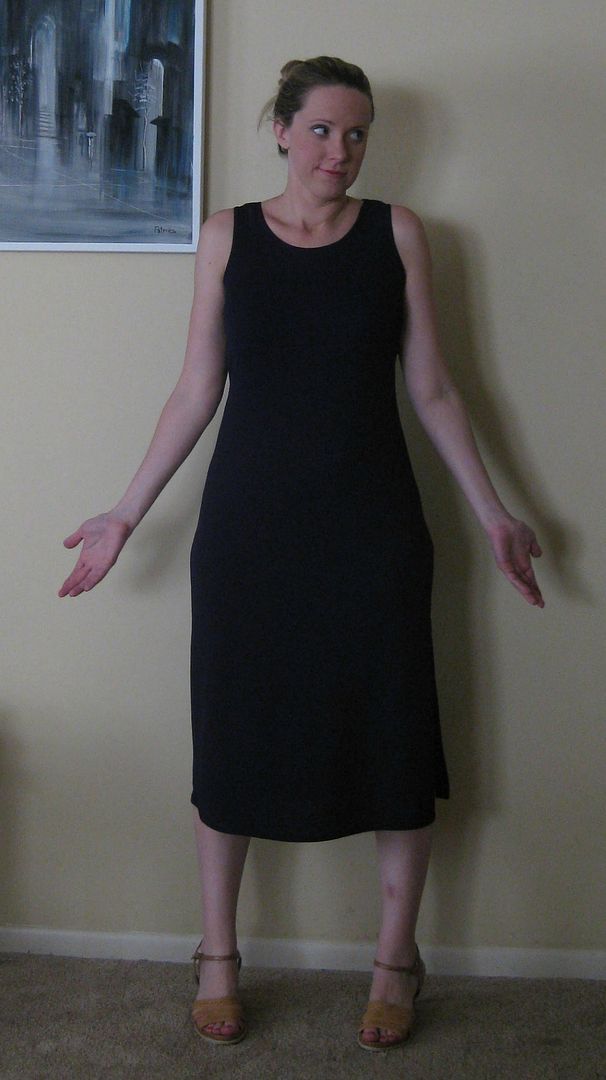
It is awkward short with a bad side slit. 

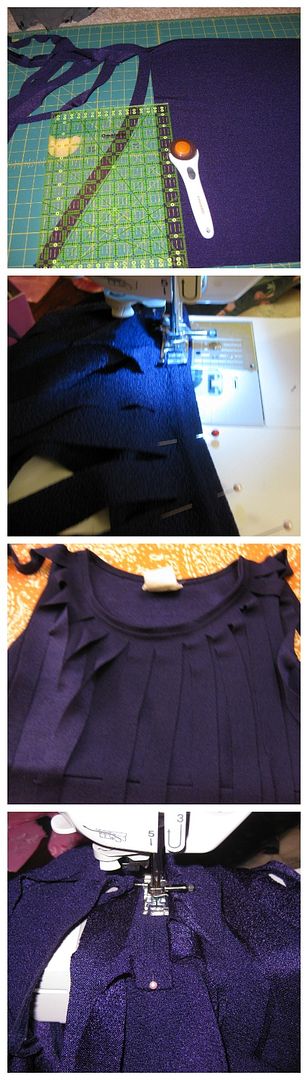
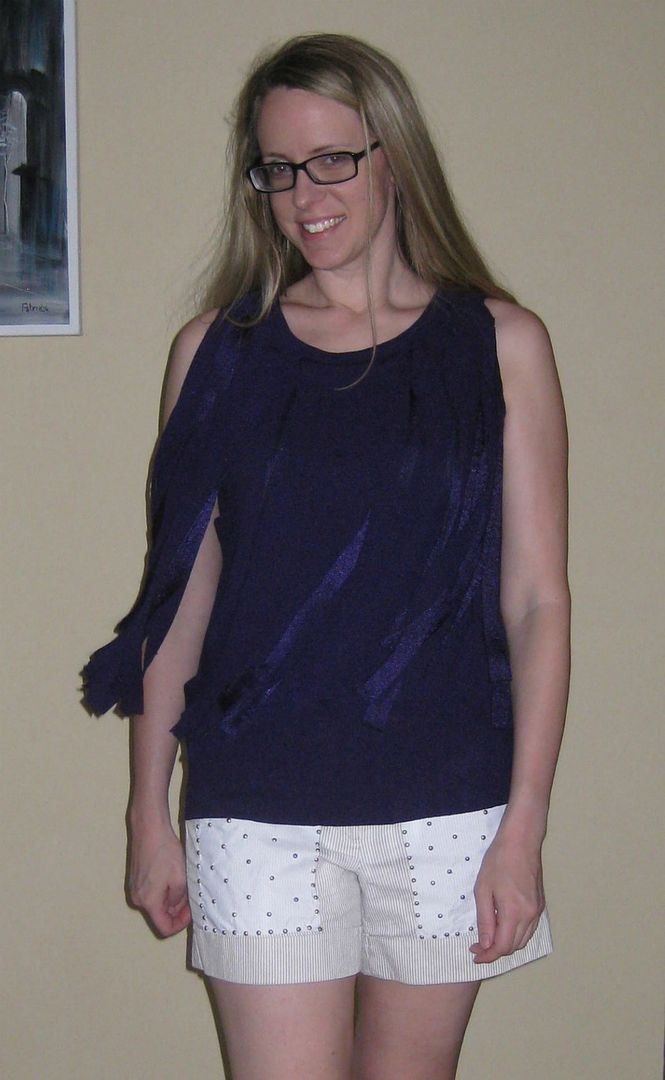
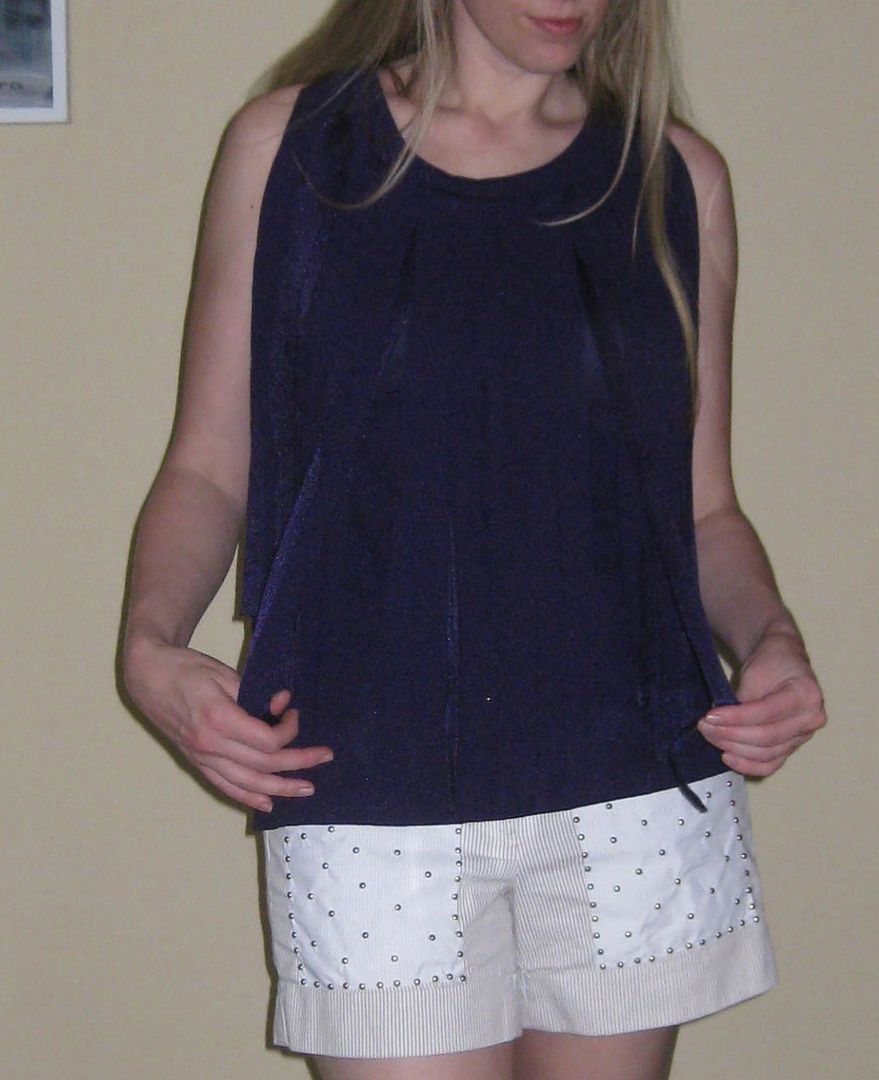
First, I cut off the bottom and decided to make a top out of it. It is not cute enough to be a dress. I could work with a top. The next thing I thought about was, I wanted something less boring. Fringe! Oh! That would be cool. I used the bottom part of the dress and cut strips up to the hem (hey instant seam and stability) every 1 inch. Easy enough.

Then I followed the neckline from the shoulder seam to the opposite shoulder seam. Sew down. Cut. Still had plenty of excess so I kept going. I had 3 rows of fringe.
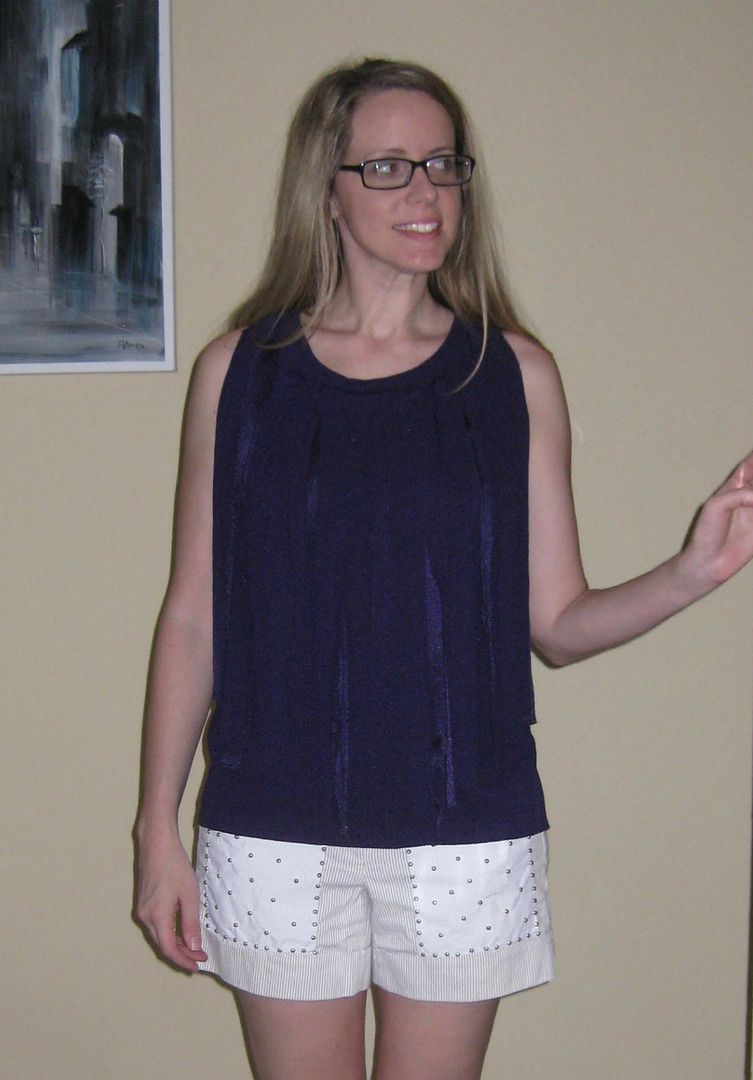
Yeah it got kind of crazy with sewing at the end. Strips of fabric everywhere!!! Here it is done!

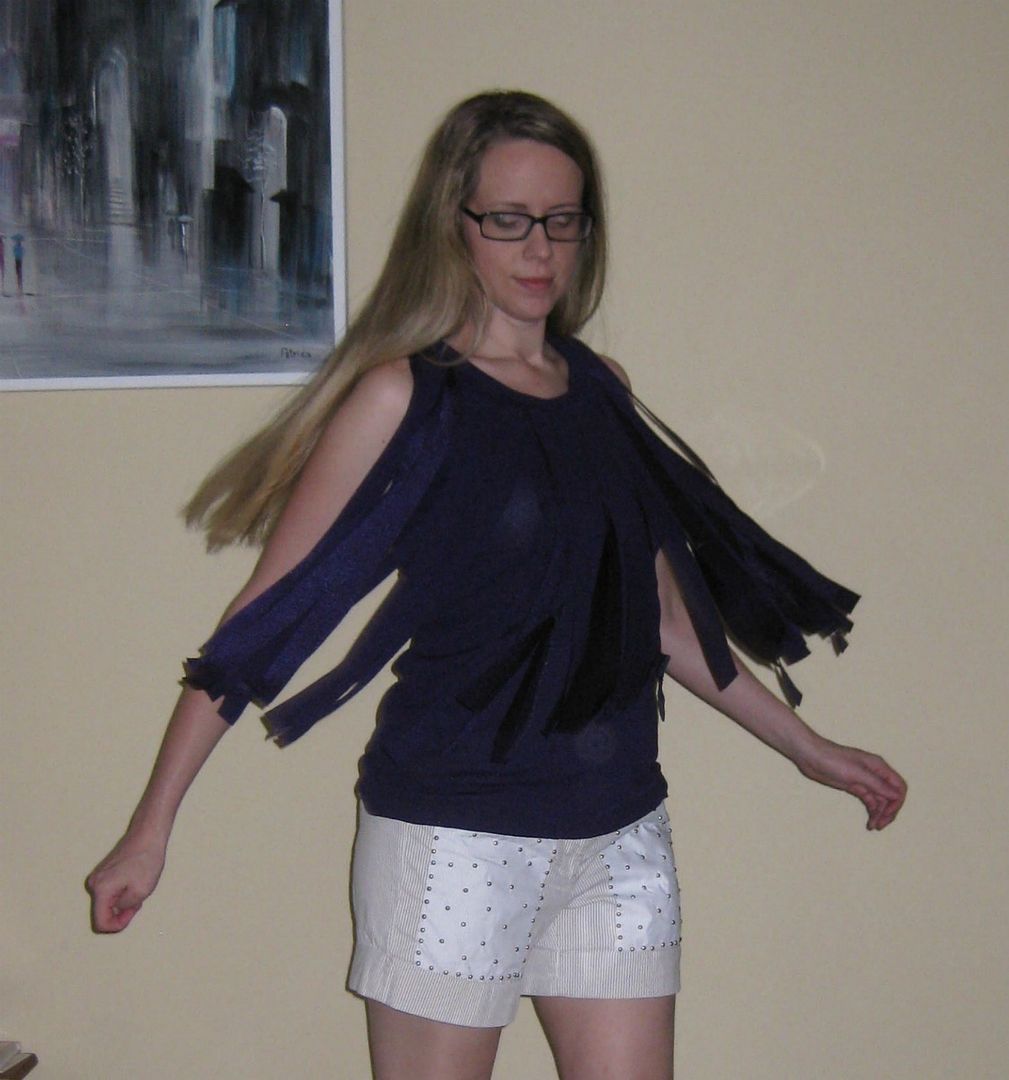
This shirt is soo much fun. Just want to twirl in it!

Hey recognize those shorts? :)


So happy with the final outcome, it is so much fun! 

Here is the recap!
I will wear this until it gets cooler. It is just so much fun! Yay! I am so happy to be over halfway done with my 99 challenge too! Whew! Tired!

Cheers,
Lauren

Monday, June 24, 2013

Fringe tassel earrings

Ok I had these old tassels that may have came from a pillow. If you have cats, dogs, or even children-tassels don't mix for home decor. So I had cut them off and saved them for later. I had no idea what I wanted to do with them but then it hit me- What if I turned them into earrings?? Why not?


First I cut off the strands as best as I could...

Next I added a drop of glue into the center. I used GS Hypo cement

Insert the earring into the middle, making sure it fits snugly. 

Done!!! 


These are fabulous. A little bit more of a winter feel so I will wait to wear them just yet. :) But a fabulous save!

xoxoxo,
Lauren

Tuesday, January 17, 2012

DIY bellydance beaded fringe

I am almost done with my Pink patchwork bellydance costume. The reason it has taken me so long is b/c I did not know how I wanted to fringe it. There was no place online that matched the color in my costume. I wanted light pink.

So my only option??? Make my own! Eek! and hence why this project sat on my shelf in a bag. For a year... until now. I was ready to tackle this project and finish it this year!

First I started off with some simple seed beads. Purchased from Michael's. Then I got some plain rope that someone would use for like a children's craft and that was going to be my base to support my fringe. There was no way I was beading each strand to the bottom of the belt! No way!

So I came up with this crazy getup that I could bead with my hands free and the rope would not twist. I used my fabric covered cardboard block and I pinned the rope to the blocks and began to sew.

After my first string!

So I knotted each string before I went to the next string. Basically, each string was double threaded, I went through the top of the rope, down 5 inches, added a bigger bead that corresponded to the beads already on the costume. Then I rewove the needle up through the seed beads back up to the rope. Knot again.


Then I kept going! Here is during the beading. I moved the rope with the beaded fringe as I went so it wouldn't hang and get too heavy. Then it was easier to keep my length correct. :)

Then I was done. Stay tuned for the next post on finishing the actual costume! :)

XOXOXOXO,
Lauren

LinkWithin

Related Posts Plugin for WordPress, Blogger...