Well since I have not been cleared yet for physical activity and may not get cleared anytime soon. I have decided to call Summer 2011 the "Summer of Sewing (and crafts)". Sewing and crafts have become a wonderful outlet for me since I am unable to dance, do yoga, pilates, run, etc, etc, etc. The creative outlet has been nice! I have a lot in store! :) I have some bellydance related posts, craft posts, sewing project, and of course refashions.
Here are finished projects needing a post:
1. Bracelet makeovers
2. Shisha mirror wreath
3. butterfly wreaths
4. How I fixed my bellydance bra from Egypt
5. My first foray in chain maille
6. Periwinkle skirt to troupe bellydance costumes
7. Capri Pants to skirt refashion
Here are some upcoming projects
1. Girls baby shower gifts: I have some super cute bibs and other projects I am working on for Liz's baby. I am so excited to make baby girl gifts!!!
2. Part 2 of the ruffle blouse
3. How I organized my craft room (LOL this may take awhile!)
4. T-shirt quilt. I just need to start working on fusing and sewing! I think I have everything ready, have to check the sashes. But I do have a walking foot. :)
5. Ebay bellydance costume upgrade
6. Vintage curtain circle skirt. OOOh and it's yellow!
7. Ruffle dress to shirt
8. Sewing project- deciding on a 1 shoulder flowered top or a 2 toned bohemian top or the free top from grosgrainfabulous. I can't make up my mind!
9. Refashioning more men's tops.
10. jewelry kit finish
11. Chain tank top
Of course other projects will pop up but those are my main focuses right now. Biggest thing is to finish Liz's baby shower gifts right now. HEE HEE I must contain myself!
Here's to the Summer of Sewing (and crafts!) :)
XOXOXO,
LaLaLauren

Friday, June 24, 2011
Tuesday, June 21, 2011
butterfly dress refashion!
Ok this will be a short post. I don't have many pictures, except the before and after pictures because this dress was a challenge. You would have thought with all that fabric, it would have been a breeze but it was not.
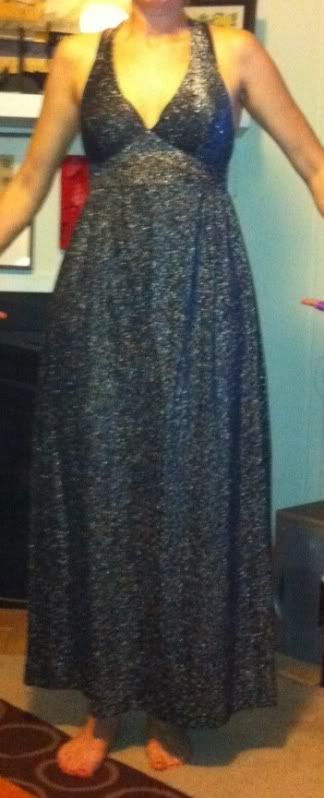
Here is the before!
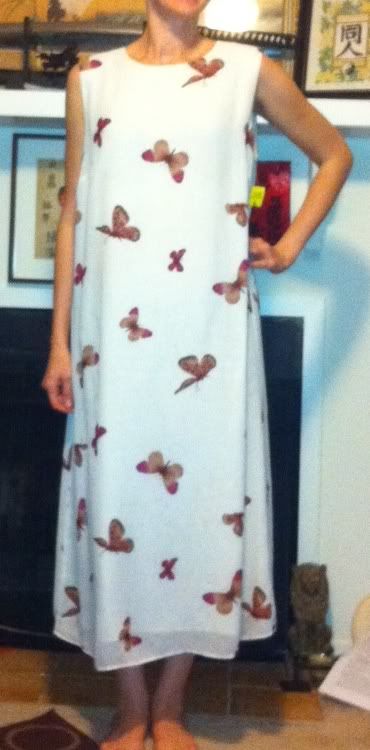 I fell for the fabric not for the shape of the dress. It is clearly a "mom dress" from many years ago. There was no back zipper in the dress so I had to insert one.
Let me just say invisible zippers yet again bring out the pirate in me b/c they make me go argh!!!
I used the pattern from McCall's 4440

I had to strategically place my pattern pieces in order to get the pattern to work. This fabric was very difficult to work with. I got quite frustrated with it on numerous occassions when I just had to walk away. Now on this pattern itself, here are my comments. There is only 1 bodice pattern for this and as you can see it can either be strapless or with straps. In my opinion, I did not like the actual bodice design. If I am going to make another strapless dress I will use another pattern b/c the top required 2 more darts in order to fit and look more like a strapless dress. The top part actually kind of hung over, peeling from my body on the top and I know i used the correct pattern size. The bottom part fit nicely, not tight nor big. But 2 darts on the top did the trick in addition to some fitting.
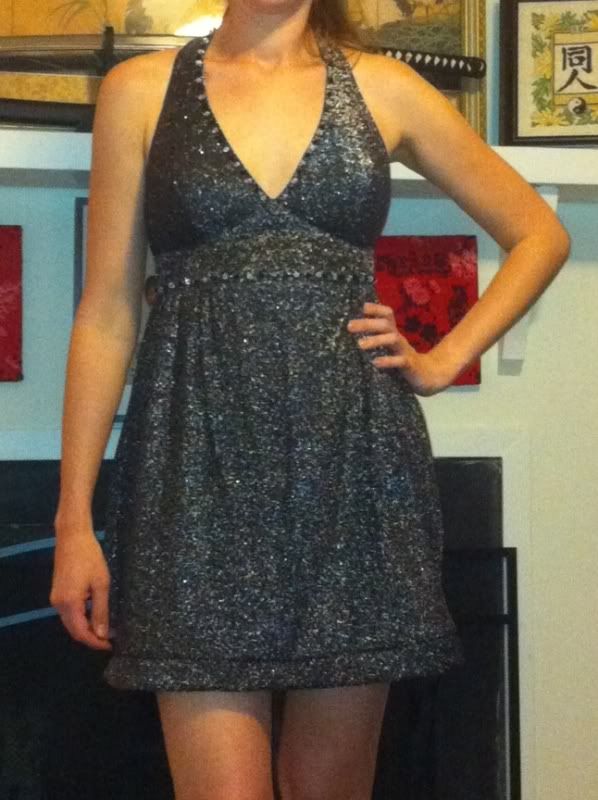
I changed the design a few times (like I wanted ruffles on the bottom but not enough fabric, and a short ruffle made it look like a nightie). But here is the end product! :)
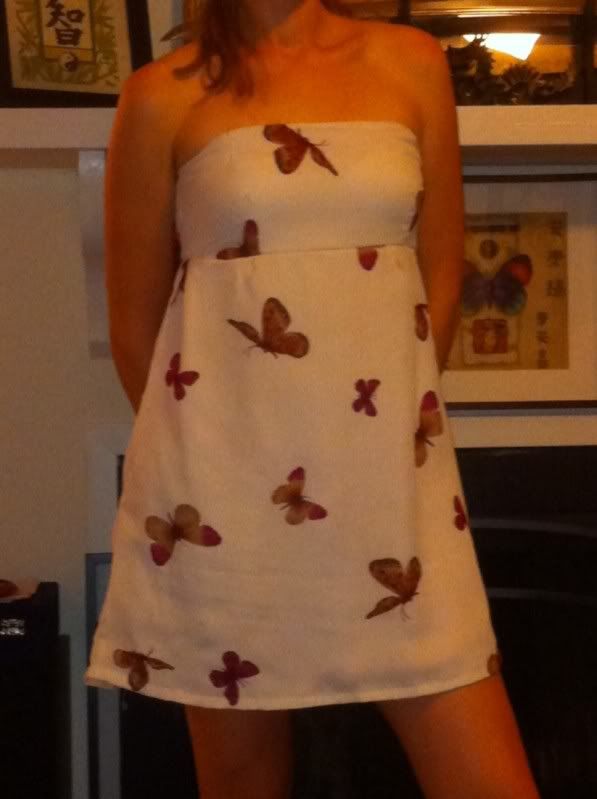 The dress looks super cute with my scrunchy brown leather boots. I am just glad this project is over! Hate that beautiful fabric. it was quite the learning curve for me!
Until next post (which I still have more!)
xoxoxo,
Lauren
Here is the before!
Let me just say invisible zippers yet again bring out the pirate in me b/c they make me go argh!!!
I used the pattern from McCall's 4440
I had to strategically place my pattern pieces in order to get the pattern to work. This fabric was very difficult to work with. I got quite frustrated with it on numerous occassions when I just had to walk away. Now on this pattern itself, here are my comments. There is only 1 bodice pattern for this and as you can see it can either be strapless or with straps. In my opinion, I did not like the actual bodice design. If I am going to make another strapless dress I will use another pattern b/c the top required 2 more darts in order to fit and look more like a strapless dress. The top part actually kind of hung over, peeling from my body on the top and I know i used the correct pattern size. The bottom part fit nicely, not tight nor big. But 2 darts on the top did the trick in addition to some fitting.
I changed the design a few times (like I wanted ruffles on the bottom but not enough fabric, and a short ruffle made it look like a nightie). But here is the end product! :)
Until next post (which I still have more!)
xoxoxo,
Lauren
Monday, June 20, 2011
Patriotic Refashion
Yes I am coming back from the dead. Well I am coming back from the ground with my back problems. But I am slowly rejoining the world but no physical activity yet. Luckily this doesn't pertain to sewing. :) And I can stand and sit longer. So now I am playing blog catch up! :)
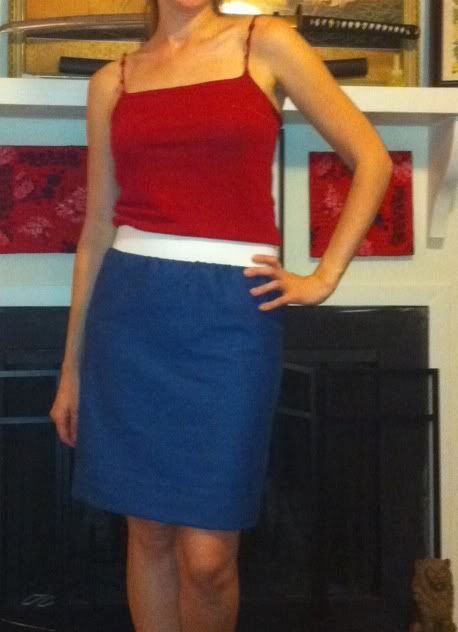
I started off with a tank top I had. It was a cute red sweater knit tank top, that came with a cardigan I got at goodwill one day. I liked the top but its a tad too short for me to wear at work. I kept it because I thought I could maybe figure out something to do.
This refashion project was not intended to be patriotic but somehow it became patriotic.
I started off with a tank top I had. It was a cute red sweater knit tank top, that came with a cardigan I got at goodwill one day. I liked the top but its a tad too short for me to wear at work. I kept it because I thought I could maybe figure out something to do.
One day online shopping, where I get ideas for my refashions when my brain hurts. I noticed a lot of dresses have these built in elastic waistbands. Then I had my aha moment... turn it into a dress!
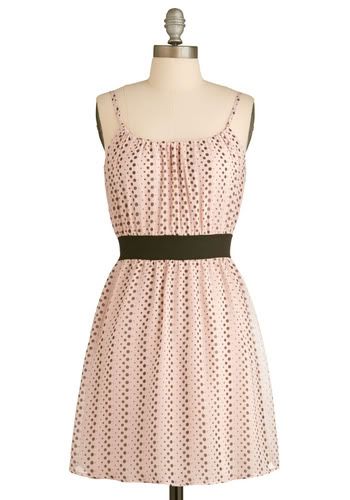
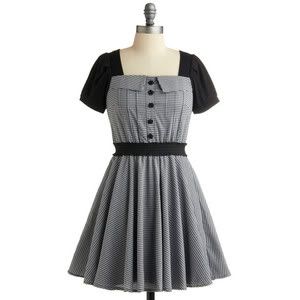
Both of these dresses I found online at modcloth. So cute yet so easy to make!
I search and searched my fabric stash but nothing really sang to me. Then one of the last piles I went thru had some light-medium color denim. I thought it would look nice paired with the red tank and a wide white elastic belt. So off I went.
Here is what I did...
First I got about a yard of wide elastic from Hancocks. They were out of black so I had to go for white, guessing it was fate. I got the widest they had, think around 2 inches. There was a 4 inch but that was too wide.
Next for the actual length, I took the elastic and laid it on top of the top, then I added 1/2 inch seam allowance on each side. But we won't sew it together yet.
Time to make the skirt! Now I did not measure anything out for the width, but for the length I went for 25 inches. Why don't know, just felt like a good number. The length went down to my knees and then i could hem it. I wanted to create a gathered effect for the skirt b/c if i didn't I would not fit over my rump!
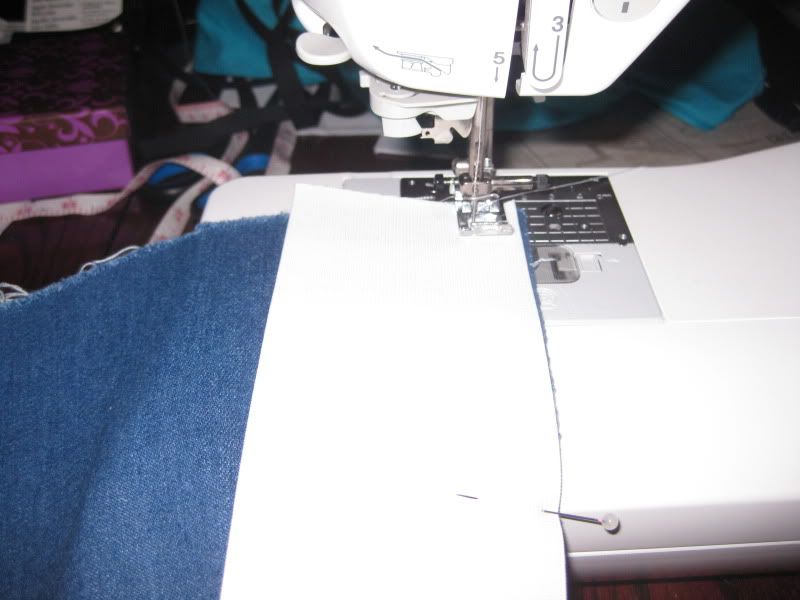
I took the denim and lined it up with the elastic (right sides together). Next I went to the sewing machine. I sewed the denim to the elastic, while i stretched elastic. Wow first time sewing denim and first time sewing and stretching elastic. This was a challenge! It was hard to get my mojo going stretching while sewing together. Definitely took some coordination!
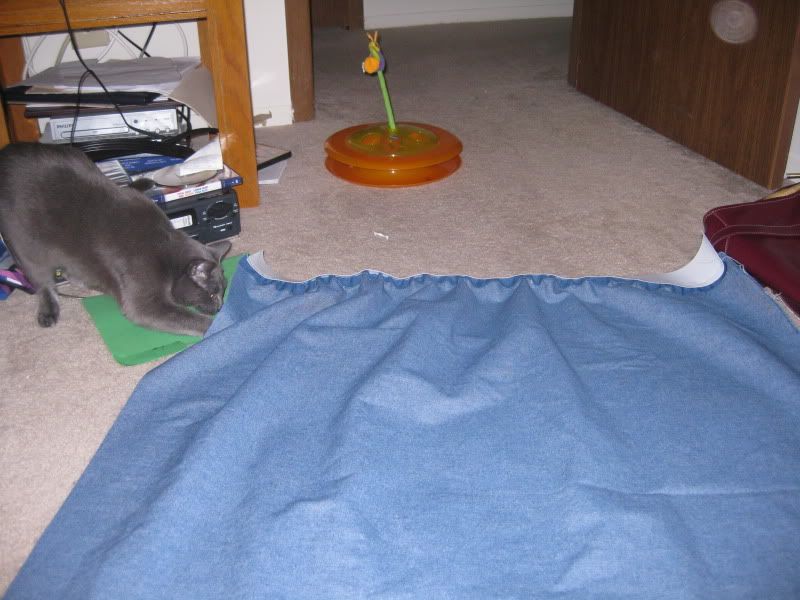
Natasha helping me out!
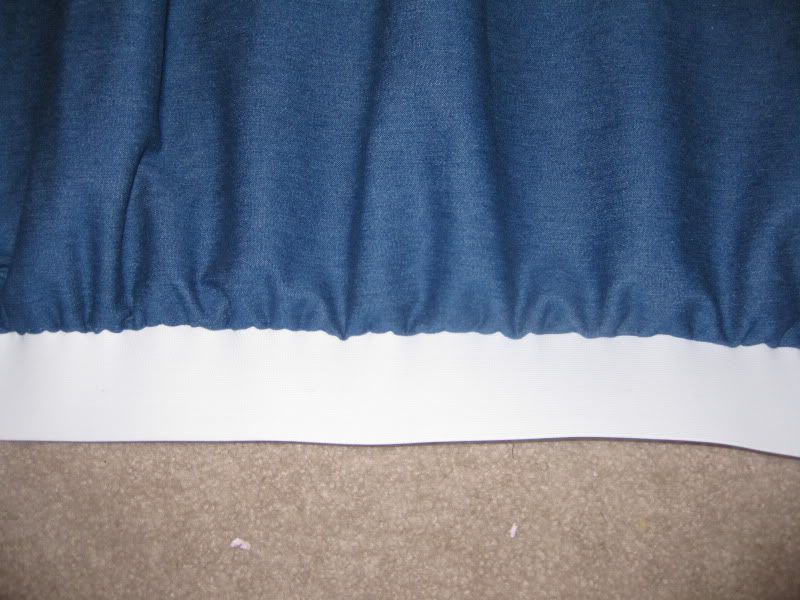
Sewed to the end and we have half a skirt. Next, I sewed down the seam for the skirt and we were in business. I did not hem it b/c I did not know how this was going to turn out.
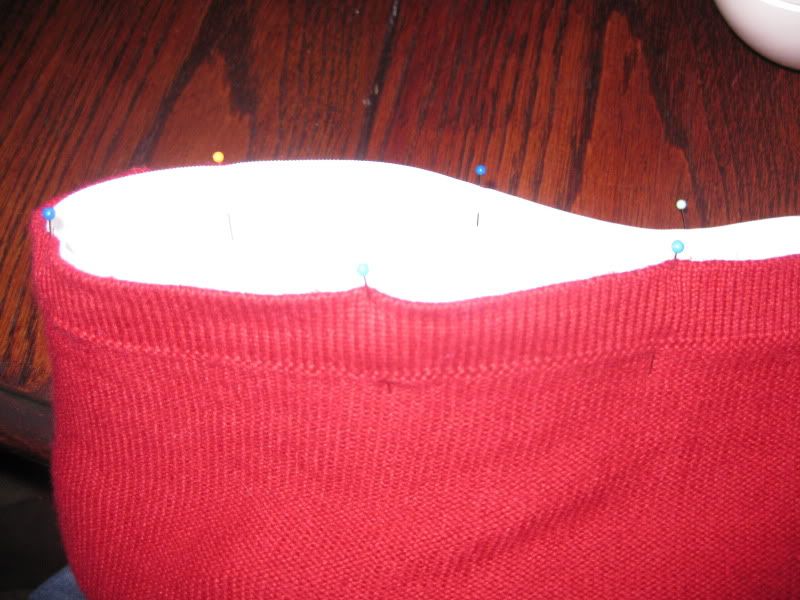
Next sew the top to the skirt. I lined up right sides together: bottom of the top with the top of the skirt. Stitch down.
Turn everything out the right way. Ok. then I hemmed the bottom. Voila! Done!
Here is the end product.
Now with a cardigan for work!

By the luck of my fingers the skirt just fits. It has a bit of a pencil like appearance which I have no idea how it happened.
Yay here is to catching up my blog and my life. I am not fond of being a slacker or being able to keep up with my own life! More to come!
xoxoxo,
Lauren
Bubbly, Black and Sparkly
I solely bough this dress because of the fabric. Not because I wanted a fancier dress, but because I wanted the fabric. Initially, the plan for the fabric was to make a bellydance costume. But I realized I have a lot of costumes and maybe this wasn't what I wanted to make a costume out of (I have so many ideas!).
And then I tried it on....
It is labeled a size 10 but something was different about this dress. There was no lining. And the bodice part actually was tight on my upper body. I figured it out, this item was altered by someone (guessing non-professional since there was no lining left in it) and was made for a girl who was small on top but big on bottom. :) I know several people like this.
The problem with this dress was the length and the way the alteration was made to compensate for the large rear just didn't flow. Something was off. I decided I needed to cut it off!
I hacked off quite a bit of the material. Tried it on and realized I needed just a smidge more length. I cut a strip of fabric and added about 2 more inches and felt much more comfortable with the length. But now something looked wrong. HMMM...
Ah! It would make a cute bubble skirt! I sliced a small hole on the inside of the added sash and threaded a piece of ribbon throughout the bottom on the skirt. Now I can adjust how much bubble I want with the skirt!
Additionally, I added some bling to the top halter b/c i felt it was missing something (that and I love to sparkle). I had some nice clear ab and black beads, I hand beaded onto the dress.
Here is the finaly product!
Love it! I was actually supposed to wear it to a wedding, but I reinjured my back the day of the wedding (and possibly recracked my hairline fracture in my spine) and was bedridden that evening. I was so bummed.
Well I will just save it for something special. Someone needs to plan something special (hint hint people!).
XOXOXO,
LaLaLauren!
And then I tried it on....
It is labeled a size 10 but something was different about this dress. There was no lining. And the bodice part actually was tight on my upper body. I figured it out, this item was altered by someone (guessing non-professional since there was no lining left in it) and was made for a girl who was small on top but big on bottom. :) I know several people like this.
The problem with this dress was the length and the way the alteration was made to compensate for the large rear just didn't flow. Something was off. I decided I needed to cut it off!
I hacked off quite a bit of the material. Tried it on and realized I needed just a smidge more length. I cut a strip of fabric and added about 2 more inches and felt much more comfortable with the length. But now something looked wrong. HMMM...

Ah! It would make a cute bubble skirt! I sliced a small hole on the inside of the added sash and threaded a piece of ribbon throughout the bottom on the skirt. Now I can adjust how much bubble I want with the skirt!
Additionally, I added some bling to the top halter b/c i felt it was missing something (that and I love to sparkle). I had some nice clear ab and black beads, I hand beaded onto the dress.
Here is the finaly product!

Love it! I was actually supposed to wear it to a wedding, but I reinjured my back the day of the wedding (and possibly recracked my hairline fracture in my spine) and was bedridden that evening. I was so bummed.
Well I will just save it for something special. Someone needs to plan something special (hint hint people!).
XOXOXO,
LaLaLauren!
Men's button down to peasant top
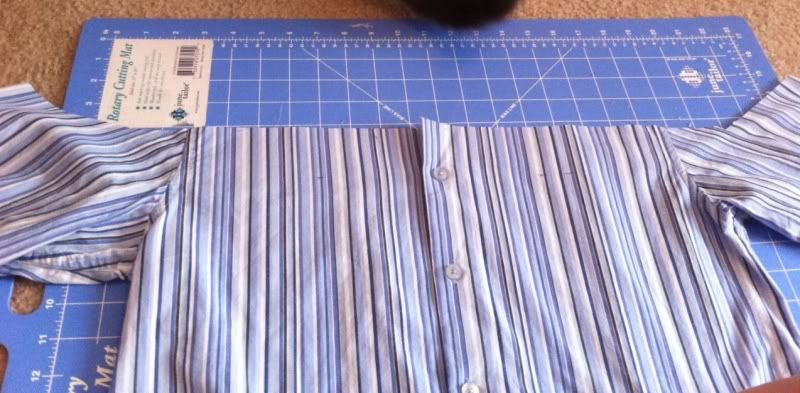
Ok finally able to finish up and publish my blogs. Had to change browsers but oh well. Next up, I thought I would take a stab at refashioning a men's button down tshirt. I found this easy tutorial at cutoutandkeep.net. I saved it for when I was ready to attempt it and now I was ready since I found this pretty multi-blue striped shirt at goodwill for $1.
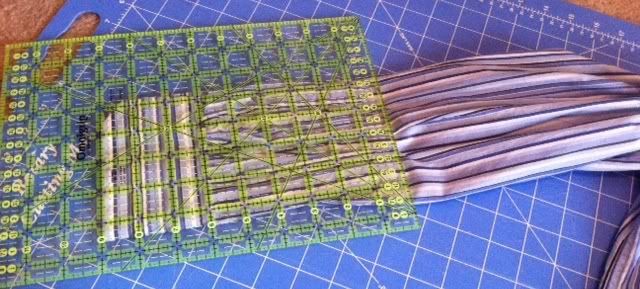
The tutorial is located here. I pretty much followed her tutorial. The hardest part I had was making the first cut, I wanted to make sure I had the sleeves positioned in the right way so I would not detach the remaining part of the sleeve from the shirt. This part was hard. I kind of eyeballed it-though I did position my ruler and cut 2 inches from the button so I could still make a ruffle.
Here is what it looked like after the first cut.
Next I sewed a zigzag stitch across the top about 1 inch from the edge. To make it gather I added thin elastic I wove through the zigzags with a dull wide needle.
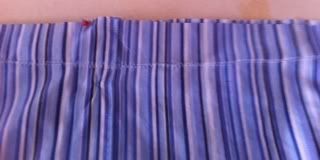
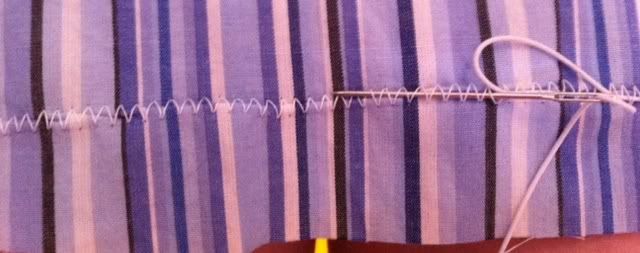
I tied off the elastic and we had the top done! Next I evened out the bottom part of the shirt and cut off about 9 inches off from the sleeves. I repeated the zigzag stitch and adding of elastic for all cut parts.
Done! Here's the shirt! I'm quite fond of it!

Ok its a bit wrinkly but there is a really long story with that. I wore it out and it was super comfy. Surprisingly I got it right with the elastic! Can't wait to try another one soon! This was fun and super easy. :)
Until next post!
XOXOXO,
LaLaLauren
The tutorial is located here. I pretty much followed her tutorial. The hardest part I had was making the first cut, I wanted to make sure I had the sleeves positioned in the right way so I would not detach the remaining part of the sleeve from the shirt. This part was hard. I kind of eyeballed it-though I did position my ruler and cut 2 inches from the button so I could still make a ruffle.
Here is what it looked like after the first cut.
Next I sewed a zigzag stitch across the top about 1 inch from the edge. To make it gather I added thin elastic I wove through the zigzags with a dull wide needle.
I tied off the elastic and we had the top done! Next I evened out the bottom part of the shirt and cut off about 9 inches off from the sleeves. I repeated the zigzag stitch and adding of elastic for all cut parts.
Done! Here's the shirt! I'm quite fond of it!
Ok its a bit wrinkly but there is a really long story with that. I wore it out and it was super comfy. Surprisingly I got it right with the elastic! Can't wait to try another one soon! This was fun and super easy. :)
Until next post!
XOXOXO,
LaLaLauren
Friday, June 10, 2011
New Sleeves
I found this nice Ralph Lauren shirt at Penelope's Closet. A thrift store that benefit's Penelope's House. $3 for Ralph Lauren, soo nice!
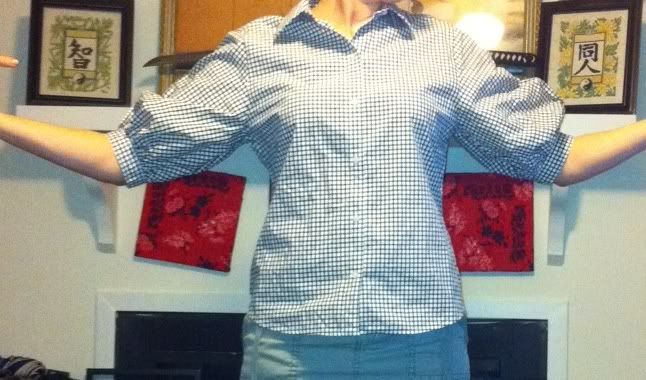
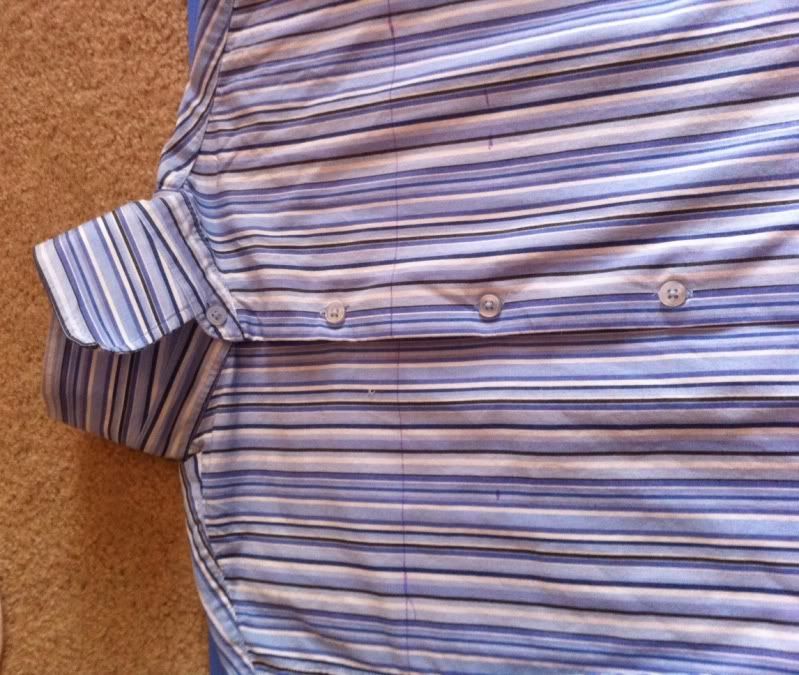
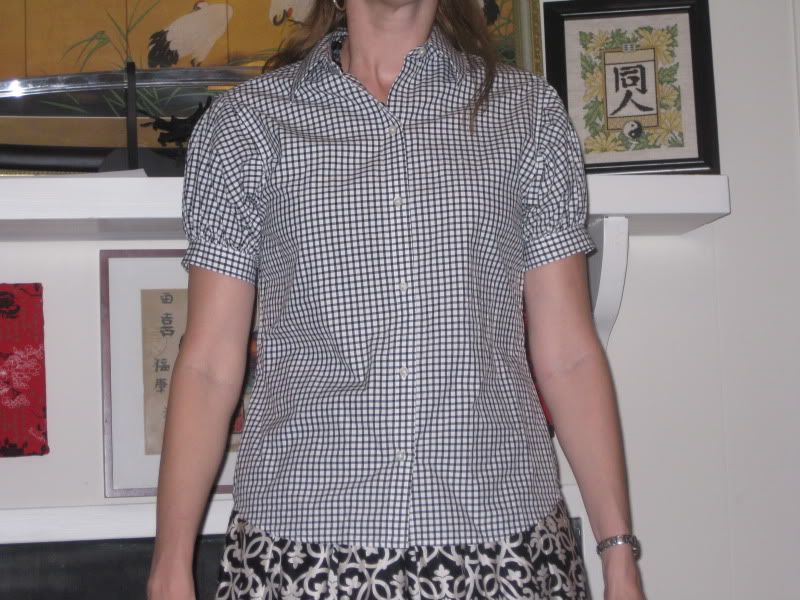
However, when I put this shirt on the sleeves were weird. They were poofy at the bottom on the sleeve. But this was a thick cotton with some stretch to it, it doesn't pool nicely or hang nicely. I think it was a sheer, light fabric this shirt would be cool. Ralph got it wrong in the fabric selection. So I took out my seam rippers and removed the sleeves and readjusted them. I did one sleeve at a time. Here is shot after one of the sleeves were fixed so you can see the difference.
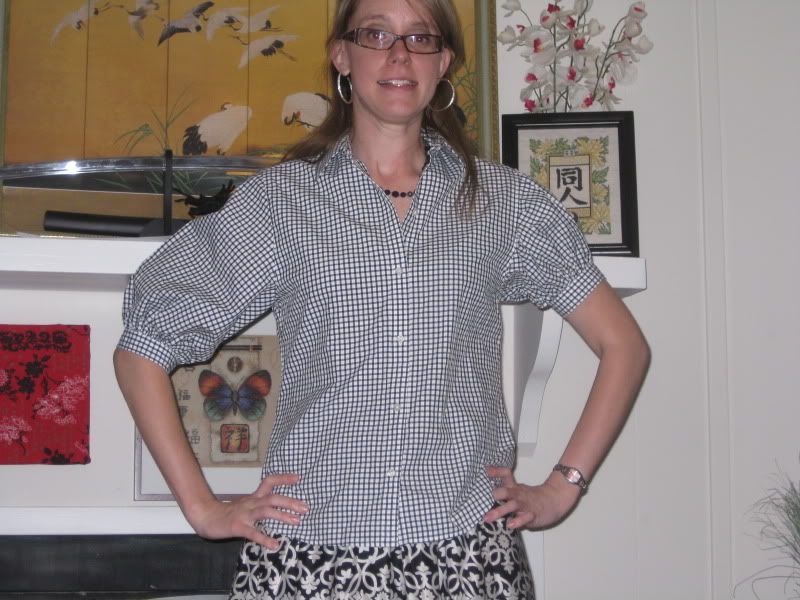
Then I fixed the other sleeve. And here is the end product. Yay.
I fixed a Ralph Lauren mistake. How nice is that?
More refashions are on the way since I am able to be upright a little more after the accident. :)
XOXOXO,
LaLaLauren
However, when I put this shirt on the sleeves were weird. They were poofy at the bottom on the sleeve. But this was a thick cotton with some stretch to it, it doesn't pool nicely or hang nicely. I think it was a sheer, light fabric this shirt would be cool. Ralph got it wrong in the fabric selection. So I took out my seam rippers and removed the sleeves and readjusted them. I did one sleeve at a time. Here is shot after one of the sleeves were fixed so you can see the difference.
Then I fixed the other sleeve. And here is the end product. Yay.
I fixed a Ralph Lauren mistake. How nice is that?
More refashions are on the way since I am able to be upright a little more after the accident. :)
XOXOXO,
LaLaLauren
Thursday, June 9, 2011
Ruffle Blouse Refashion Part 1
This white blouse I found at goodwill one day was $3. I really loved the flounces and the flowy-ness of this top. And I wanted to practice dying fabric more.
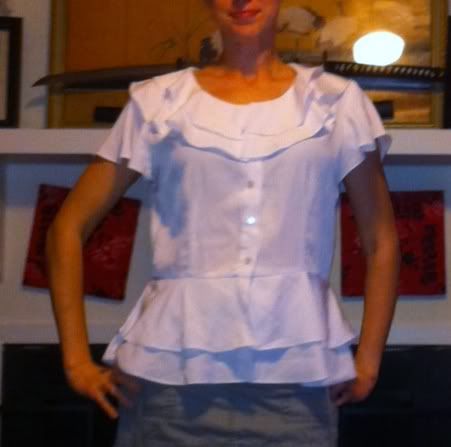
The reason why I wanted to dye it was there were several stains that just would not come out. Sigh.
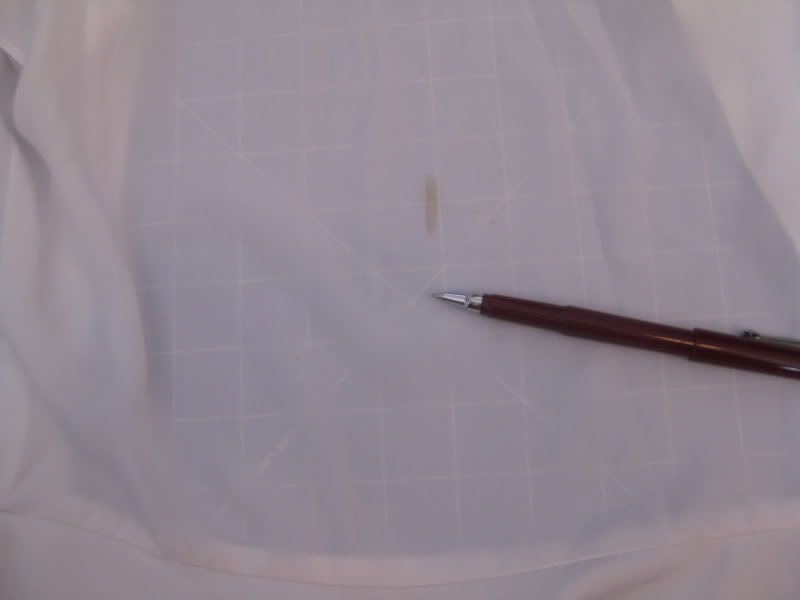
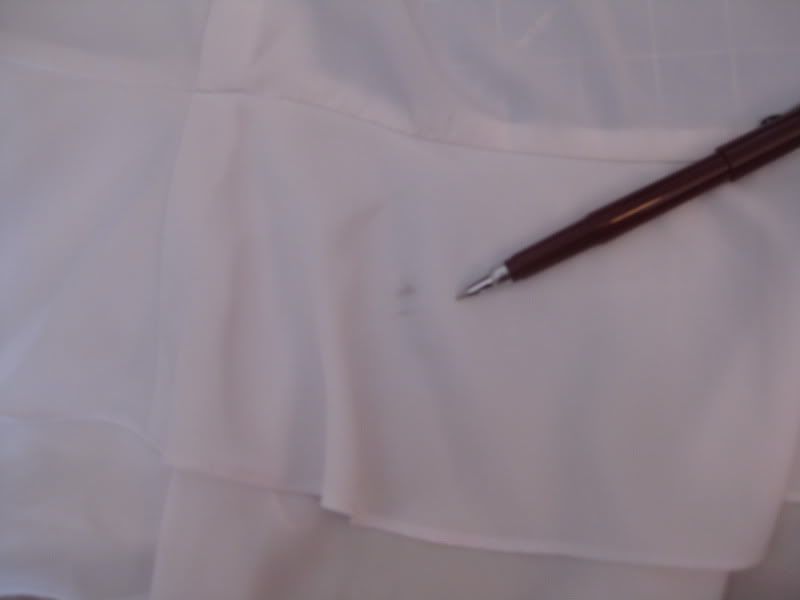
Then I realized this shirt is 100% polyester.
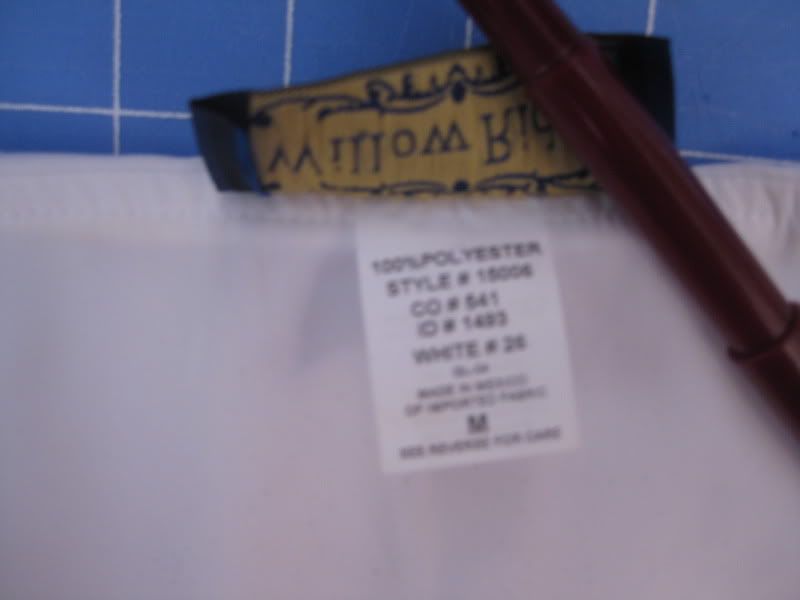
Most dyes on the market do NOT dye polyester. I found a dye that does dye polyester called iDye on Dharma Trading. They don't have a lot of options for colors, so I opted for black rather than a primary color. Black goes with so much!
Before I started to dye I decided the bottom flounce needed to come off. I thought I could attach it to another project (see part 2 coming soon!). Then I dyed my fabric in my iDye and WOW it worked. It was black! I would have even been happy with various shades of gray but it came out black. So I did a happy dance! (no picture taken sorry).
Next I repeated what I did in the patriotic refashion of the red tank top so I could get more use of stretching elastic while I sewed. I opted to a raspberry pink material this time. Nothing else I thought looked right.
I repeated the same steps again but this time I made sure I stretched my elastic more and more consistently. However when it came to adding the blouse it sat up much higher on my waist rather than my hips. I made sure that it would fit my waist and not be too big.
Now the size of the blouse did not fit the size of the skirt. I found the center and the sides and pinned to the skirt. Next I took off the excess by making small darts. Then I sewed it all down to the elastic. Done!
Note: This dress would not have worked had i not had the buttons on the front of the blouse so I could get in. The blouse doesn't stretch, unlike the red knit tank top so I had to do things a little bit differently. I really wanted to avoid putting in a zipper. I hate zippers, still trying to master that skill.
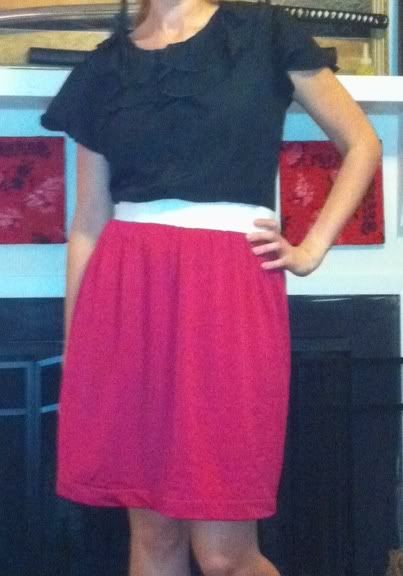
Anyways. another dress for work. And on top of it, super comfy. Ahhhh. Yay.
XOXOXO,
LaLaLauren
Planning my return!
I went to the Doctor last week to figure out what is wrong with my back. Long story short. I have a small hairline fracture in one of my lumbar vertebraes. It is small and a bit of an analomy but it explains why I hurt. I have been banashed from physical activity for a total of 4 weeks! Never have I craved to run a 10K (I don't really run!) or play tennis or do karate. I guess you always want what you can't have (or do, in my case). I have spent 1 week after work on my back on the floor when I get home. To let me do something, because being idle or lazy doesn't work for me, I have been cross stitching while I lay on the ground and watch tv. Working on a christmas stocking. Wahoo. The good news is since I have been resting and not leaning over or backwards, I am finally strong enough to be able to sit up for a bit and sit behind my sewing machine! I am so excited! With that said, by the end of this weekend I shall be able to finish and blog about 4 (yes 4!!) refashion projects I was working on and need to blog. Maybe I will even get that darn butterfly dress done too!
Happy Days are here again! :)
Happy Days are here again! :)
Subscribe to:
Posts (Atom)