Well hi welcome to my little blog. Just my little corner of craftiness, sewing, and refashioning. I am also a newly gluten free eater so you have a little bit of recipes mixed in here.
Showing posts with label maxi dress. Show all posts

Saturday, May 31, 2014

Maxi dress, Simplicity 2692

I am attempted to sew. I am truly. For me, it helps relieve stress. I finished this garment at the beginning of May but took forever to get an end photo. This crazy psuedo animal print in multiple colors, I believe could only be justified as a maxi dress. I opted to turn it into a 1 shoulder dress using the simplicity pattern 2692.

It was an easy sew. Really. I did no pattern modifications other than not gather as much in the bust. Which lead to the zipper issue. I corrected this by adding an invisible zipper that somehow I made magic happen and it completely hides in the seam. I was so excited! Also with the middle band I had no idea if it was going to work or not. It barely worked!

My new dress, which is light and silky feeling. Perfect for summer!


messy hair!


I also was part of the Clara Dress Sew a Long. This also took up  some time. I am almost complete. Post soon to follow! I am still struggling with my blog. Please bear with me, a lot has happened in the part few days.

Cheers,
Lauren

Monday, May 12, 2014

Maxi dress to skirt, #36

Mom found a dress for me. Thanks mom! But when I put it on. Something was off.

The top was too big and didn't hug my chest area, it constantly fell down. Then too short. Boo!

I cut the dress in half. I will convert the top to a swimsuit later. The bottom part I made a casing and added elastic. Poof now I have a maxi skirt and I will wear it.


It totally makes me want to twirl and spin in circles...

Recap! Easy refashion! 

Cheers,
Lauren

Monday, March 3, 2014

Blue sweater maxi dress refashion, #16

An awkward length "maxi" sweater dress.

So another sweatshirt-like BAD maxi dress made it into my possession. I don't have any during shots as it was a simple fix. I cut off the bottom and just hemmed it. Simple. And now I have a warm navy sweater dress. Paired with sweater tights, boots, and I added a cardigan (and I know with my hat- I didn't want to take it off, it is cold outside) I had an outfit I wore to work.


Ok without the cardigan.. but still with my hat.

Simple and easy. This dress has some new life in it! Here's the recap.... Must less awkward!


Cheers,
Lauren

Wednesday, November 20, 2013

Drapey Maxi Dress: Vogue Pattern V8241

This is probably one of the dresses I am super excited about this dress!!!

So let's start from the beginning! I used this Very Easy Vogue Pattern V8241.

And let me tell you it was super easy to sew. Now cutting it on the other hand, was super hard. See that cute fuzzy little grey "angel"? Hovering around the cutting table and wanting to mess with the tissue paper??

I still see you..... You are not hidden. Actually you hide very badly.

The material is a polyester interlock. Actually, it was meant to be a full half skirt for a choreography I was part of but never made one. Then I moved! So it just languished but I realized I had just enough to make this dress. I was super excited. The only part I had issues with was sewing the back slit. I mean I was confused on this part badly. I actually sewed it at one point so badly that it was wrapped around the bodice. No pics. I was so frustrated. I had to walk away and let my brain settle. I got it after a bunch of practice parts. I was not going to give up. So that picture could have been better. Also I promise you for the elastic part in the waist, I called to sew elastic bigger than your waist. I actually made the elastic smaller to make the bodice drape a little more. Actually, I think I could have went in an inch more.

I love my dress... Love it. Here is with a belt.


There is a back leg slit, so you can walk. And also a back slit so you can put it on. Oh yeah, I modified the pattern to not do a button. I actually put in a snap. Way faster and easier. Plus I got to use the hammer with the tool. LOL Don't ask me why I was excited. 

With out the belt so you can see the dress


Easy, breezy, and OMG I just love this dress. I would totally make another one. Seriously. The fit is perfect. I did my normal size 12. Perfect. Highly recommend too.

Cheers,
Lauren

Wednesday, September 4, 2013

Pink/Purple Tie Dye Maxi Dress Refashion

I had this dress for a bit but for some reason it never worked. I wore it once and then it shrunk some and it was a weird length. Then I found myself pulling up the top. It was just too frustrating to wear.


So hard to see the bottom oddly, ok whatever. I took a pair of scissors to the top part of the dress. Here is the top from the bottom, separated. Weird huh?

Time to make it a maxi skirt. I serged the top portion of the skirt b/c I hate unfinished edges. 

Fold over, sew-creating a casing. Feed through some elastic. Adjust to fit. 

Connect the elastic together- however your heart feels content to sew it.... (LOL!)

Done! A maxi skirt that fits. I need to mess around with styling. No more anyone seeing my weird feet and ankles!

Got to love easy refashions!

xoxoxo,
Lauren

Thursday, August 4, 2011

Easiest Maxi dress ever!

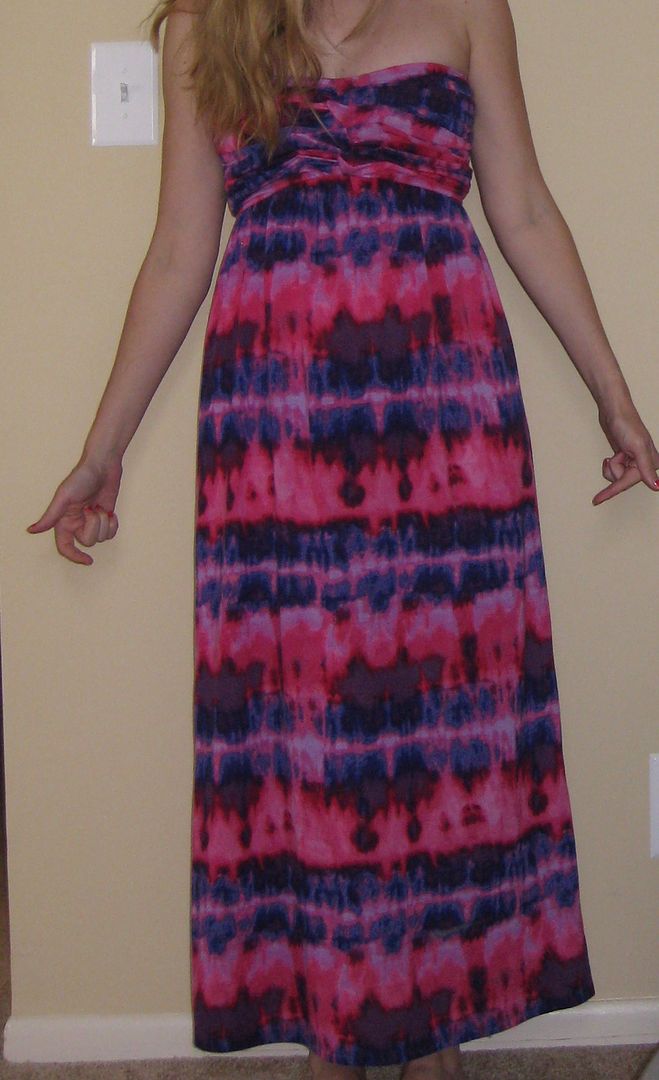
Here is my easiest maxi dress ever! Seriously I spent 10 mins to sew it and that was it! Actually I spent more time thinking if I should bling it or not then actually working on the dress. I opted to not bling it or add anything to it-it was just too much for the dress.

First, I always give credit when credit is due to Sweet Verbena, who just posted this easy tutorial on how to make a maxi dress. I had actually 1 less sewing step. Actually I only had 1 sewing step!

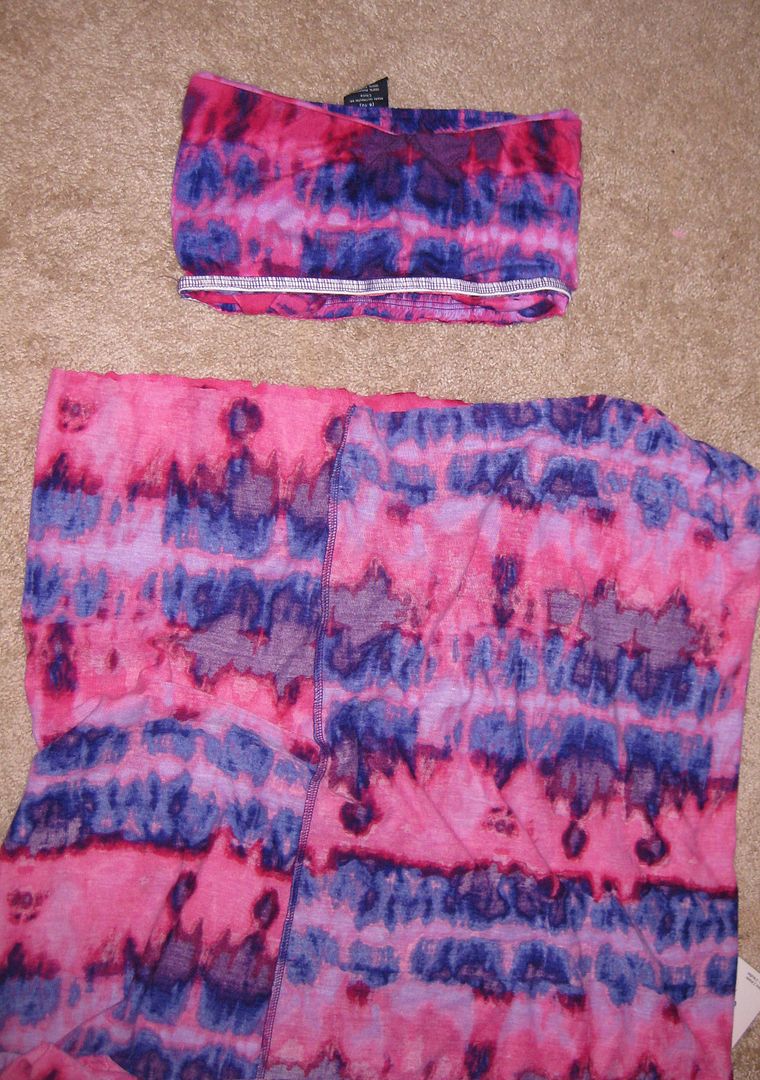
First, after reading her tutorial I dug through my fabric stash. I have a lot of knit fabric, really I was trying to figure out what color and did I have enough of that fabric. I almost went for purple but I have a lot of purple dresses (just came to realize this) and I need to expand my color pallete. I chose this dark blue/teal color knit fabric.

A plus of this fabric was it was 60 inches wide and one SOLID TUBE OF FABRIC!!! And.... And it was totally the length I needed. So I didn't even have to cut it. Score!!!

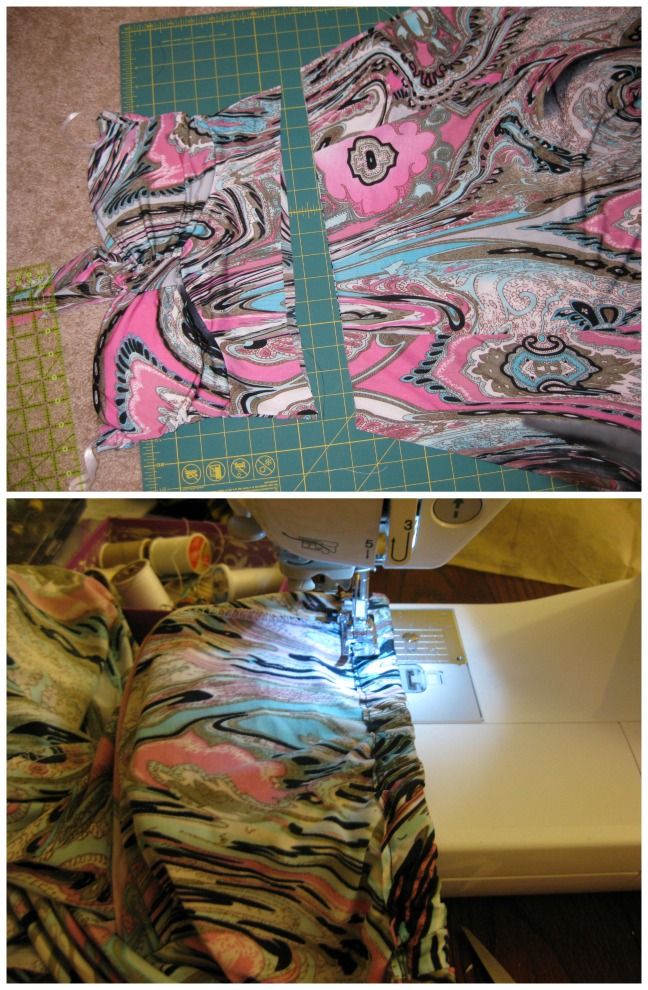
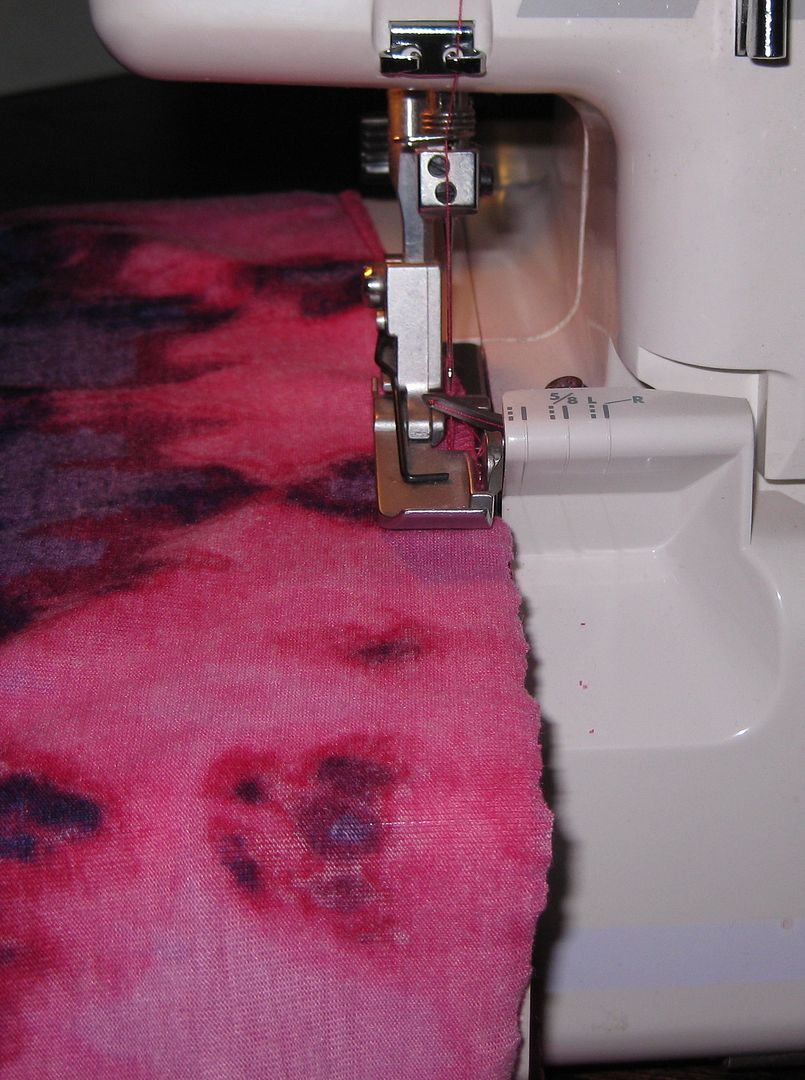
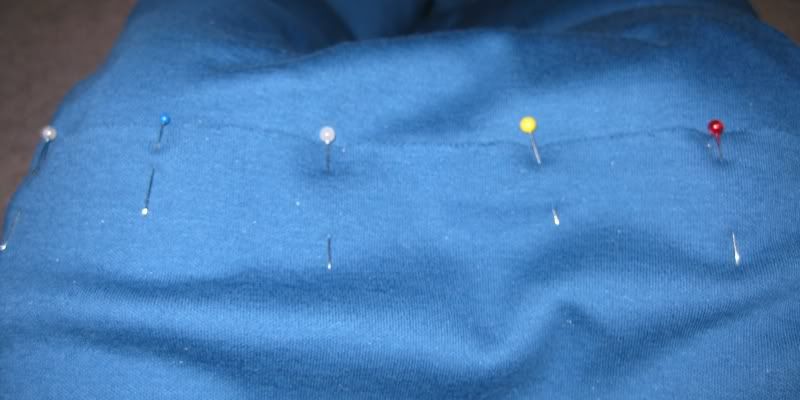
I turned the fabric inside-out and pinned the top portion of the tube together. Sew down. (here is lauren is dumb moment- forgot to change my needle from a heavy duty regular needle to a heavy ball point needle but I managed). I used a zig zag stitch.


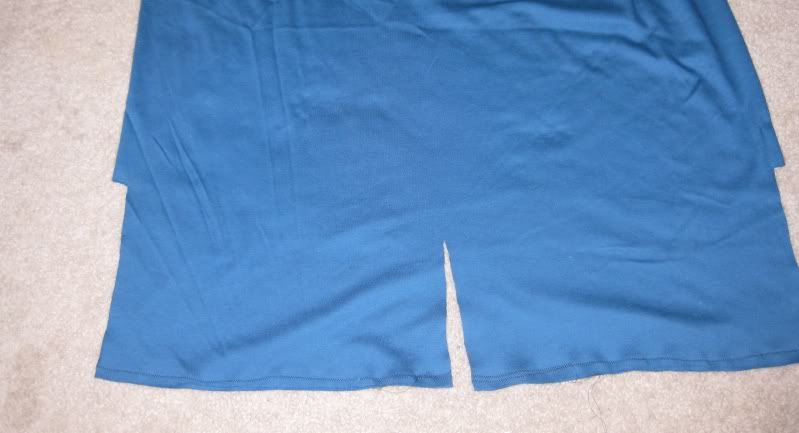
Next I followed the direction exactly! I found the center and cut 6 inches down (just one big SNIP!!). And here is Natasha helping me with my ruler!


Next, cut out the armholes. She used 8 inches, as did I and 1 inch wide. No need to hem or finish everything b/c knit does not fray.


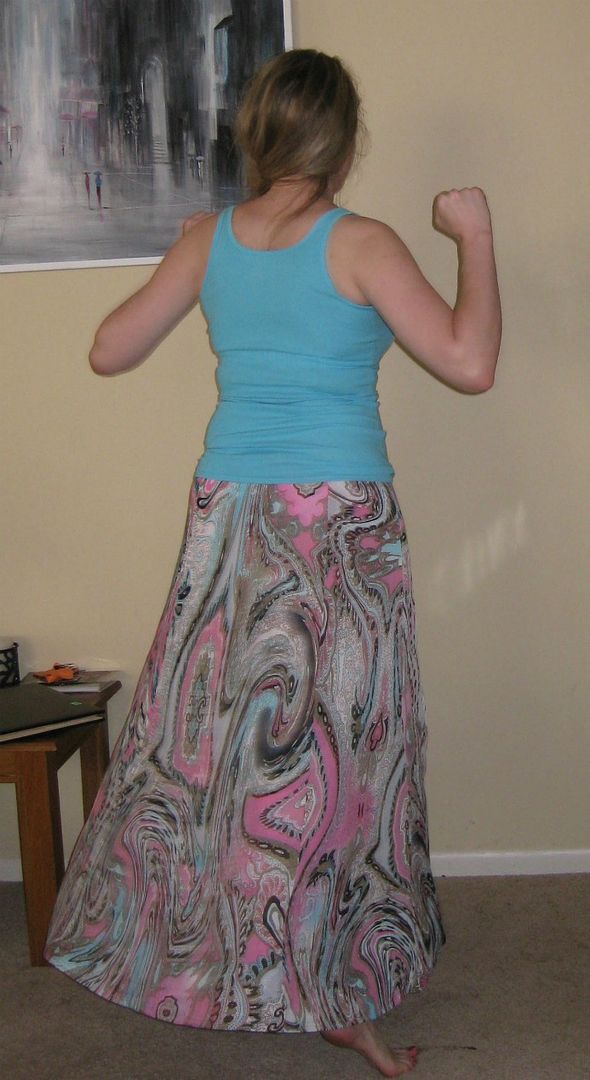
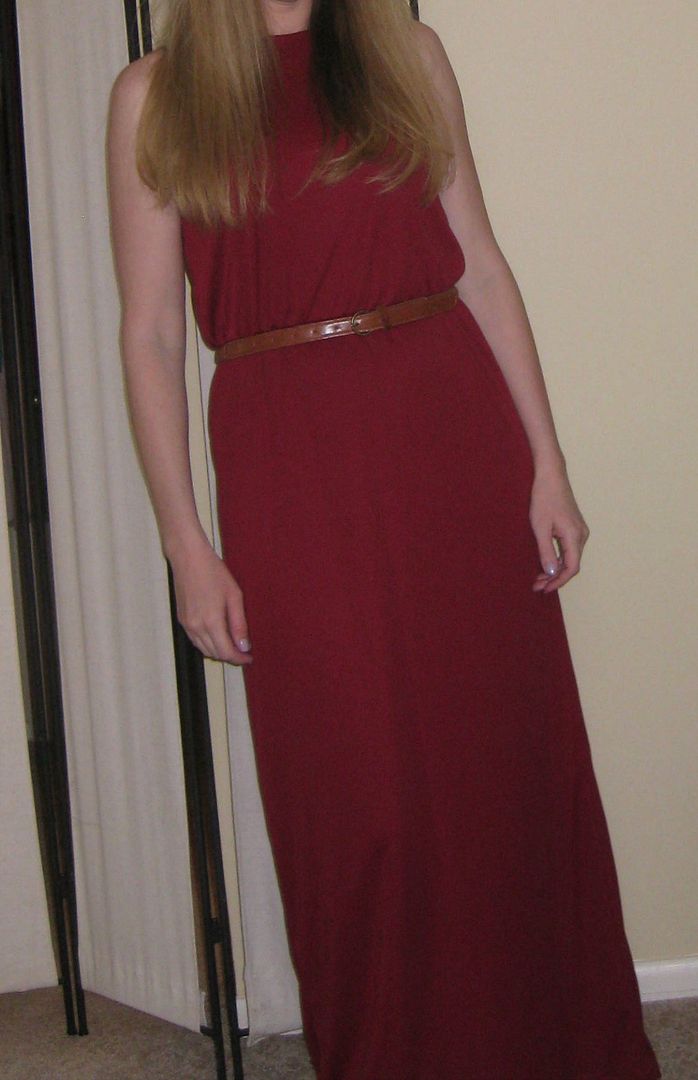
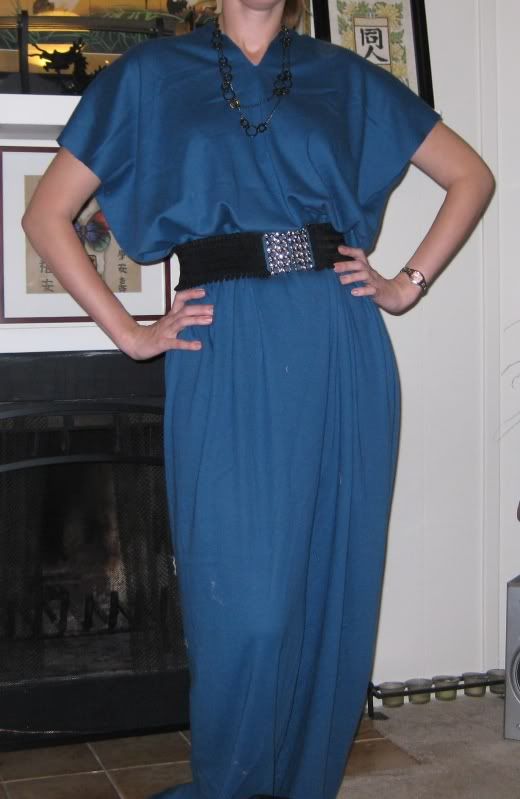
Turn right side out! Put on, and add a belt! Poof done!


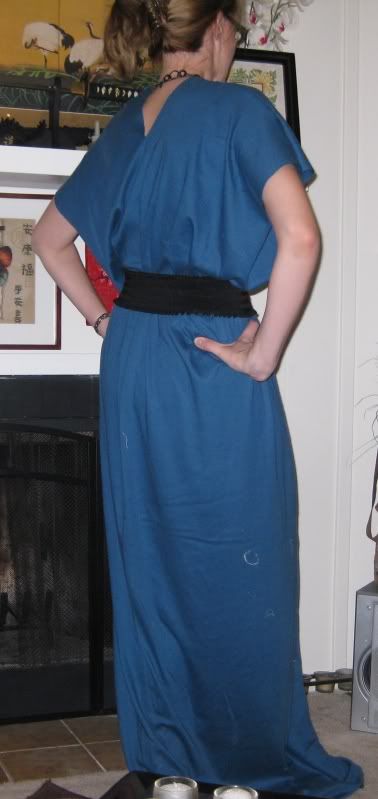
The length is slightly on the long side but I was going to wait until I wear it once and see how it dries. Even though I have washed it, I tend to have bad luck in the length department. So I am waiting. I have plenty of room to spare!

Thank you for the easy tutorial. And here is to an easy dress! That is super comfy and chic! :)

XOXOXOXO,
Lauren

LinkWithin

Related Posts Plugin for WordPress, Blogger...